𝐌𝐫. 𝐑𝐞𝐧𝐝𝐞𝐫 | 𝐒𝐜𝐮𝐥𝐩𝐭𝐢𝐧𝐠 𝐚 𝐓𝐫𝐨𝐥𝐥 𝐇𝐞𝐚𝐝 𝐰𝐢𝐭𝐡 𝐏𝐨𝐥𝐲𝐦𝐞𝐫 𝐂𝐥𝐚𝐲

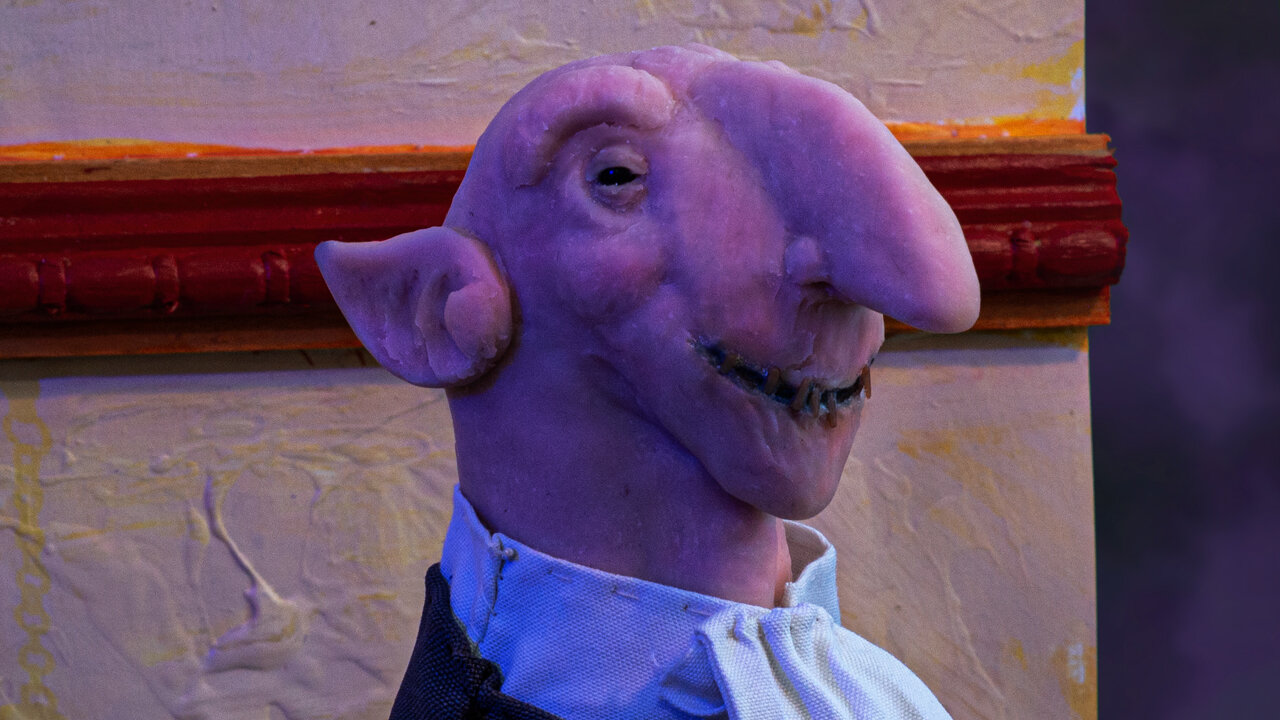
During a recent period of artist block, I was inspired to get up to a bit of sculpting a troll head with polymer clay. Meet Mr. Render, an underworld enforcer troll-like character that I created. I’ve often had a fondness for period gangster film and television like Guy Ritchie’s “Lock, Stock, & Two Smoking Barrels” and “Snatch” as well as “Peaky Blinders”. While I also enjoy American period crime drama, I really enjoy stories of the cockney accented London east enders. The idea for Mr. Render “The Ender” was sparked by such media as well as tough-man turned actor Lenny “The Guv’nor” McLean who was cast as Barry “The Baptist” in Ritchie’s “Lock, Stock”. McLean was not only cast in such roles, but also was something of that in real life in addition to being a champion in illegal bare knuckle boxing. There’s a documentary on him on Amazon Prime called “The Guv’nor” that I’d recently watched.


Watch Mr. Render | Sculpting a Troll Head with Polymer Clay

 
Sketching-out some design ideas for the troll.

Sketching-out some design ideas for the troll.

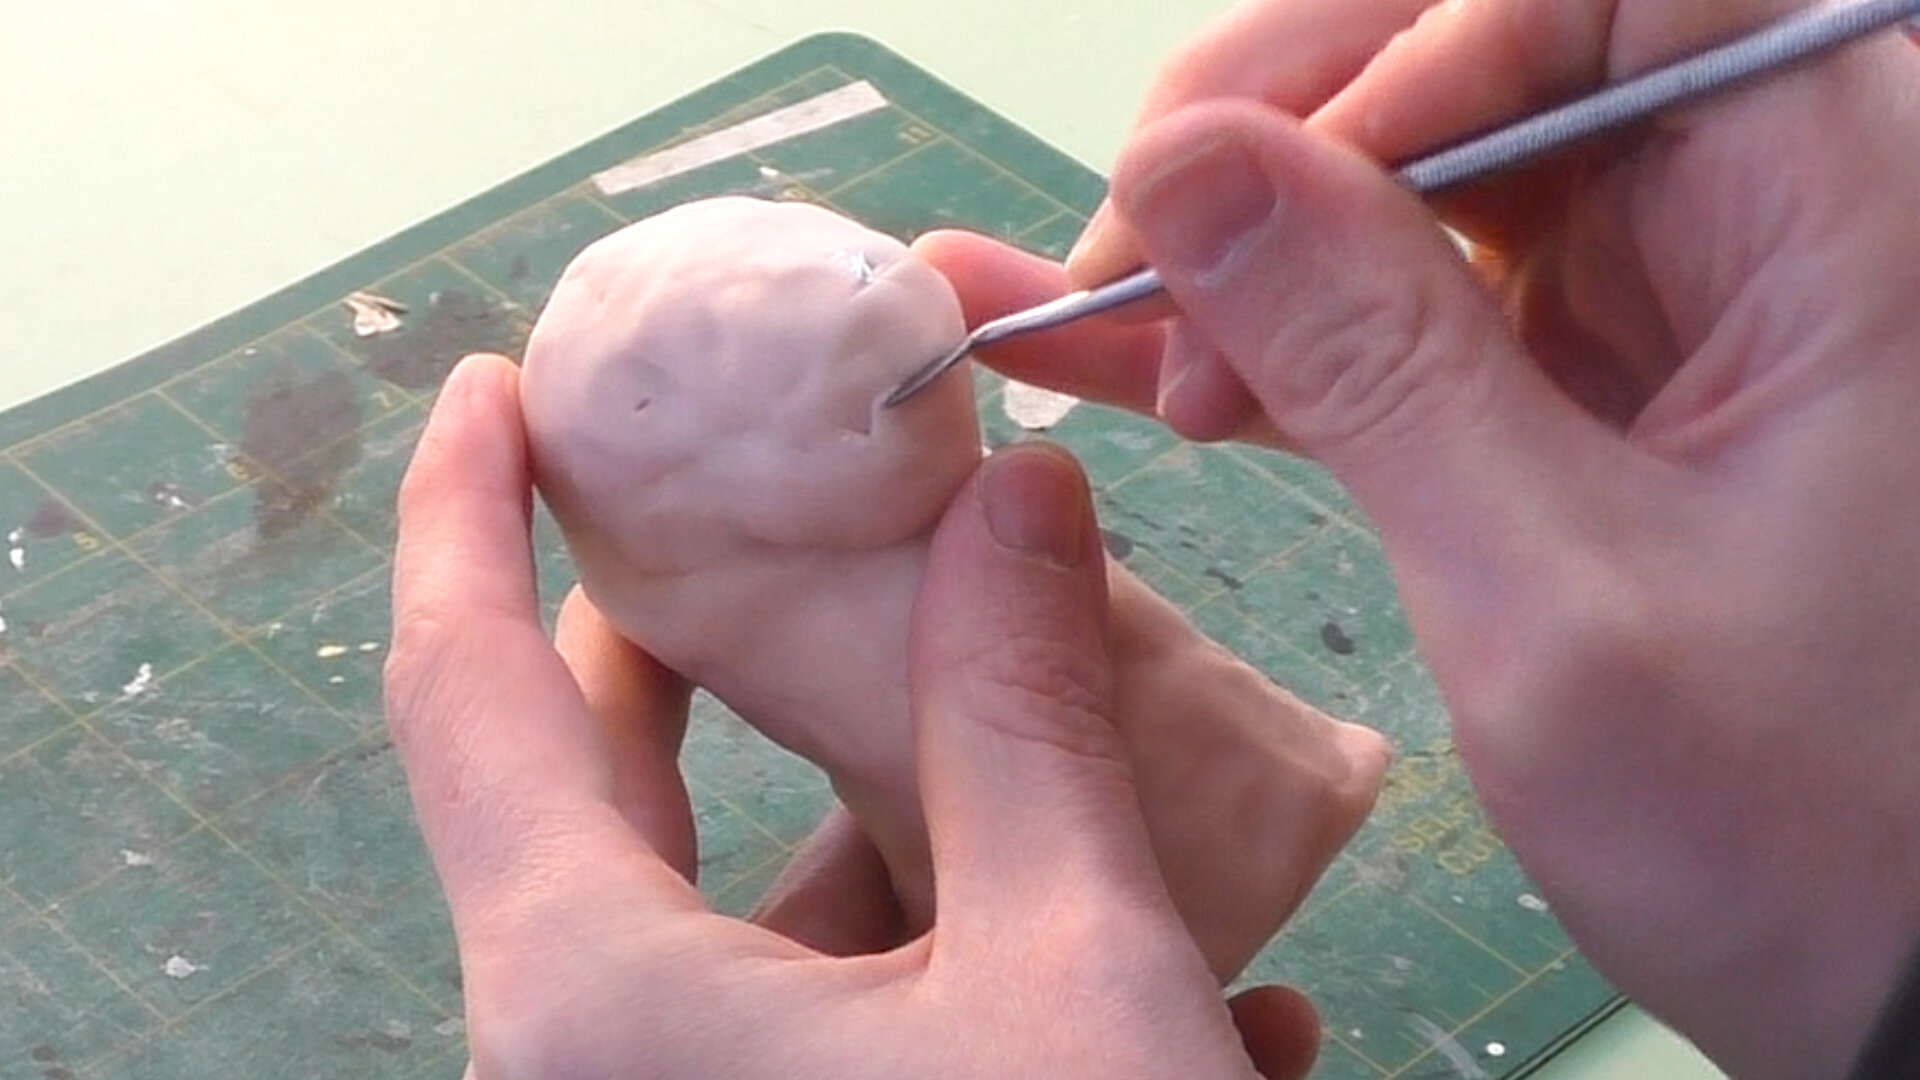
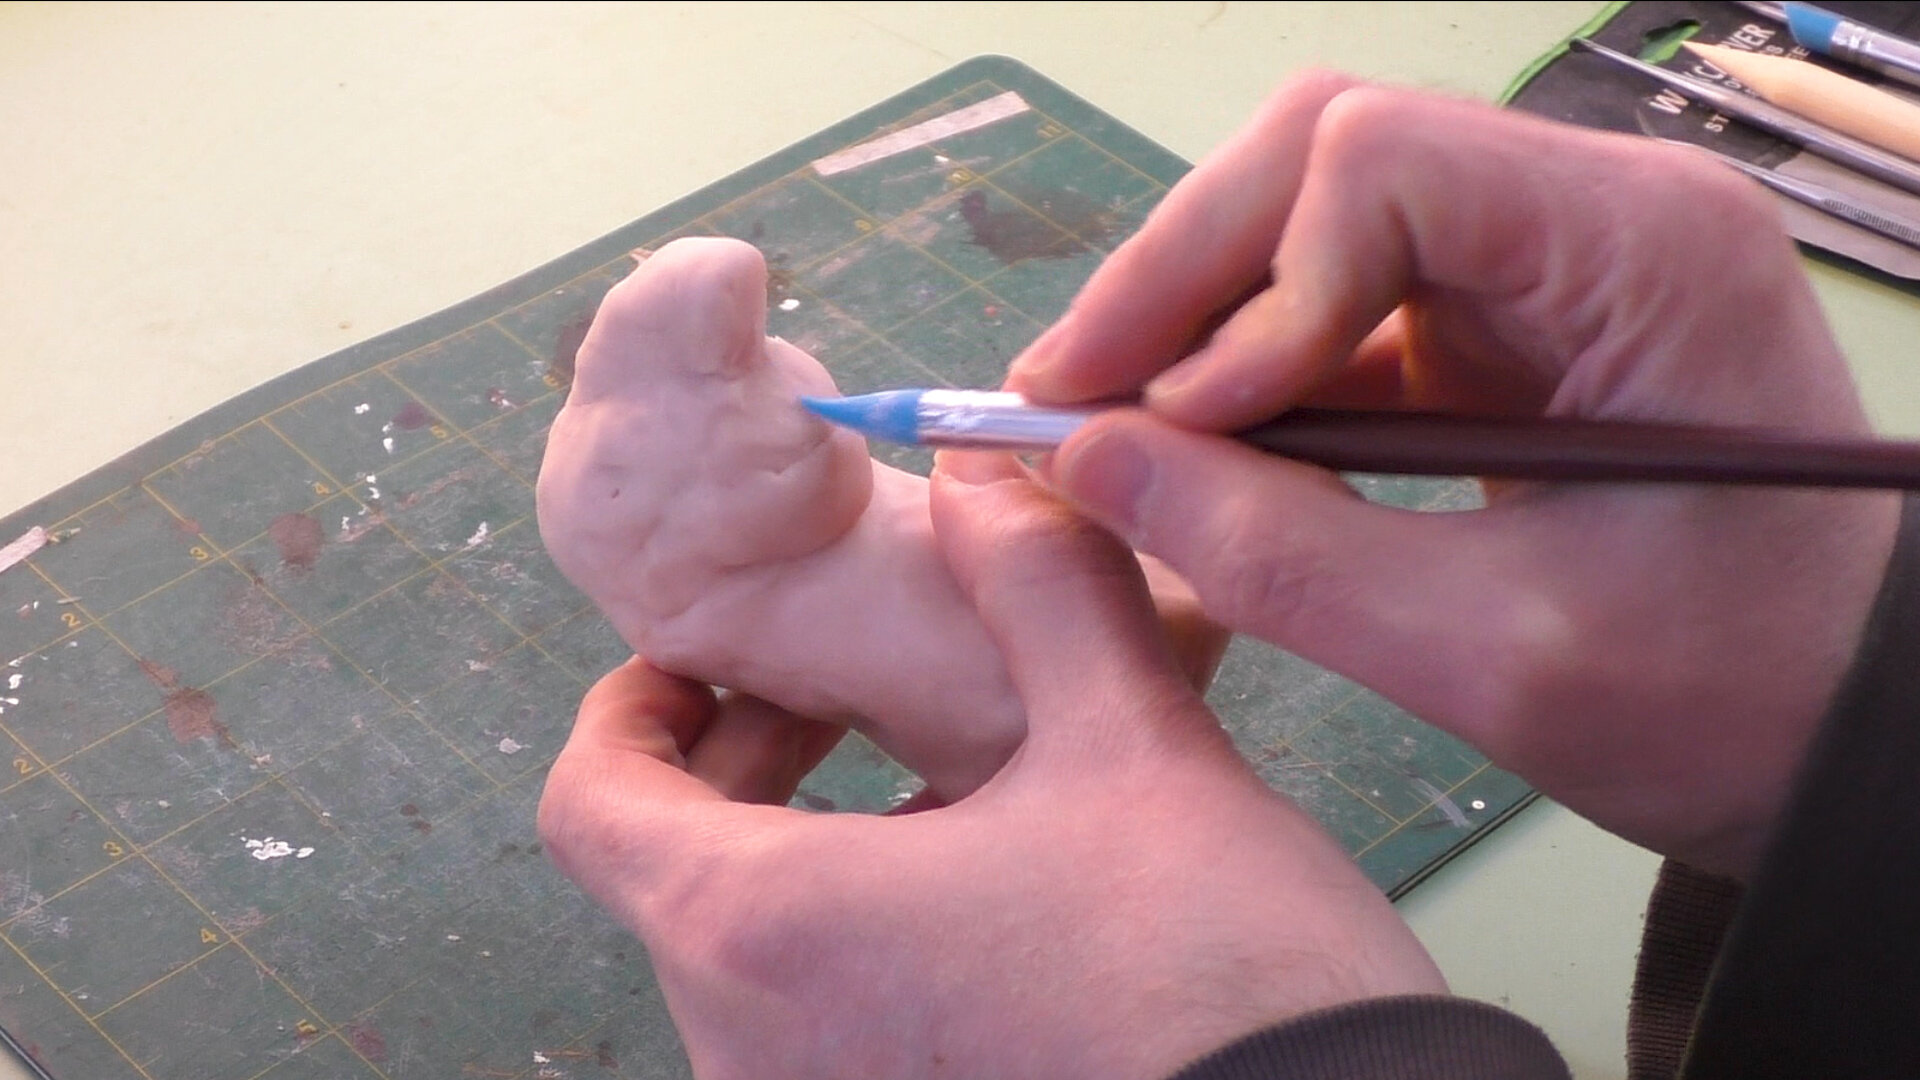
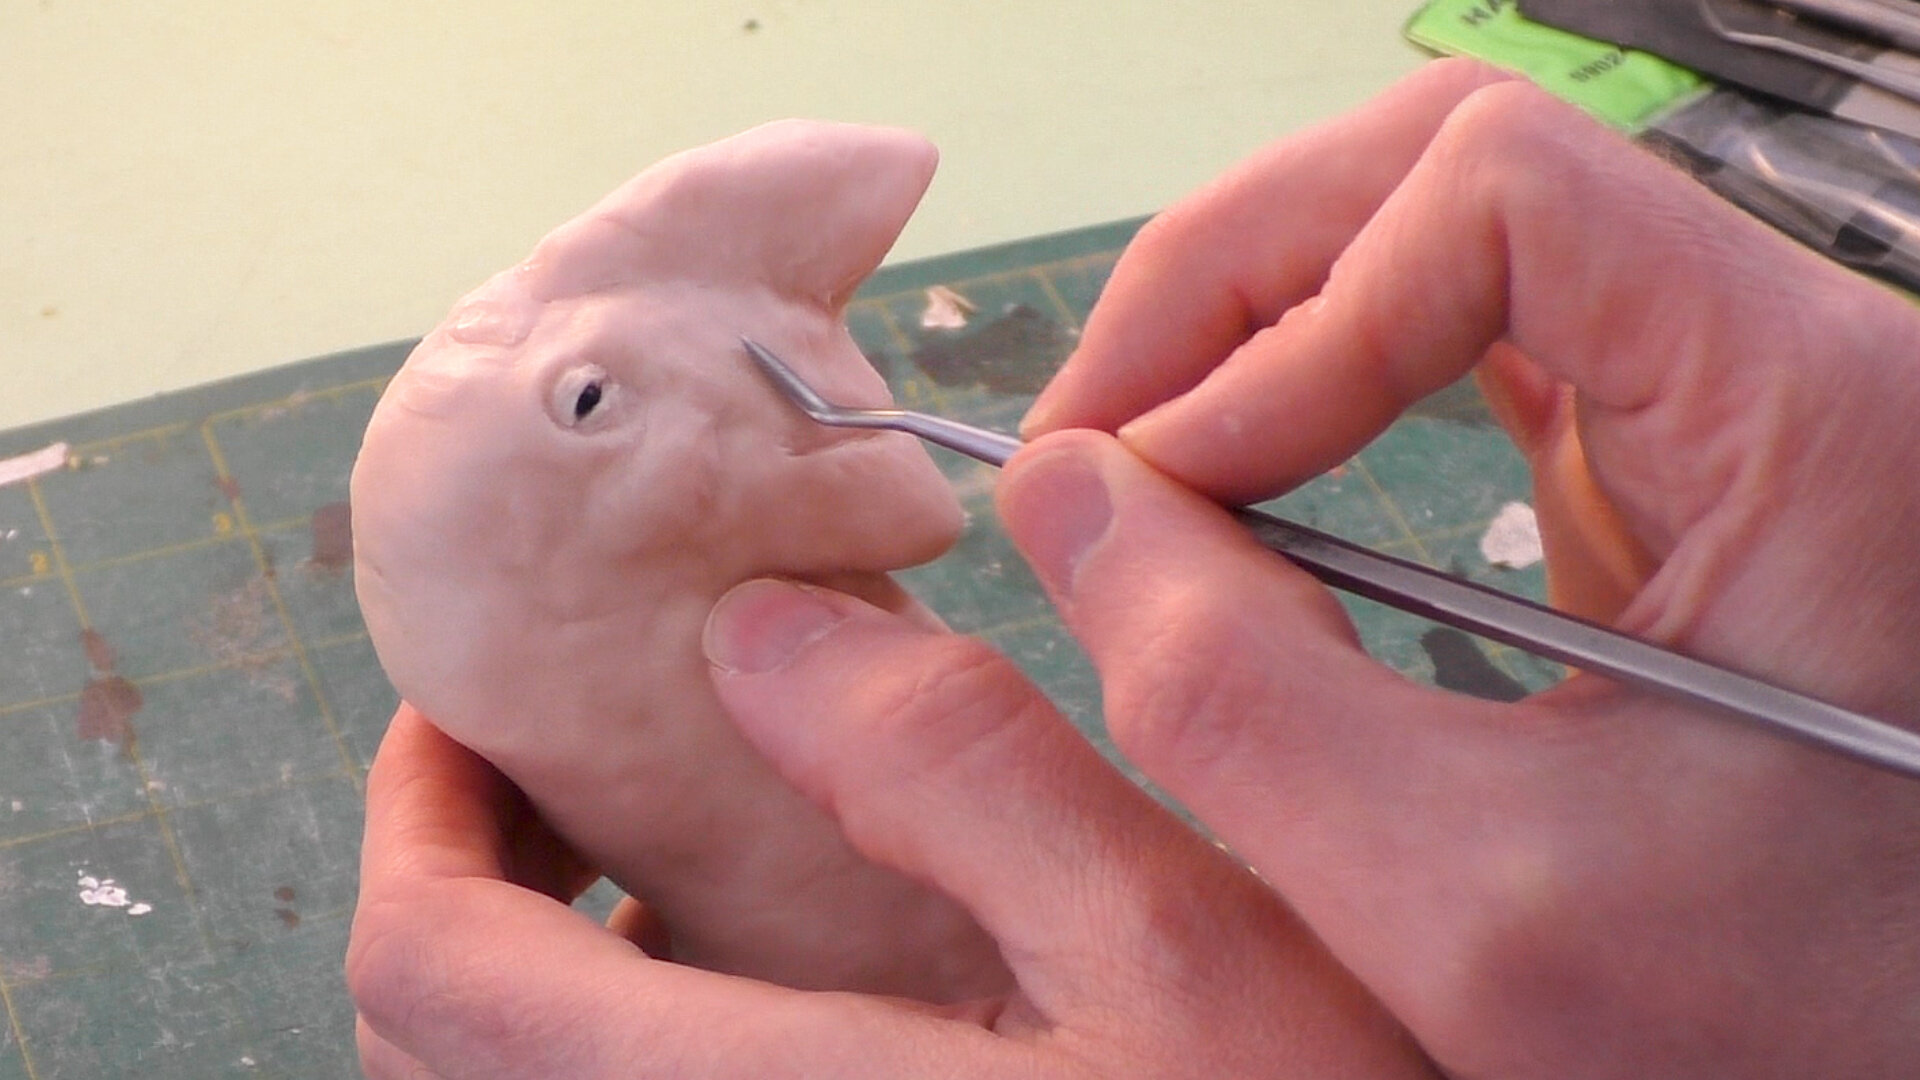
The armature of this troll bust is just some crumpled up tin-foil that I built-up a Sculpey polymer clay form up around. Once the basic shape’s formed it’s then a matter of adding bits of clay here and there and refining the details with clay tools- steel tools, color shapers, and ball styluses as well as my fingers. I wanted to give this creature a very characterful face that recalls the look of the elongated snouts of storybook trolls. I also have a tendency to enjoy depicting characters with large noses and beady eyes (in this case, made from actual beads), which I didn’t fail to deliver on with this sculpt.
One of my favorite costuming references, “Historic Costume in Pictures”

One of my favorite costuming references, “Historic Costume in Pictures”

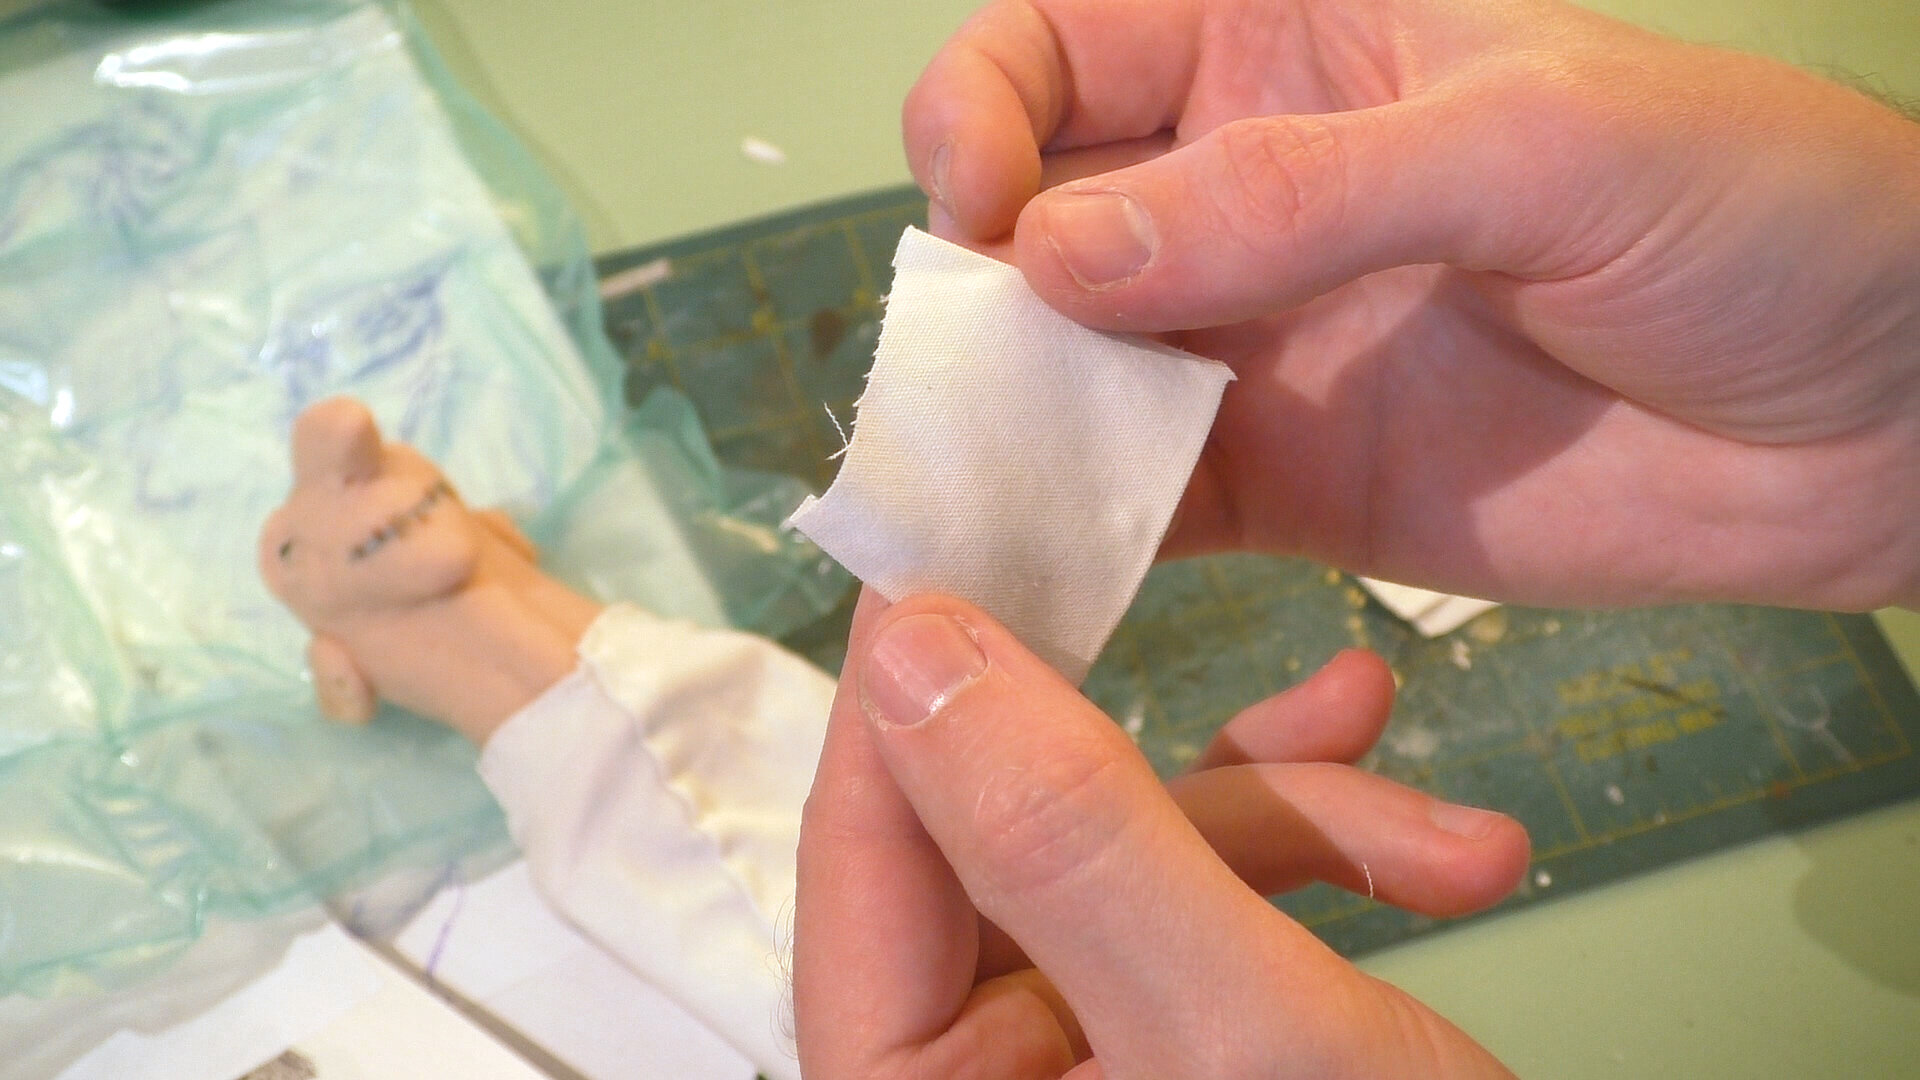
The sculpture’s only a bust, but I decided I wanted to add some fabric costuming. For that I turned to one of my favorite resources to page through, “Historic Costume in Pictures” for inspiration. Using some white fabric with some added ruffles and a grey fabric, I implied a fashionable gentlemanly suit. I generally find I can accomplish what I want with the simple whip and running stitches, which is great because I’m by no means an amazing tailor. The ruffles were made with some Fabri-Tac seams, accordion folding the pieces (I went over them with an iron to help reinforce the folds), and then using a gathering stitch to attach each progressively shorter layer to the one underneath.

Mr. Render isn’t exactly a troll. In this fantasy world I’ve been building, I kind of see most humanoid creatures as individuals with their own unique characteristics and sometimes abilities. I’m mostly breaking with the fantasy trope of races of creatures that all have X characteristics like elves or goblins or whatever. I think of all of that stuff as a pretty modern conception that’s sort of been ingrained in us through pop culture, genre writing, role-playing games, video games, that sort of stuff, but terms like fairy, elf, spirit, and goblin were used pretty interchangeably throughout mythology and folklore to just refer to some thing not of this world.

 
TrollHead.FinishedBust.jpg

I’m considering the idea of doing a silicone mold and resin casting him and hand sewing on clothes Mr. Rend. For this reason I filled in some gaps in his sharp teeth with some Apoxie Sculpt so they wouldn’t get caught in the silicone while molding. Doing a silicone mold would let me paint different colorations of this creature and I could use different fabrics to create variations. For example, he could be in a simple cloak- maybe with a hood.

Here’s an idea of what the troll bust would look like with a simple cloak.

Here’s an idea of what the troll bust would look like with a simple cloak.

 
TrollHead.BustIdea.jpg

Thanks for joining me so far and here’s to the adventures we have in future! To be the first to know when I launch new polymer clay art videos, be sure to subscribe to my YouTube channel and hit the bell icon. Catch all of my videos here: https://www.youtube.com/thedreamsyndicatearts. You can also find many of the supplies I use in crafting here: https://www.thedreamsyndarts.com/supplies-gear/. And sign-up for my newsletter (in the sidebar) to get the latest studio goings-on! Thanks so much for joining me on this journey and until next time: Make. Believe!

Want to be the first to know about new happenings in the Dream Syndicate? Sign-up for my newsletter below!
𝐖𝐚𝐧𝐝𝐞𝐫 𝐒𝐭𝐨𝐧𝐞 | 𝐏𝐫𝐨𝐜𝐞𝐬𝐬 𝐟𝐨𝐫 𝐃𝐞𝐬𝐢𝐠𝐧𝐢𝐧𝐠 𝐚 𝐑𝐞𝐬𝐢𝐧 𝐅𝐀𝐍𝐓𝐀𝐒𝐘 𝐒𝐜𝐮𝐥𝐩𝐭𝐮𝐫𝐞

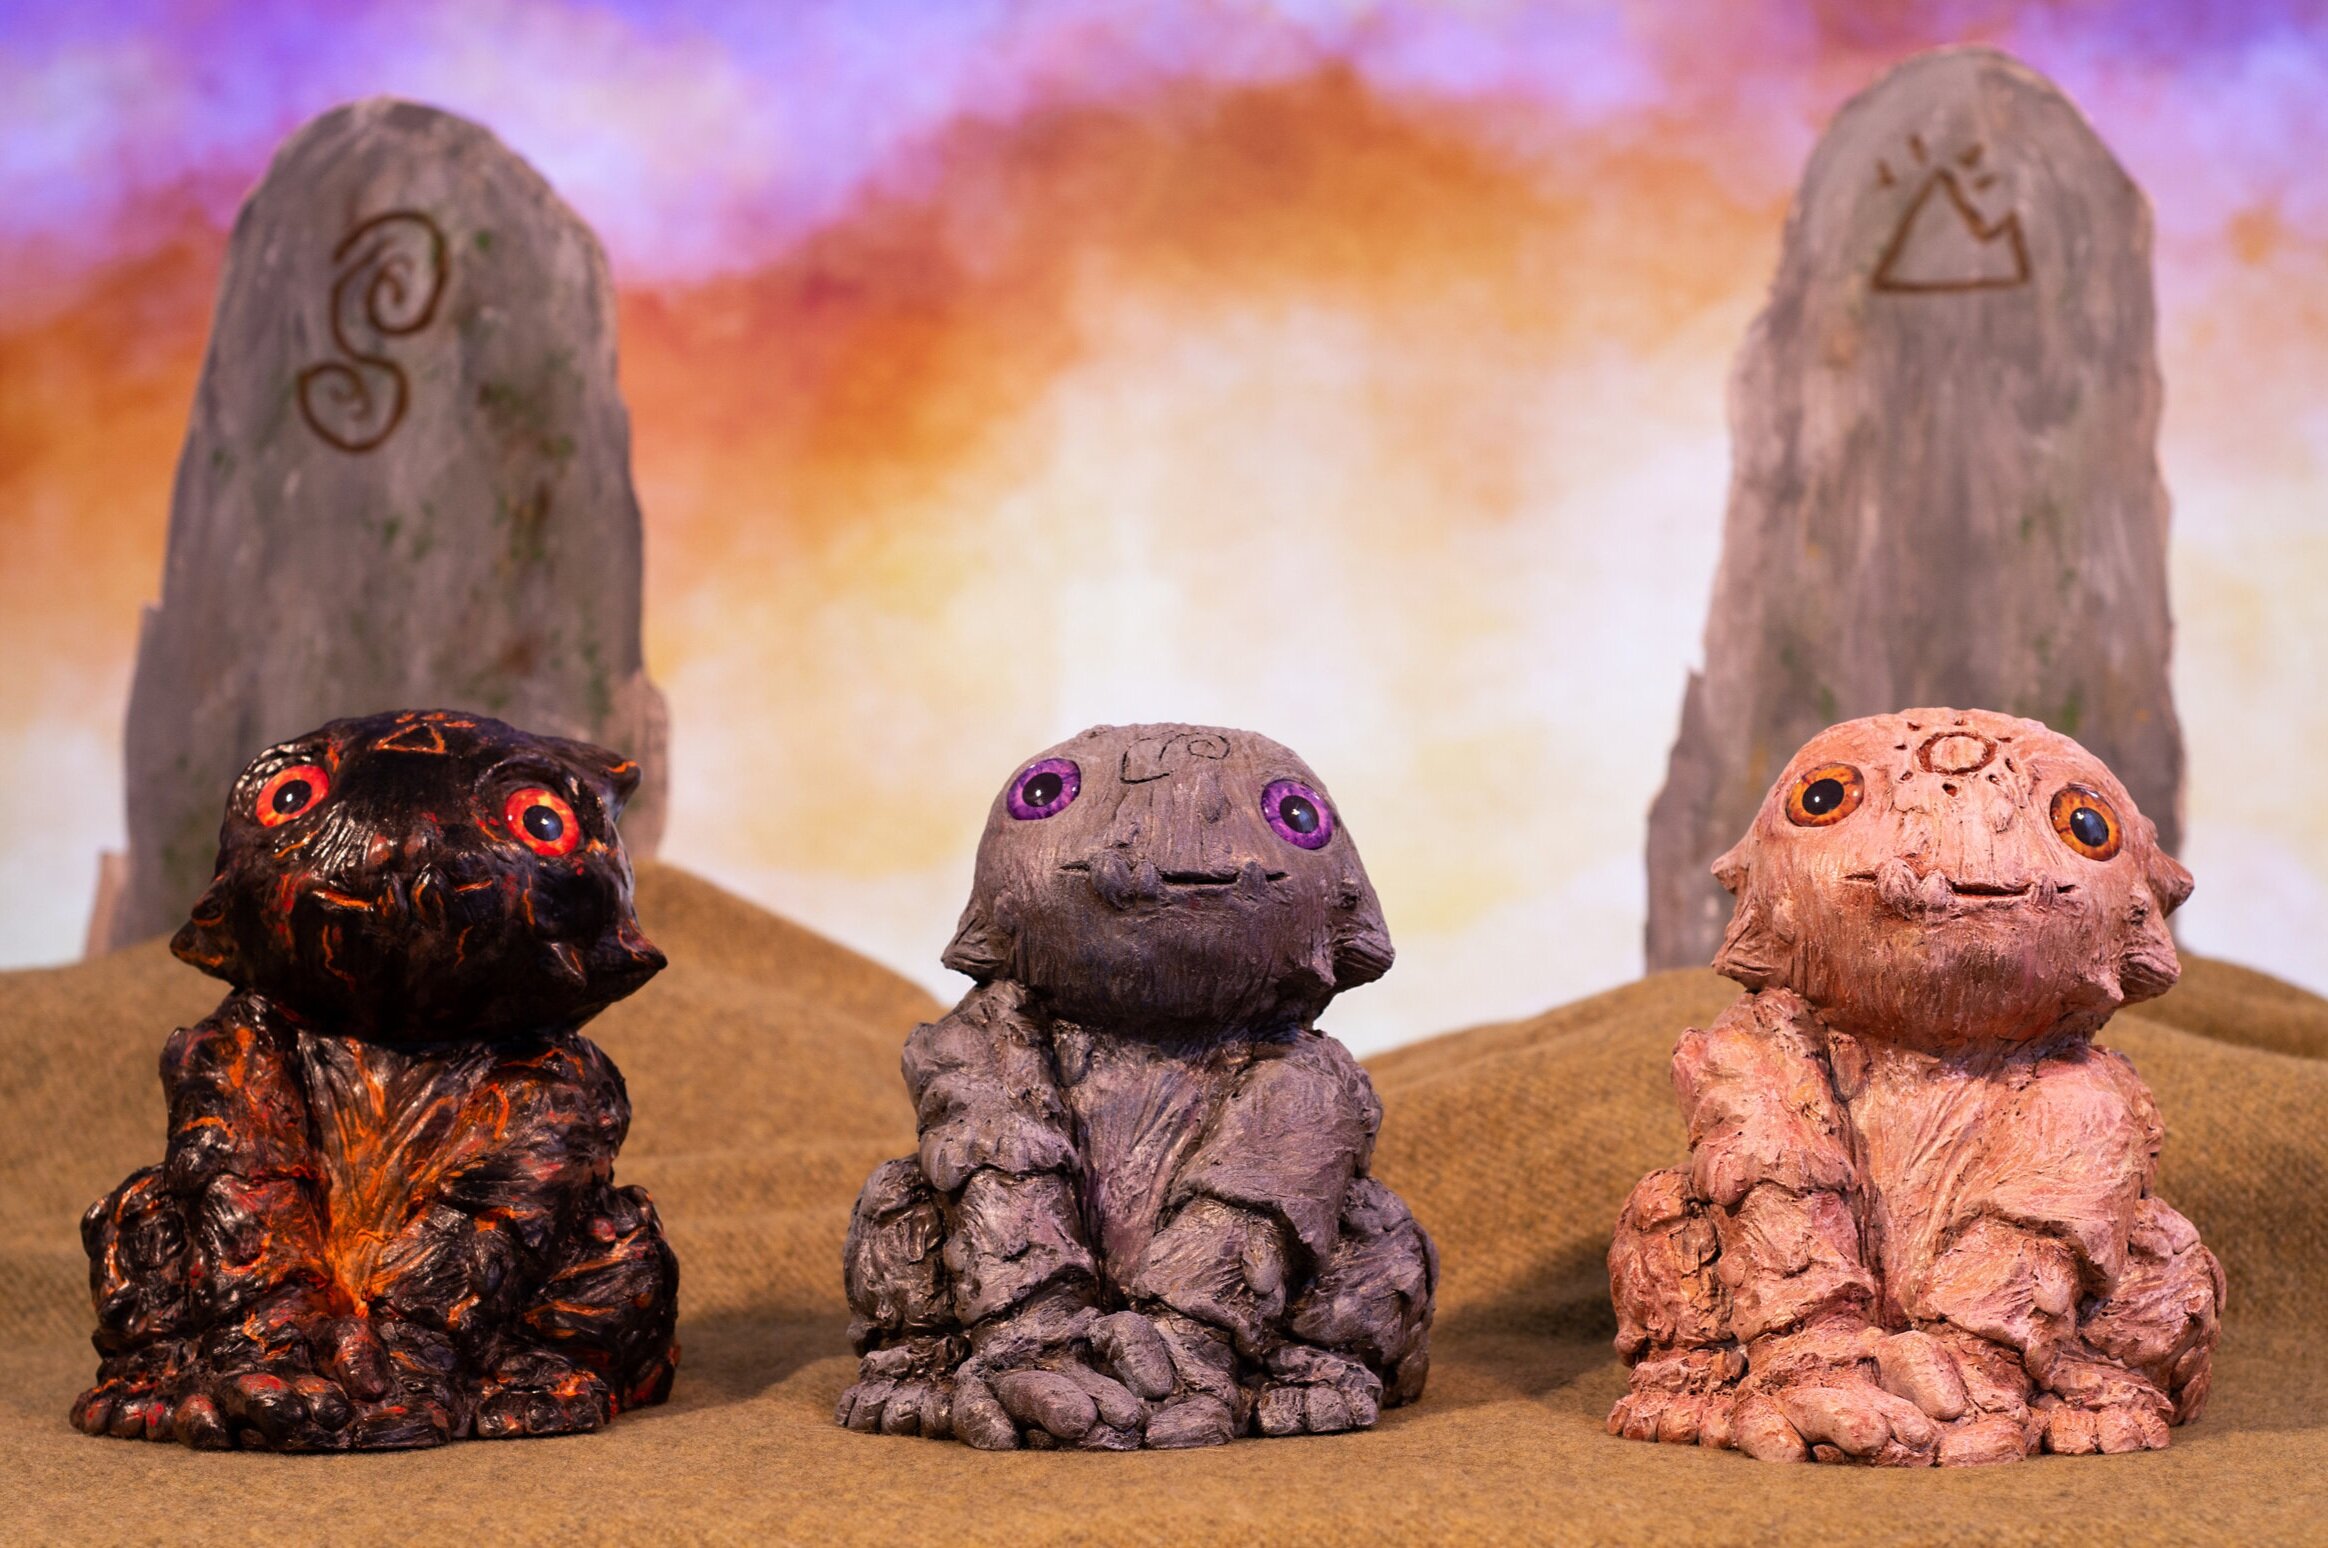
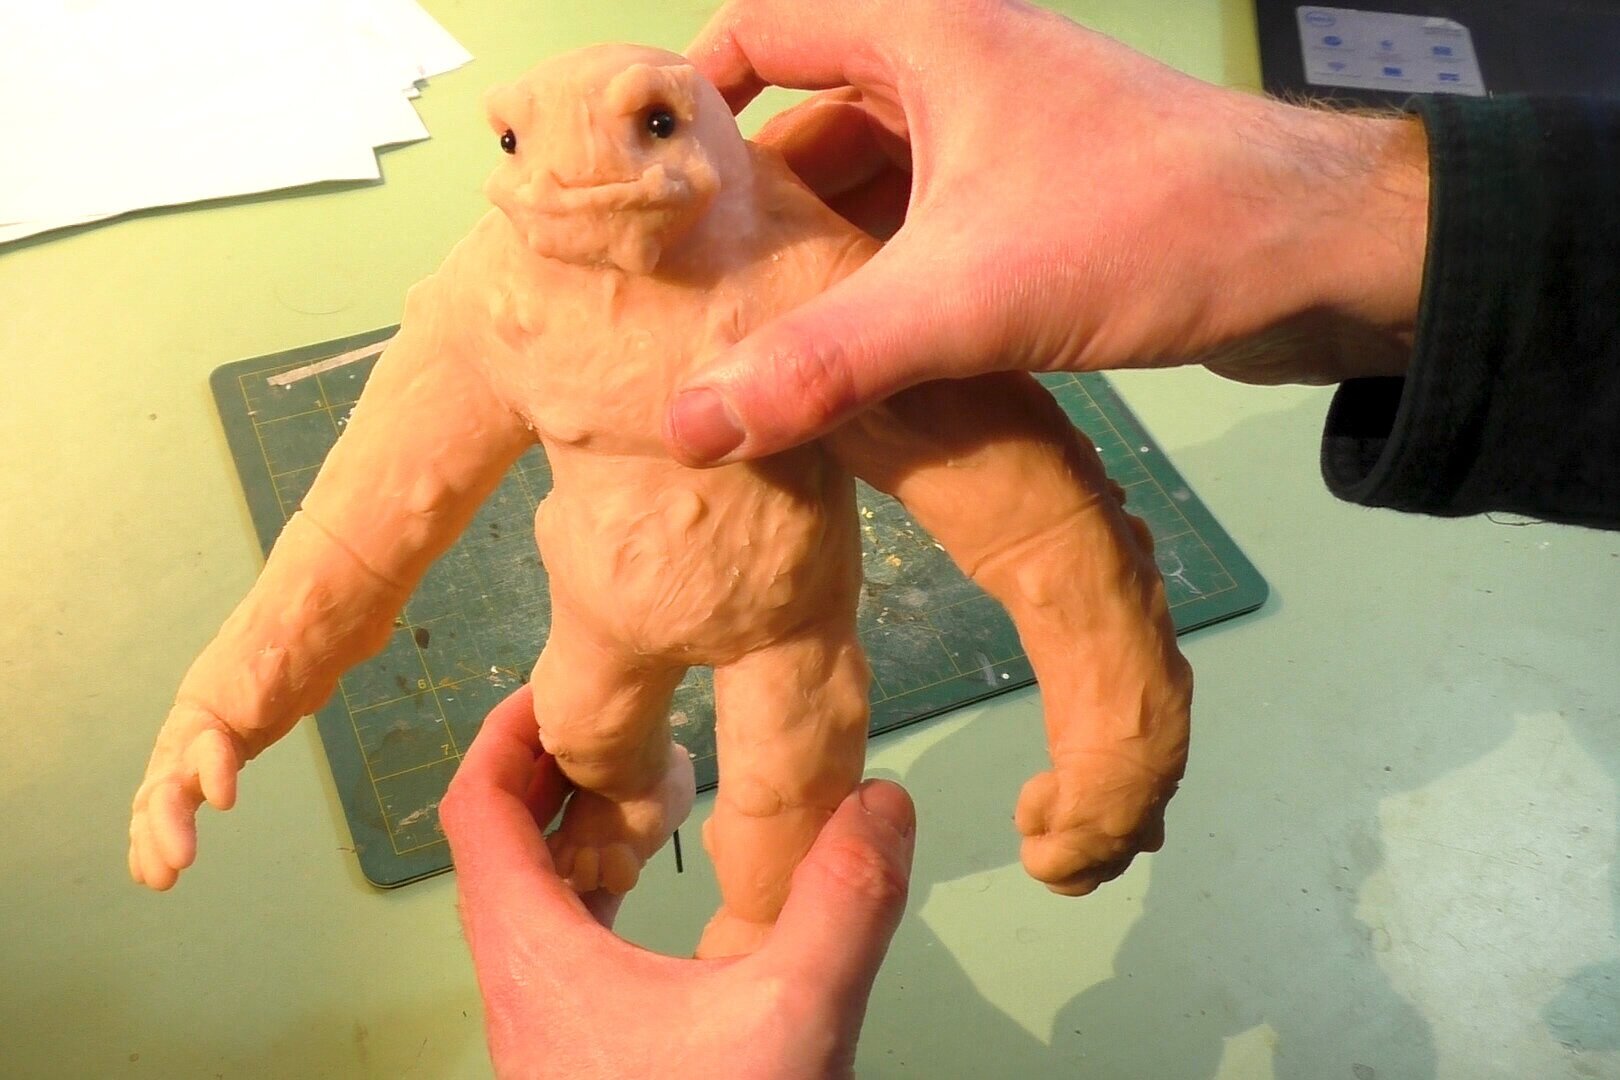
Recently I made the acquaintance of a new species within the Dream Syndicate, wander stones. Wander stones are nomadic, elemental beings that travel in small herds known as a ruckus or larger, more dangerous herds that are called a calamity. The process for designing these resin fantasy sculptures wasn’t without it’s challenges- I had over a dozen setbacks before the wander stones were fully brought to life!

A trio of wander stones.

A trio of wander stones.


Watch Wander Stone | Process for Designing a Resin Fantasy Sculpture

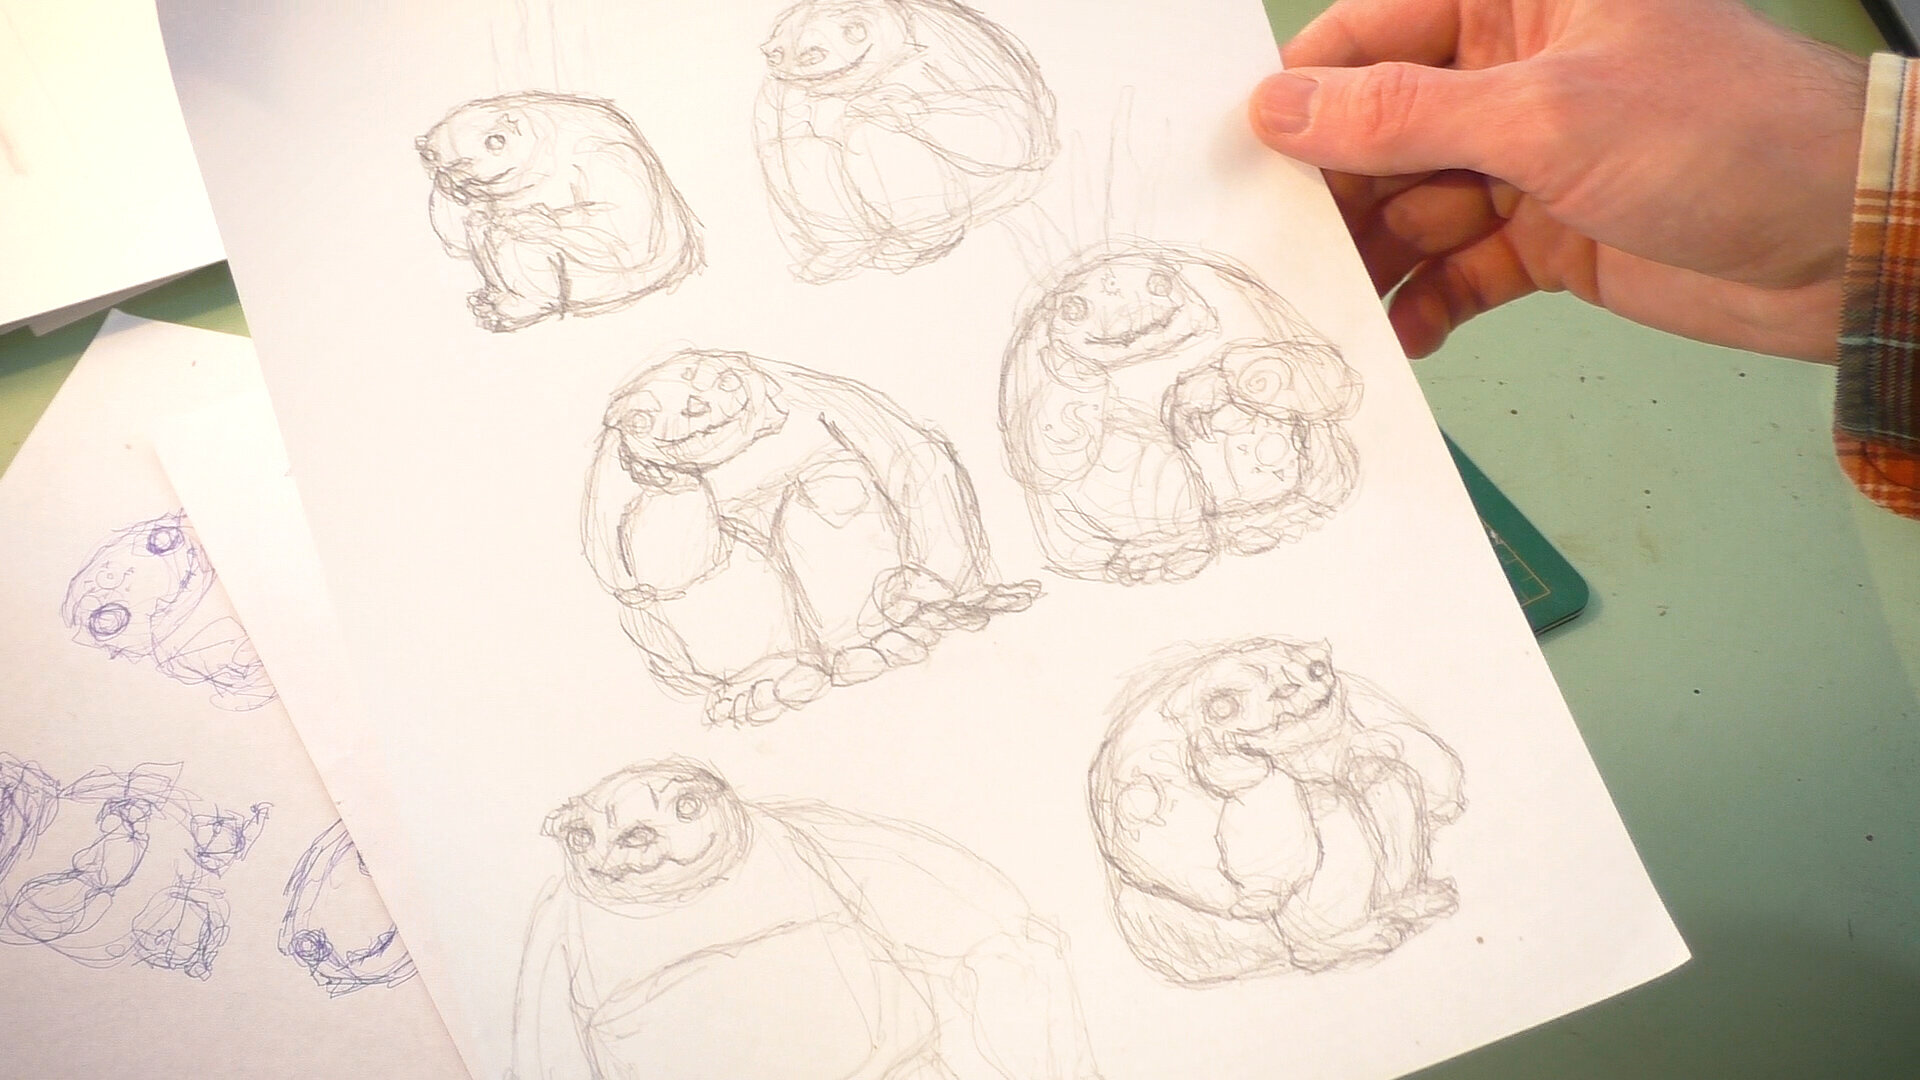
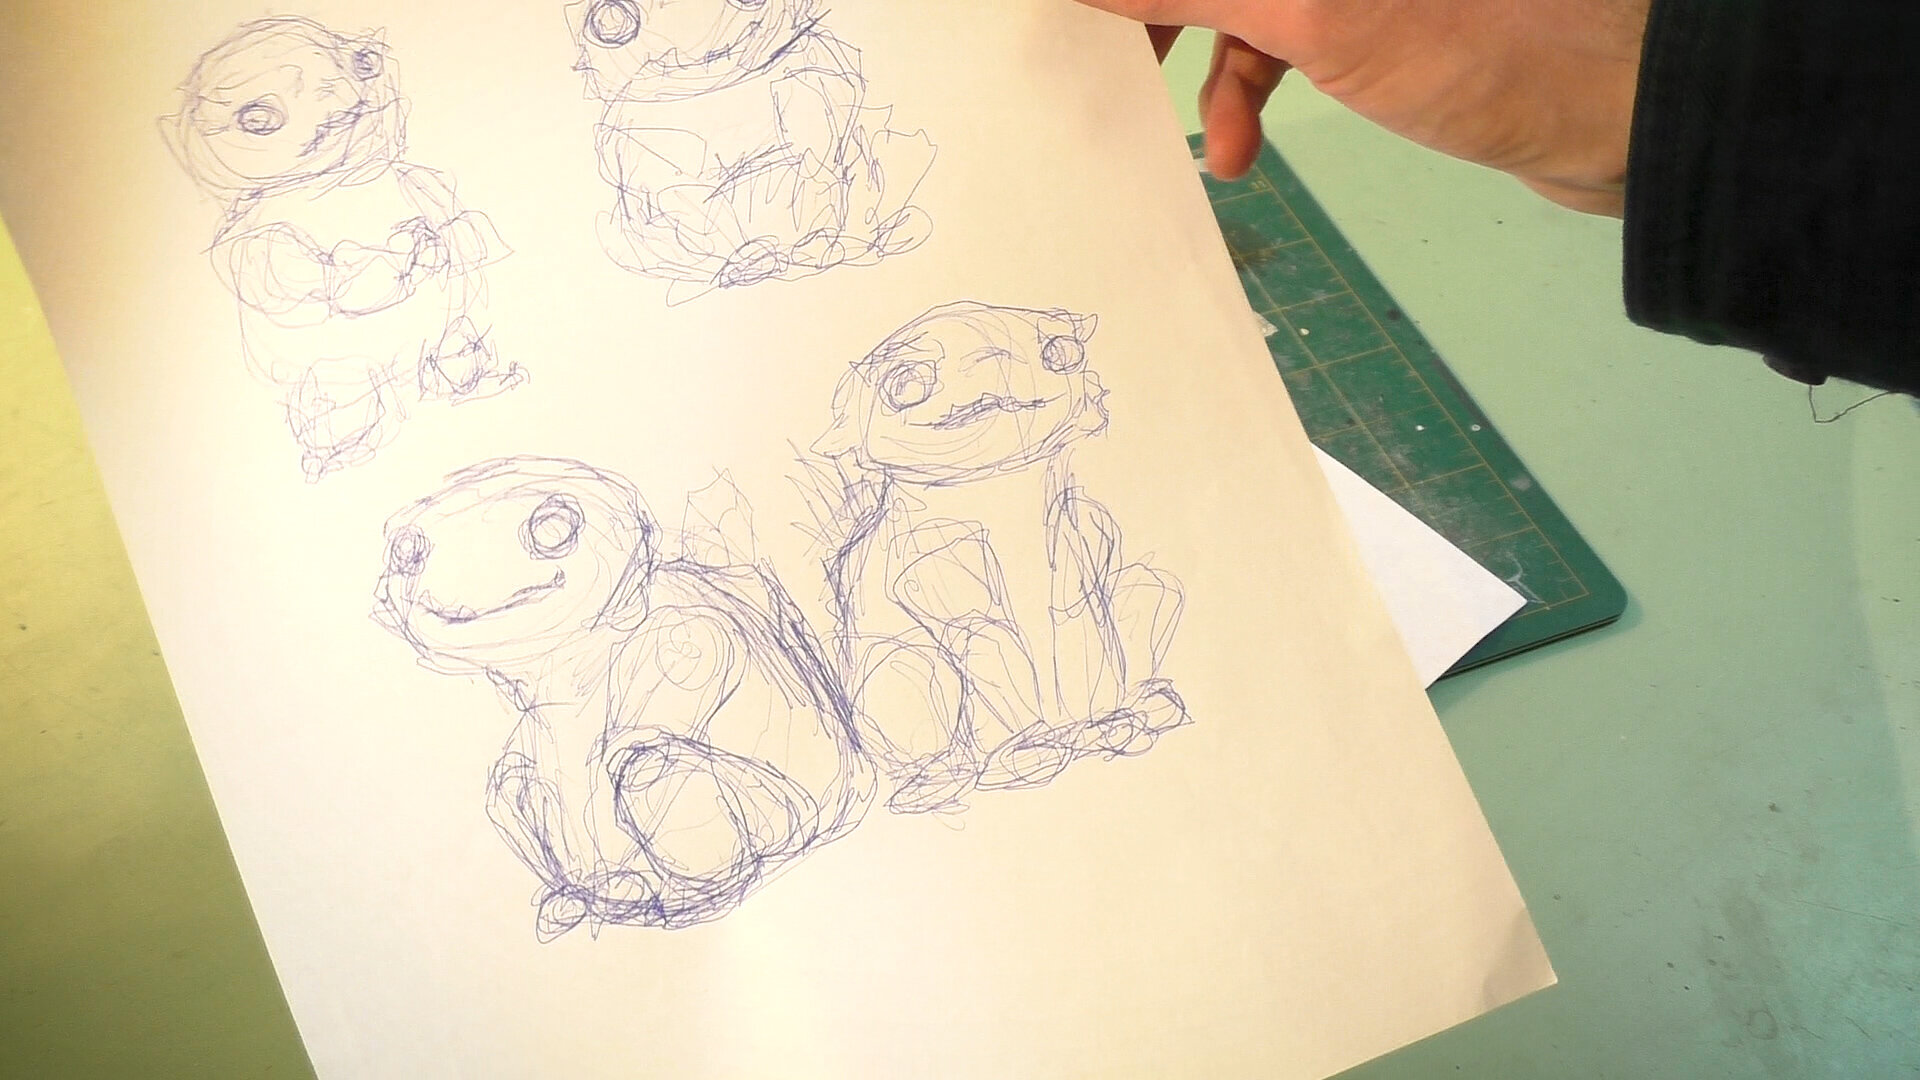
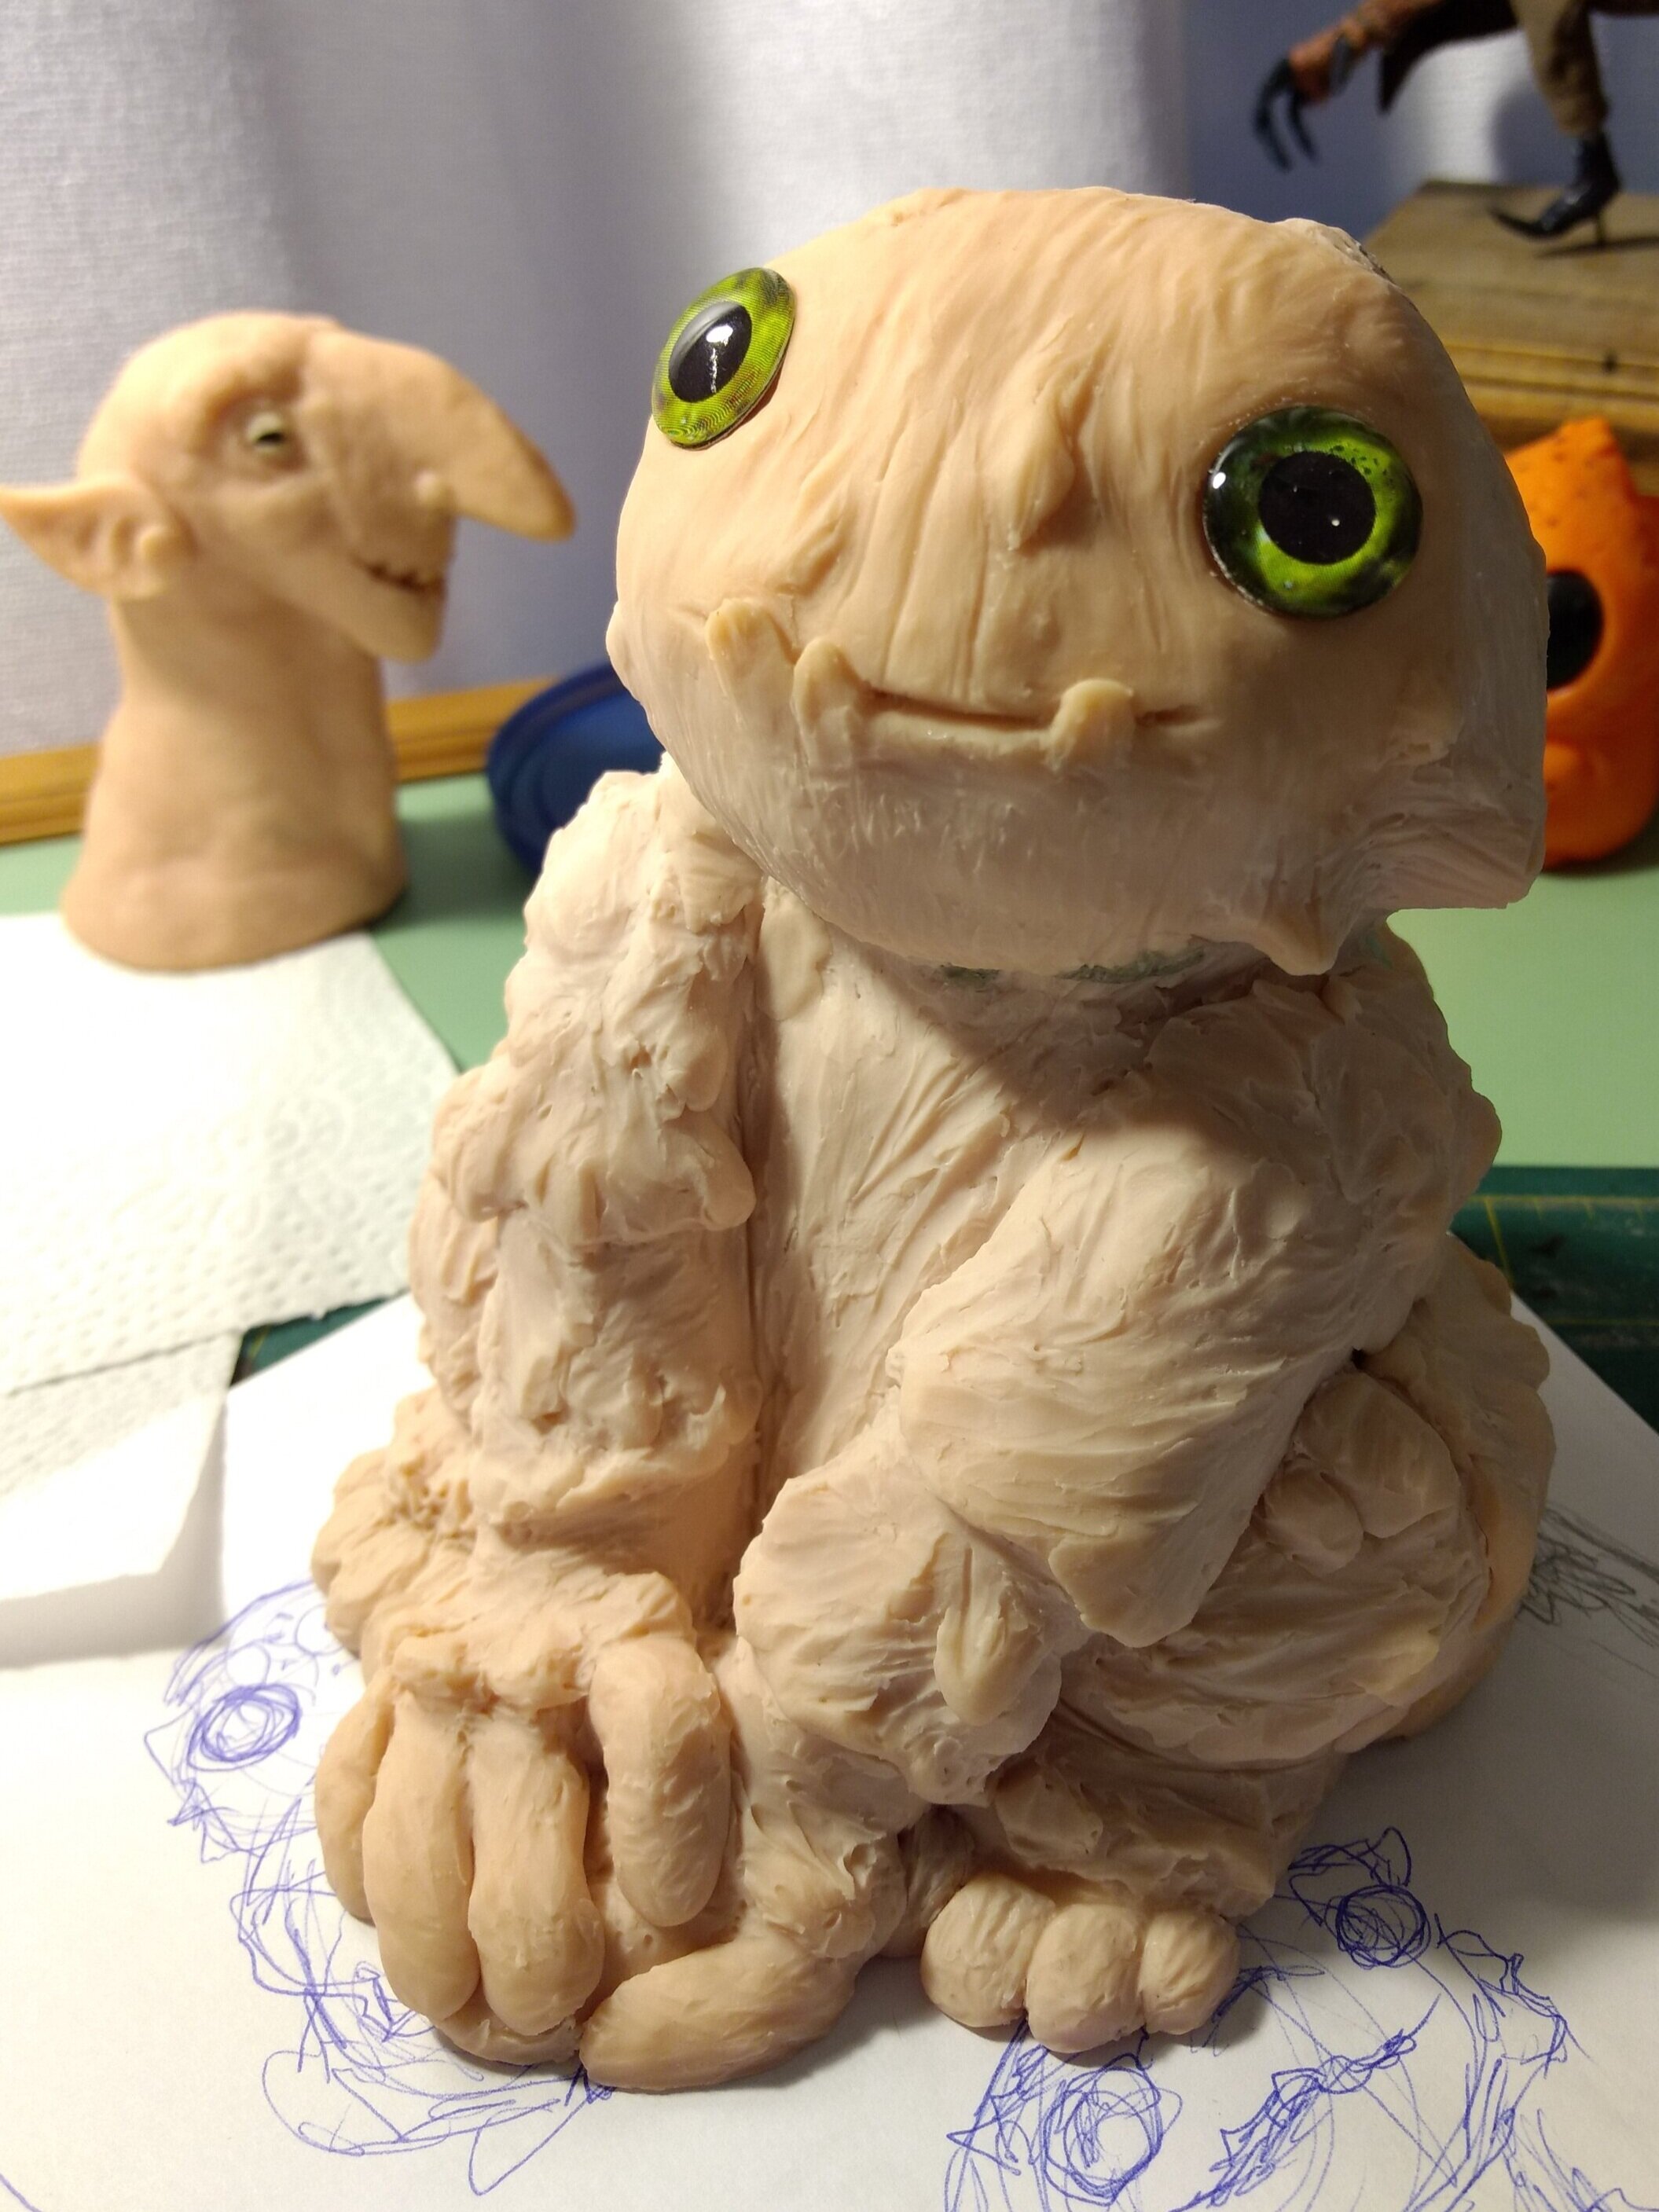
As many things so often do, these earth elemental creatures began as vague sketches in my sketchbook that I refined and from there I sculpted a full-grown wander stone. I have it mind to an image with over a dozen of these creatures, but thought I might start with molding and resin casting a sculpture of a wander stone. I’d originally thought I was going to make a planter of an adult creature, but settled on making a younger, cuter wander stone.


WS.Adult.jpg

Wander stones reproduce in a strange way.  A new wander stone is brought into the world during auspicious occasions when a herd is gathered. Members of a herd chant in their rolling, gravelly baritones rhythmically drumming on the ground, their bodies, and stamping their feet while a few find the rocks within the area that have the right resonances, sculpting and refining them. Finally a rune is carved on the forehead depicting some significant event occurring during the birth of this being, this could be an eclipse, a volcanic eruption, or the sprouting of a blade of grass, summoning an earth spirit that becomes a wander stone.

IMG_20210218_174240072.jpg

The sculpture is largely made from Sculpey polymer clay with a few Apoxie Sculpt touch-ups. Once the sculpting was complete, constructed a mold box from large Lego bricks and a baseplate, laid down a thin layer of plastilina clay, and alternated between building up the height of the mold box, and refining the bed of clay around the sculpture. I initially ran afoul on this project by not buying enough silicone Mold Star 15 Slow- I tried to cheap-out with the smaller sized containers of it when I should have just bought the larger buckets of the material. As a result, I didn’t have enough silicone to finish the first pour leaving me with a partially embedded sculpture. This required surgery to not only cut the wander stone sculpt out of the silicone, but I also had a breakage on the fingers and toes, so those had to be re-sculpted.

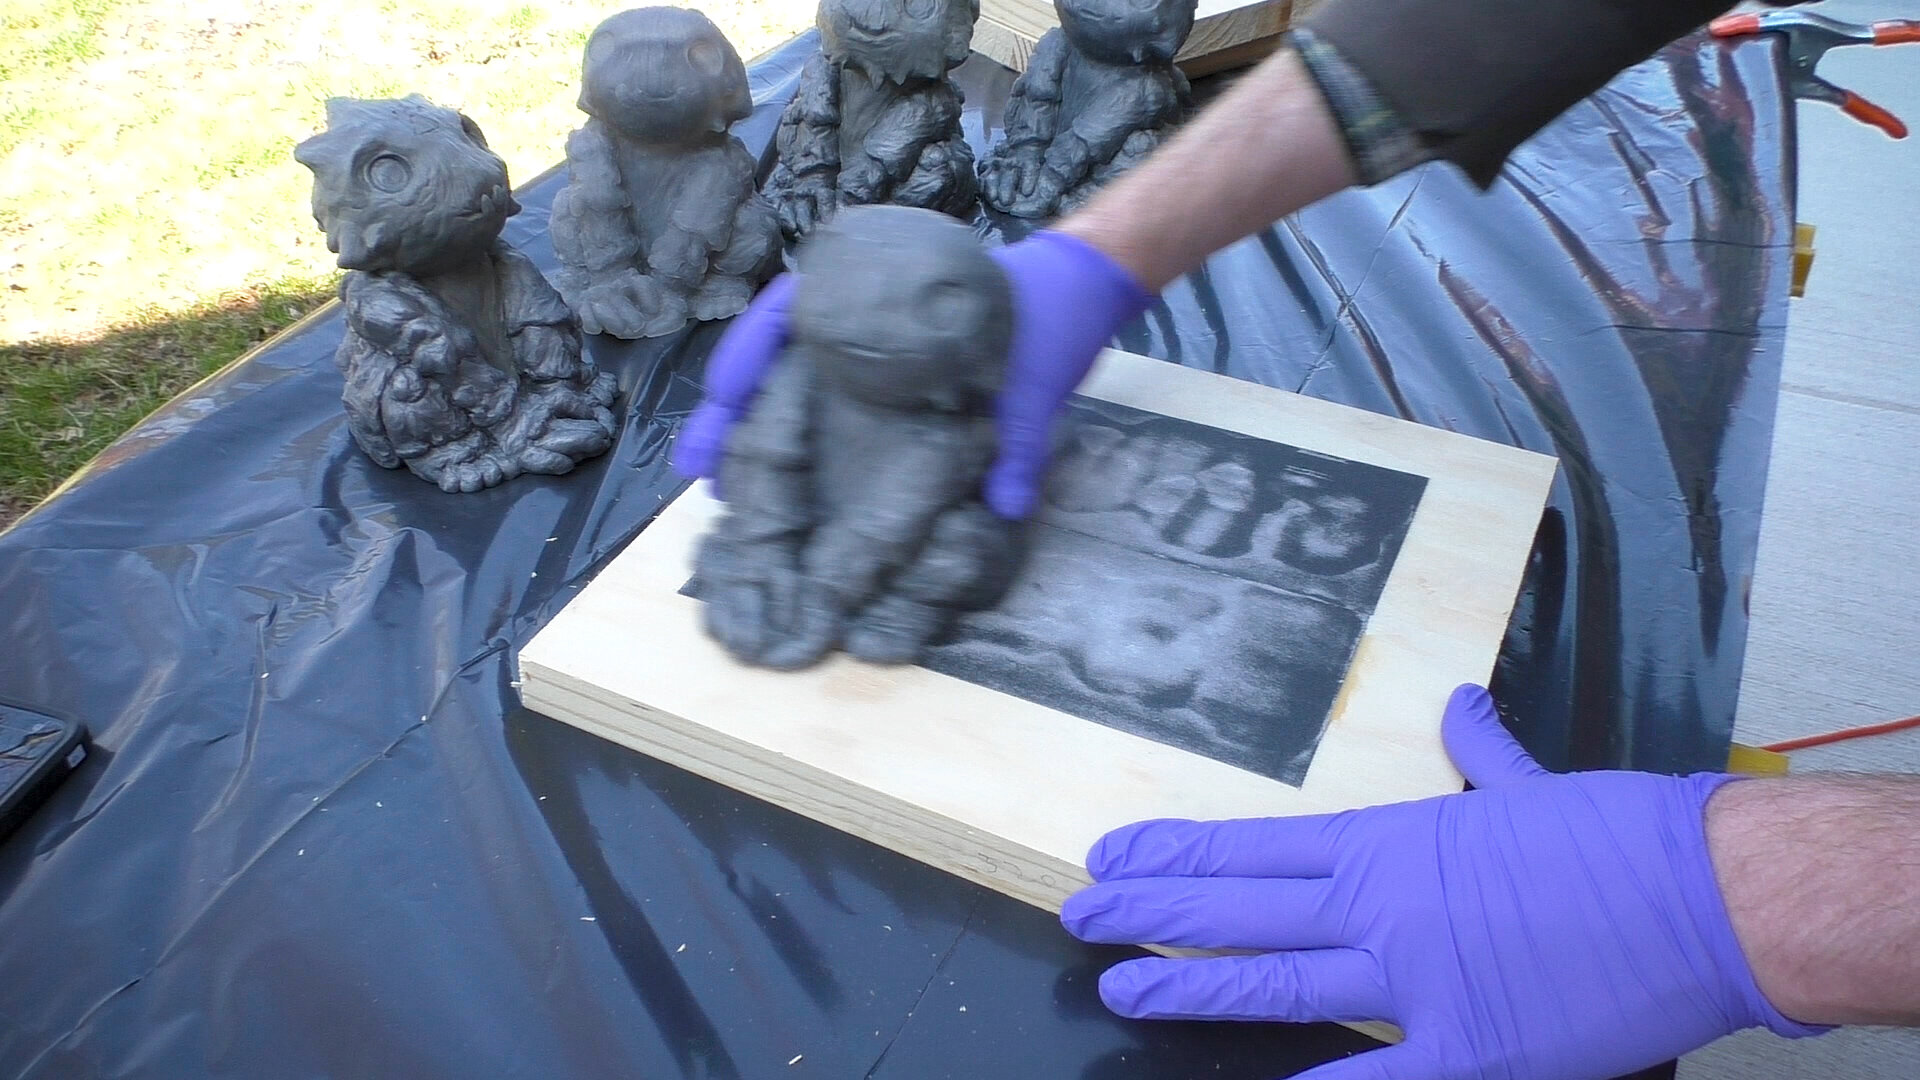
These young earthen spirits are cast in resin, using SmoothCast 66D, and I’m using a process called slush casting (aka roto-casting). There are various contraptions and simple machines for this, but with the method I’m using, I filled the larger front half of the two part silicone mold, secure the two halves together with several rubber bands, and slowly turn the mold in various practically random directions over the course of about 40 minutes. As you turn the mold in your hands, you can feel the liquid resin sliding along the walls inside of the mold. I try to manage the curing material inside in such a way that a bit more settles along the bottom so that the bottom is heavier. The reason for casting them in such a manner, making them hollow, is otherwise, they would be quite heavy and use an awful lot of material, making them fairly expensive to produce.

WS.IntofSilicone.jpg


WS.SandingBottom.jpg

After the resin sculptures are cast, I refine them with files and sandpaper as well as sculpt some additional details onto each piece to make it unique and a glyph is also carved onto the forehead of these young wander stones. The glyph on the wander stone’s forehead relates to some auspicious event that was occurring as they were being imbued with life.

WS.GreyPainting.jpg

The fantasy sculptures are then primed and hand-painted with acrylic paints. Finally, once the paint has dried, the wander stones are sprayed with a couple of coats of varnish and the eyes are glued into their sockets with some Crafter’s Pick glue. And when the glue’s set, the eyes are polished with a little rubbing alcohol applied on a q tip.


WS.PuttingEyeIn.jpg
WanderStoneSculptPics-8.jpg

Wander stones are available through my web store.


Wander stones are drawn to the same resonances that cause other beings to live places which when enough of them gather, can be quite perilous. A small group of wander stones is called a ruckus and outside of the occasional nuisance of a few of them rolling or a sudden crash, isn’t anything to be concerned about.  As these boulderous creatures gather, they tend to form themselves into piles when stationary, readjusting from time-to-time. Now, when wander stones congregate in greater numbers, 20-50 or more, they are referred to as a calamity, which has the potential to cause injury or death or could even cause a rockslide that flattens buildings or even entire villages. Some individuals take up the profession of a rock herd or a stone shepherd to drive a ruckus or calamity to more remote areas with the aid of a tuning-fork that they strike in certain pitches and rhythms that lures the beasts away.

Thanks for joining me so far and here’s to the adventures we have in future! To be the first to know when I launch new polymer clay art videos, be sure to subscribe to my YouTube channel and hit the bell icon. Catch all of my videos here: https://www.youtube.com/thedreamsyndicatearts. You can also find many of the supplies I use in crafting here: https://www.thedreamsyndarts.com/supplies-gear/. And sign-up for my newsletter (in the sidebar) to get the latest studio goings-on! Thanks so much for joining me on this journey and until next time: Make. Believe!

Want to be the first to know about new happenings in the Dream Syndicate? Sign-up for my newsletter below!

𝐉𝐮𝐬𝐭 𝐒𝐊𝐔𝐋𝐋𝐏𝐓𝐈𝐍𝐆 💀| 𝐌𝐚𝐤𝐢𝐧𝐠 𝐌𝐢𝐧𝐢𝐚𝐭𝐮𝐫𝐞 𝐒𝐤𝐮𝐥𝐥𝐬 𝐰𝐢𝐭𝐡 𝐏𝐨𝐥𝐲𝐦𝐞𝐫 𝐂𝐥𝐚𝐲

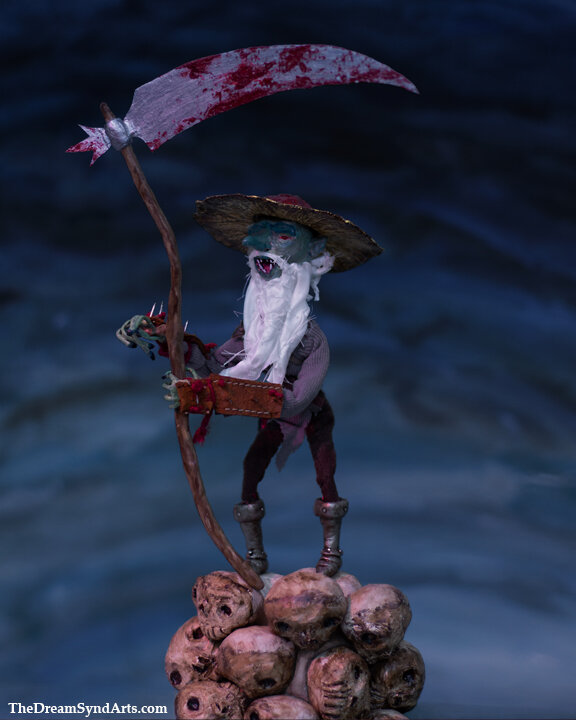
I wanted to have the figure standing on a pile of skulls and so I sculpted a bunch of miniature skulls with polymer clay as an art doll prop in the image. I was inspired by stylized works by people such as Shaun Tan from his book “The Singing Bones” and by the work of sculptor Dug Stanat.

Watch me get up to some Skullpting

RedcapSkullsWEB.jpg

Prints of the dimensional-illustrations made with the redcap art doll are available here:

Open Edition Prints

“Redcap’s Rage” https://www.inprnt.com/gallery/thedreamsyndicate/redcaps-rage-evil-fae-fantasy-art/

”Redcap’s Rest” https://www.inprnt.com/gallery/thedreamsyndicate/redcaps-rest-evil-fae-fantasy-illustration/

“Redcap’s Reaping” https://www.inprnt.com/gallery/thedreamsyndicate/redcaps-reaping-wicked-fae-fantasy-art/


The skulls were made with original Sculpey, which is something I generally avoid using unless it’s for a background element. The issue I tend to have with sculpting with the original polymer clay’s that it’s really soft and gets even softer as your hands warm up as you work with it. In this case, I set myself the challenge of making these little sculptures with minimal clay, with each skull being mostly comprised of aluminum foil and also that I would make each one quickly, spending less than five minutes on each individual sculpture.

Once sculpted and baked in the oven, the skulls were tinted with raw umber ink, painted with a lightly earthy tinted white, and a final wash of ink was again applied. I found the change of pace freeing to work in such a loose and abstracted style.

Thanks for joining me so far and here’s to the adventures we have in future! To be the first to know when I launch new polymer clay art videos, be sure to subscribe to my YouTube channel and hit the bell icon. Catch all of my videos here: https://www.youtube.com/thedreamsyndicatearts. You can also find many of the supplies I use in crafting here: https://www.thedreamsyndarts.com/supplies-gear/. And sign-up for my newsletter (in the sidebar) to get the latest studio goings-on! Thanks so much for joining me on this journey and until next time: Make. Believe!

𝐑𝐄𝐃𝐂𝐀𝐏 | 𝐃𝐀𝐑𝐊 𝐅𝐀𝐄 𝐏𝐨𝐬𝐞𝐚𝐛𝐥𝐞 𝐄𝐯𝐢𝐥 𝐅𝐀𝐍𝐓𝐀𝐒𝐘 𝐀𝐫𝐭 𝐃𝐨𝐥𝐥 | 𝐓𝐢𝐦𝐞𝐥𝐚𝐩𝐬𝐞 𝐌𝐢𝐱𝐞𝐝-𝐌𝐞𝐝𝐢𝐚 𝐀𝐫𝐭 𝐃𝐨𝐥𝐥 𝐓𝐮𝐭𝐨𝐫𝐢𝐚𝐥

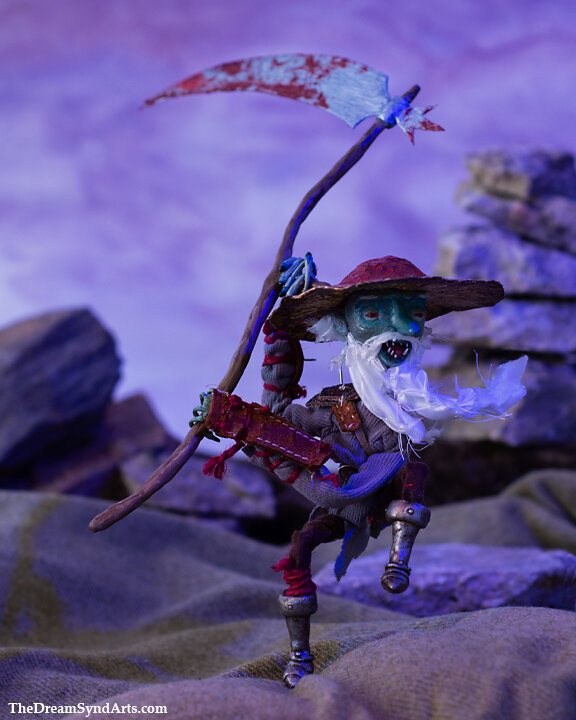
I recently spent some time documenting some terrible, malevolent, dark fae, the redcap. These nasty, blood-thirsty creatures make their homes in castle ruins or sites of gruesome battles and prey upon any who enter their domain. Redcaps are described as red-eyed old men with long, greasy beards, carrying pike staffs or scythes, and renown for wearing heavy iron shod boots and despite their ungainly footwear, move with preternatural speed. What really gives them their name are the red hats on their heads. The red is no mere ornamentation, it is actually soaked in blood and must remain so, for if a redcap’s hat ever runs dry of the crimson ichor, the creature will perish.


Watch me make the Redcap Art Doll here:


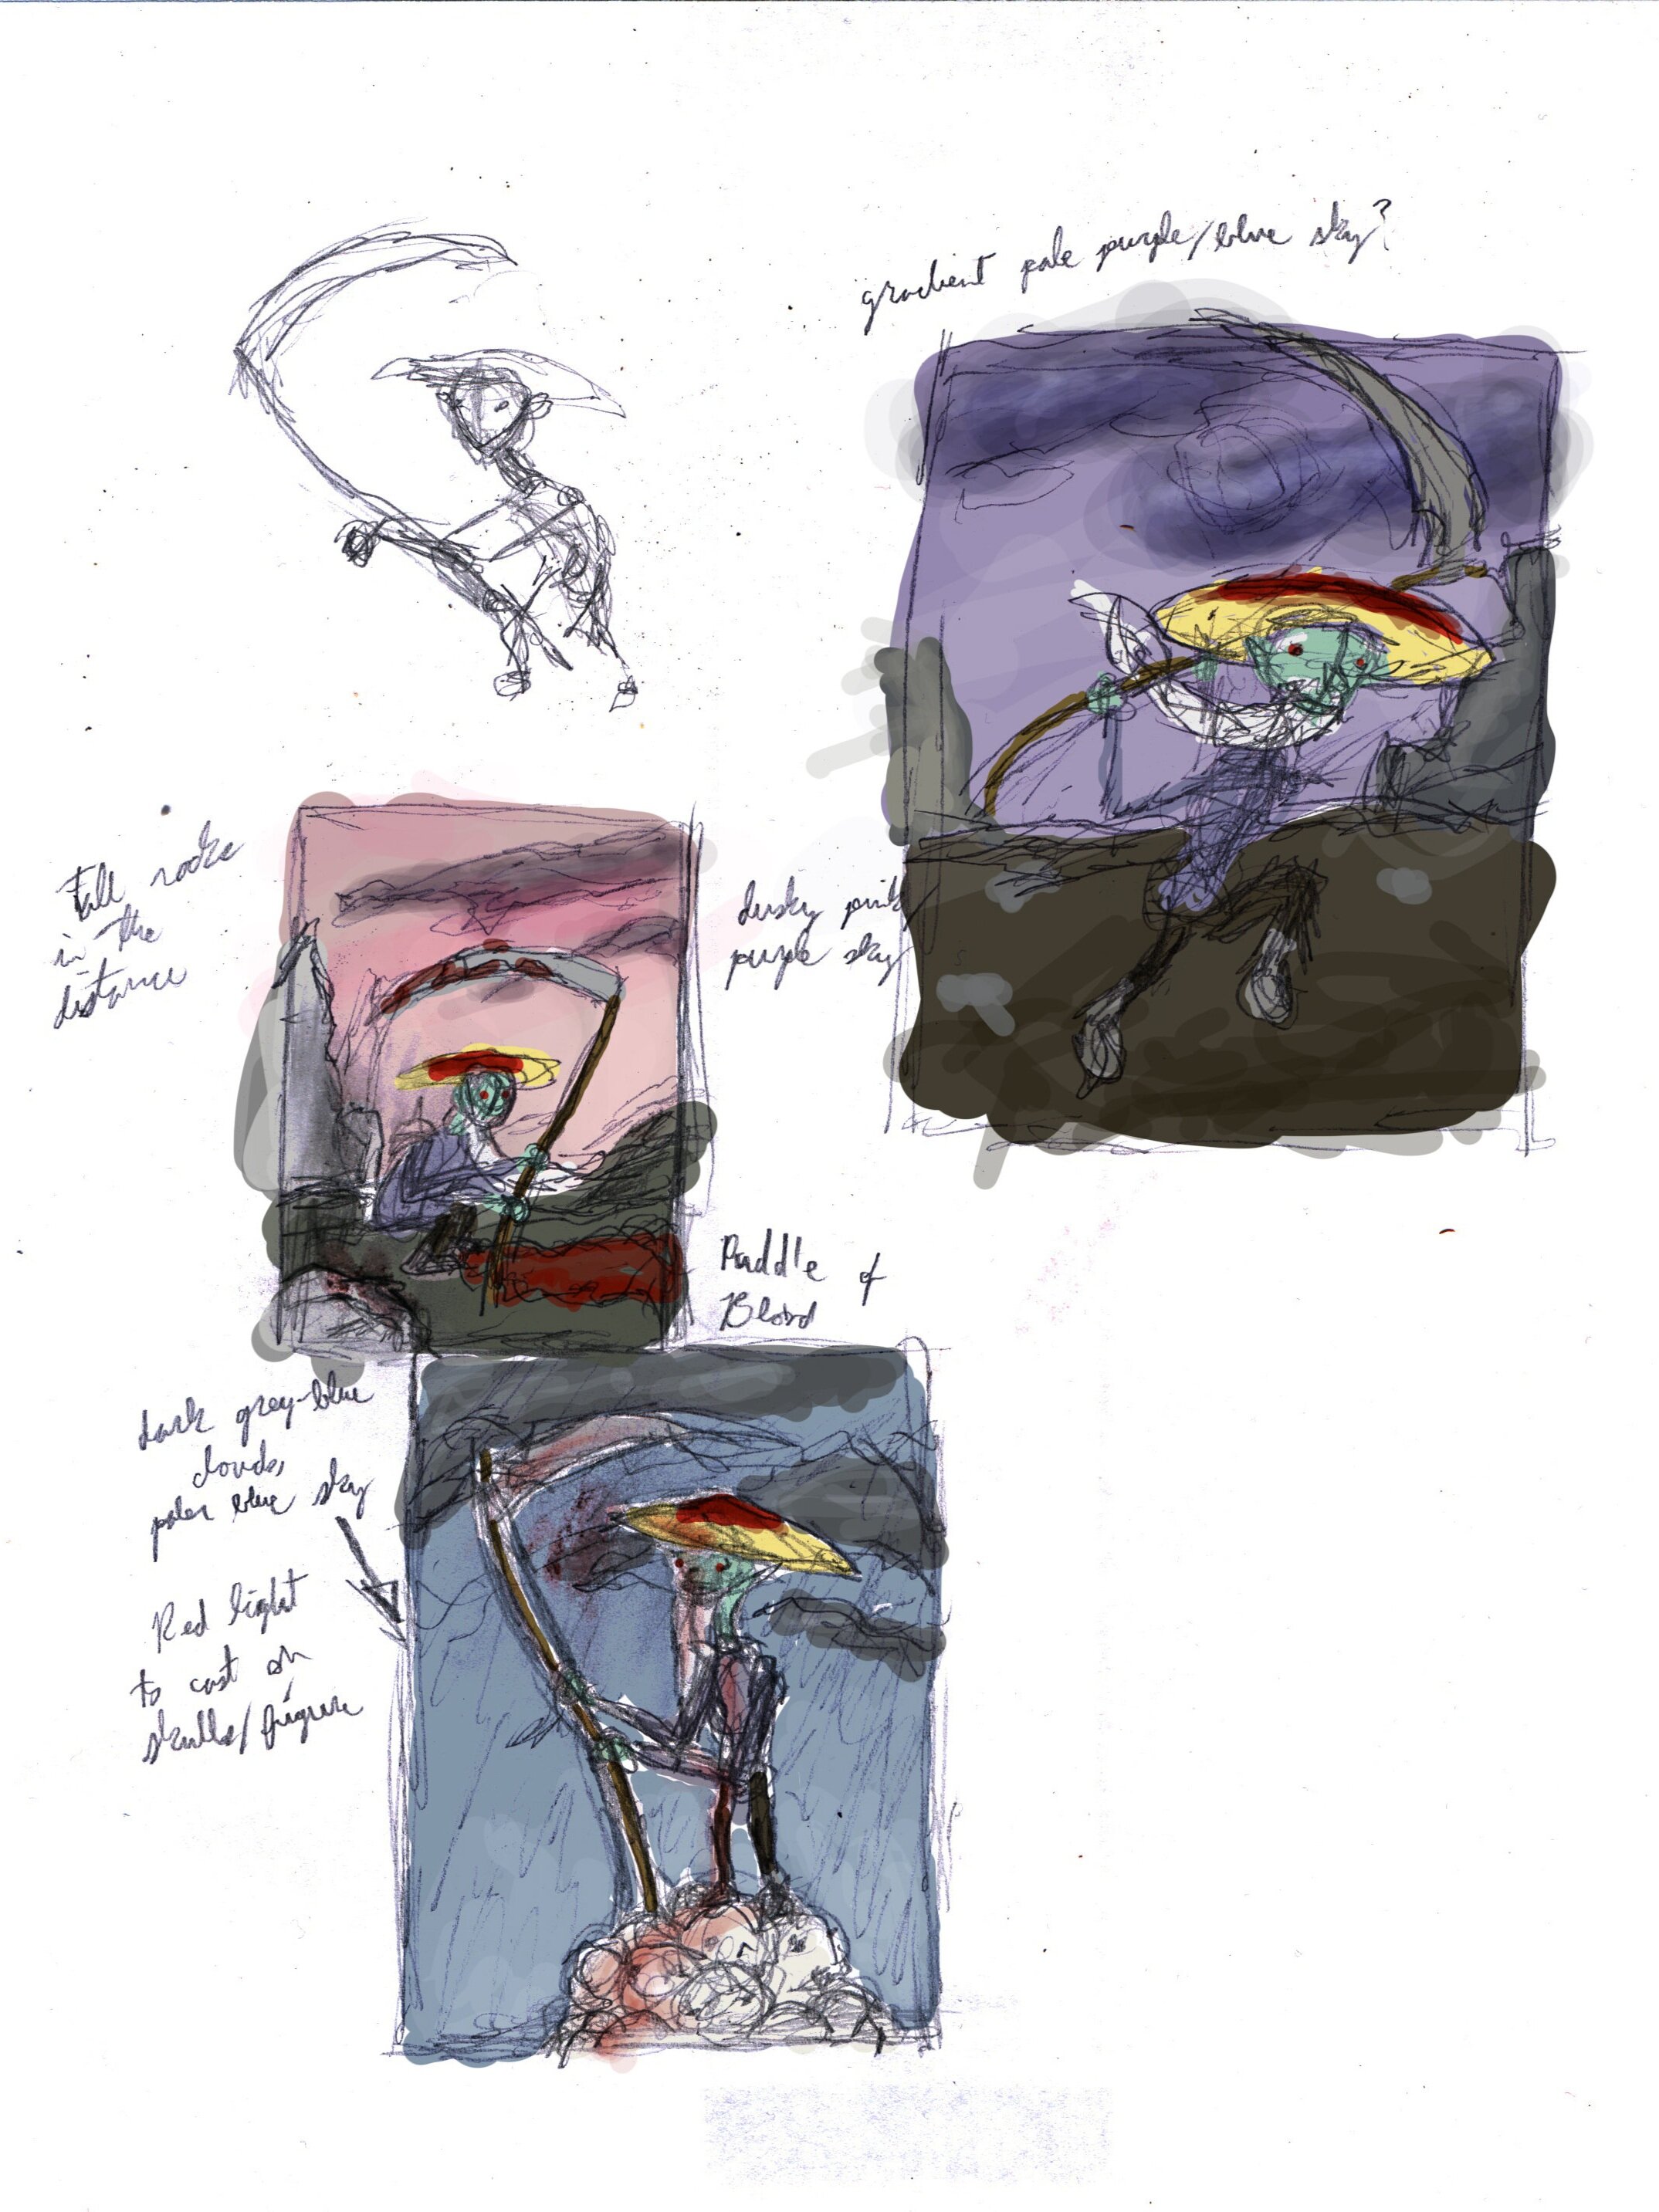
While the lore tends to describe the evil fae creatures as having a stout build, I tend to like spindly creatures. This poseable art doll was made in my typical mixed-mixed media style, beginning with sketches and ending with a finished dimensional-illustration. I made his fleshtone a sort of minty green hue because I thought it would coordinate well with the red cap on his head. One direction I decided to take on the design of this art doll was to make his hat resemble a mushroom- surprisingly, not many artists had made this character design decision. It made perfect sense to me, there are all manner of benevolent fae seen wearing mushroom hats and given that their are a good number of mushrooms that can seriously harm or kill a person and the redcap fae creature is menacing it’s self, it almost seemed like an obvious choice.

The art doll has a Sculpey polymer clay sculpted head, poseable wire armature body, fabric clothing, and his accessories are made from a variety of mediums. I particularly love some of the dingy little details of this malevolent creature like his spiked armguards and shoulder pad made from upcycled materials. His whole outfit was meant to have a rough-hewn, thrown together quality to it as if this creature doesn’t spend much thought to how he looks at any given time.

 
Sketching the design of the redcap art doll

Sketching the design of the redcap art doll


The art doll has a Sculpey polymer clay sculpted head, poseable wire armature body, fabric clothing, and his accessories are made from a variety of mediums. I particularly love some of the dingy little details of this malevolent creature like his spiked armguards and shoulder pad made from upcycled materials. His whole outfit was meant to have a rough-hewn, thrown together quality to it as if this creature doesn’t spend much thought to how he looks at any given time.

Prints of the dimensional-illustrations made with the redcap art doll are available here:

Open Edition Prints

“Redcap’s Rage” https://www.inprnt.com/gallery/thedreamsyndicate/redcaps-rage-evil-fae-fantasy-art/

”Redcap’s Rest” https://www.inprnt.com/gallery/thedreamsyndicate/redcaps-rest-evil-fae-fantasy-illustration/

“Redcap’s Reaping” https://www.inprnt.com/gallery/thedreamsyndicate/redcaps-reaping-wicked-fae-fantasy-art/

 
Color studies for the various dimensional-illustrations made with the fae art doll.

Color studies for the various dimensional-illustrations made with the fae art doll.


Thanks for joining me so far and here’s to the adventures we have in future! To be the first to know when I launch new polymer clay art videos, be sure to subscribe to my YouTube channel and hit the bell icon. Catch all of my videos here: https://www.youtube.com/thedreamsyndicatearts. You can also find many of the supplies I use in crafting here: https://www.thedreamsyndarts.com/supplies-gear/. And sign-up for my newsletter (in the sidebar) to get the latest studio goings-on! Thanks so much for joining me on this journey and until next time: Make. Believe!


𝐃𝐈𝐘 𝐀𝐩𝐩𝐥𝐞 𝐒𝐇𝐑𝐔𝐍𝐊𝐄𝐍 𝐇𝐄𝐀𝐃𝐒 𝐓𝐮𝐭𝐨𝐫𝐢𝐚𝐥 🍏 | 𝐇𝐀𝐋𝐋𝐎𝐖𝐄𝐄𝐍 𝐒𝐩𝐨𝐨𝐤𝐲 𝐂𝐫𝐚𝐟𝐭𝐬 🎃🍂

As a fun way to get into the spirit of the season, I decided to try my hand at making apple shrunken heads. These Halloween spooky crafts don’t require a ton of prep or supplies. With most things in arts and crafts, I go into them with a lot of planning. With these it was more of using the apples like “carving doodles” and seeing what came out.


Lost Your Head

Do my stitched eyes and mouth fill you with dread?

Beware, you’re on a path where none should tread

Heedlessness will end up costing your head    

Too late, you’re now half decoration, half undead


Watch DIY Apple Shrunk Heads Tutorial | Halloween Spooky Crafts


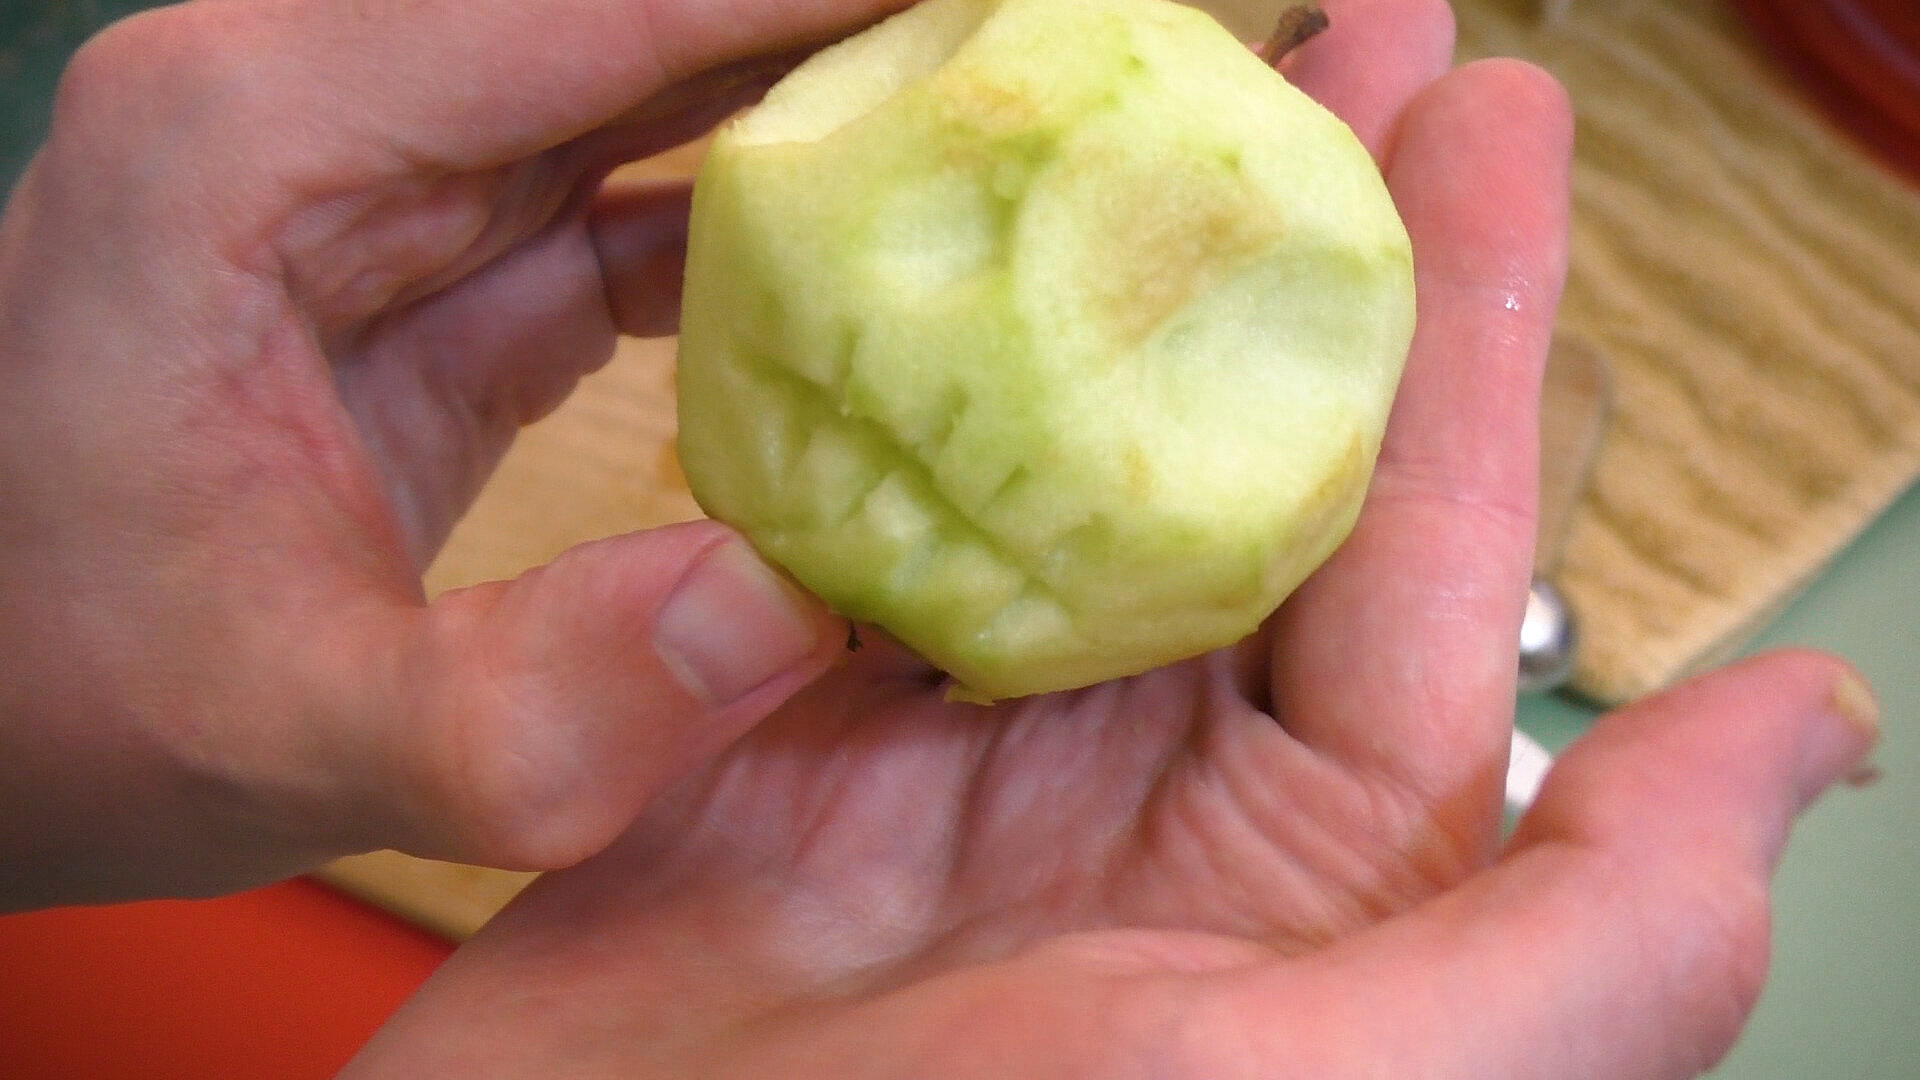
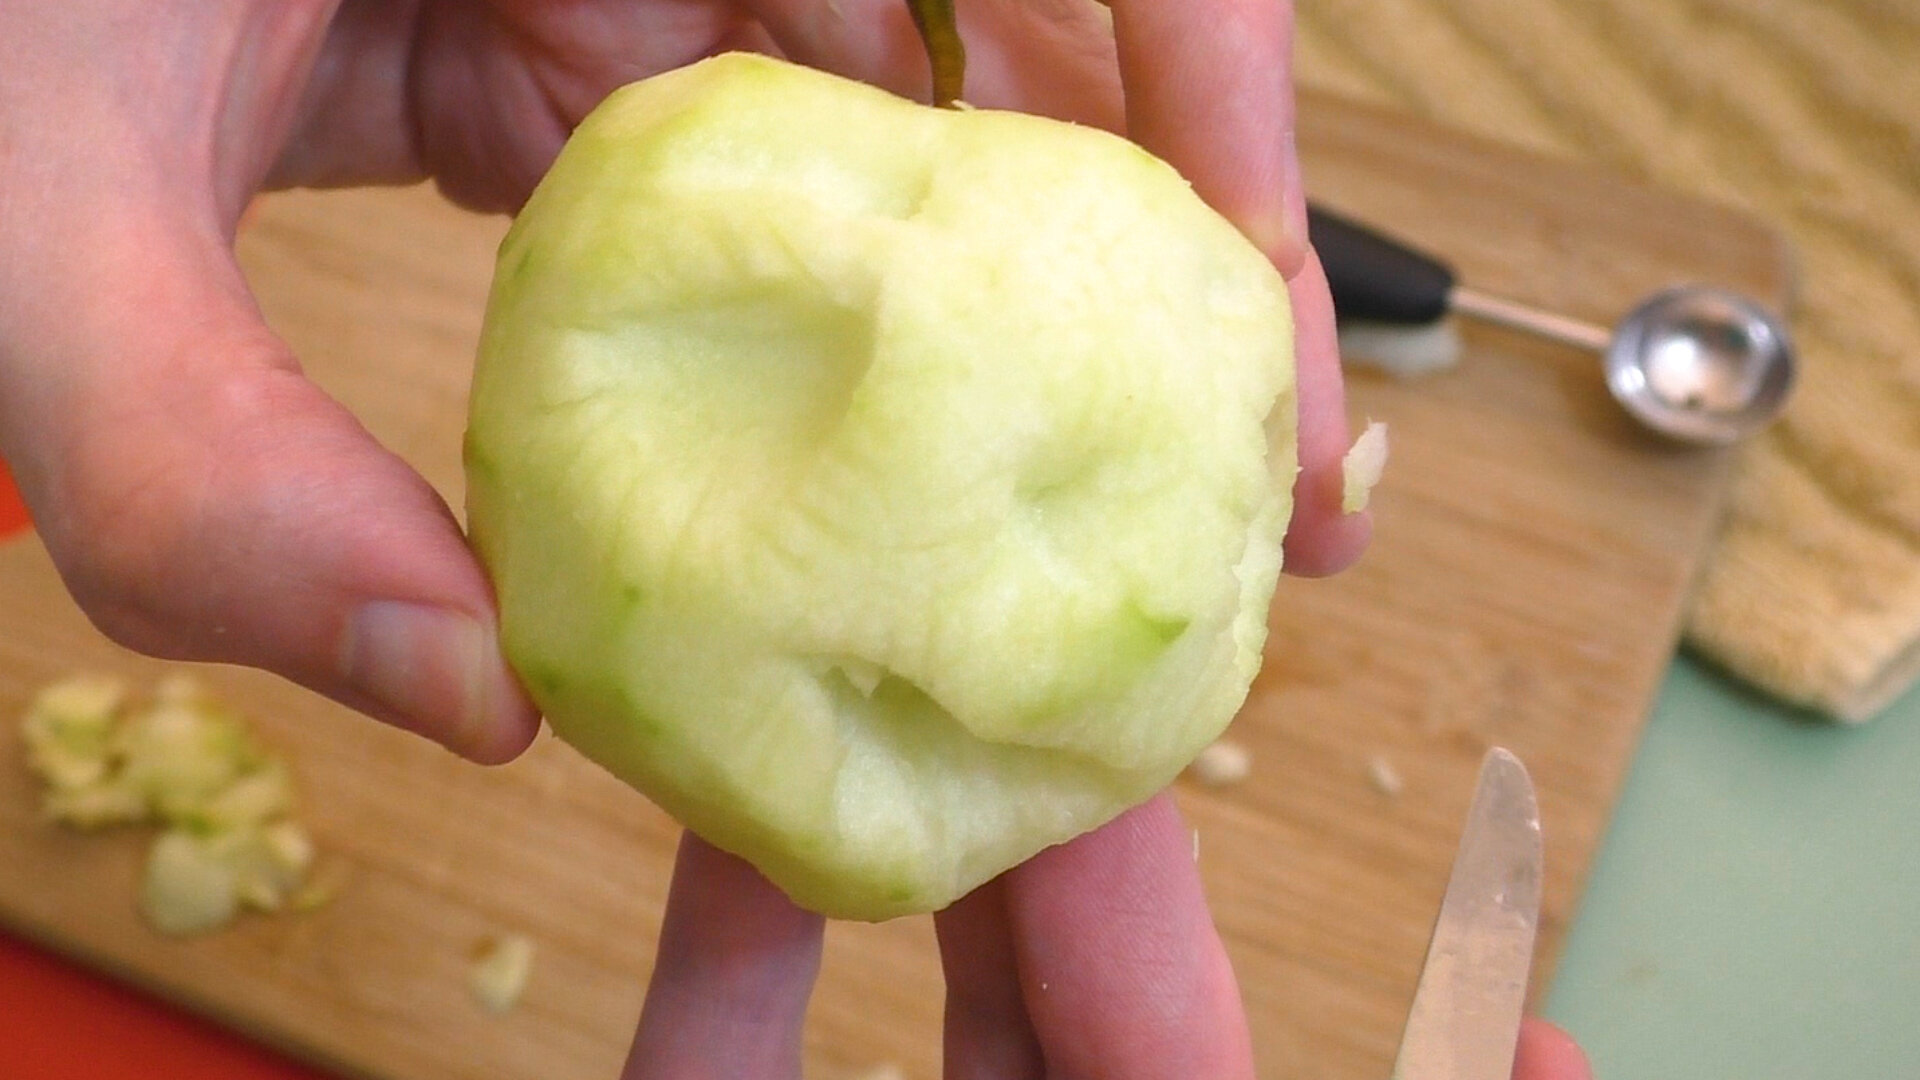
To make these shrunken heads you’ll need apples, a melon baller and/or a paring knife, parchment paper, lemon juice, and salt. You can use whatever kind of apple you want, but granny smith apples are generally recommended for the way they wrinkle when dried-out, and you’ll peel the outer skin before you begin carving. 


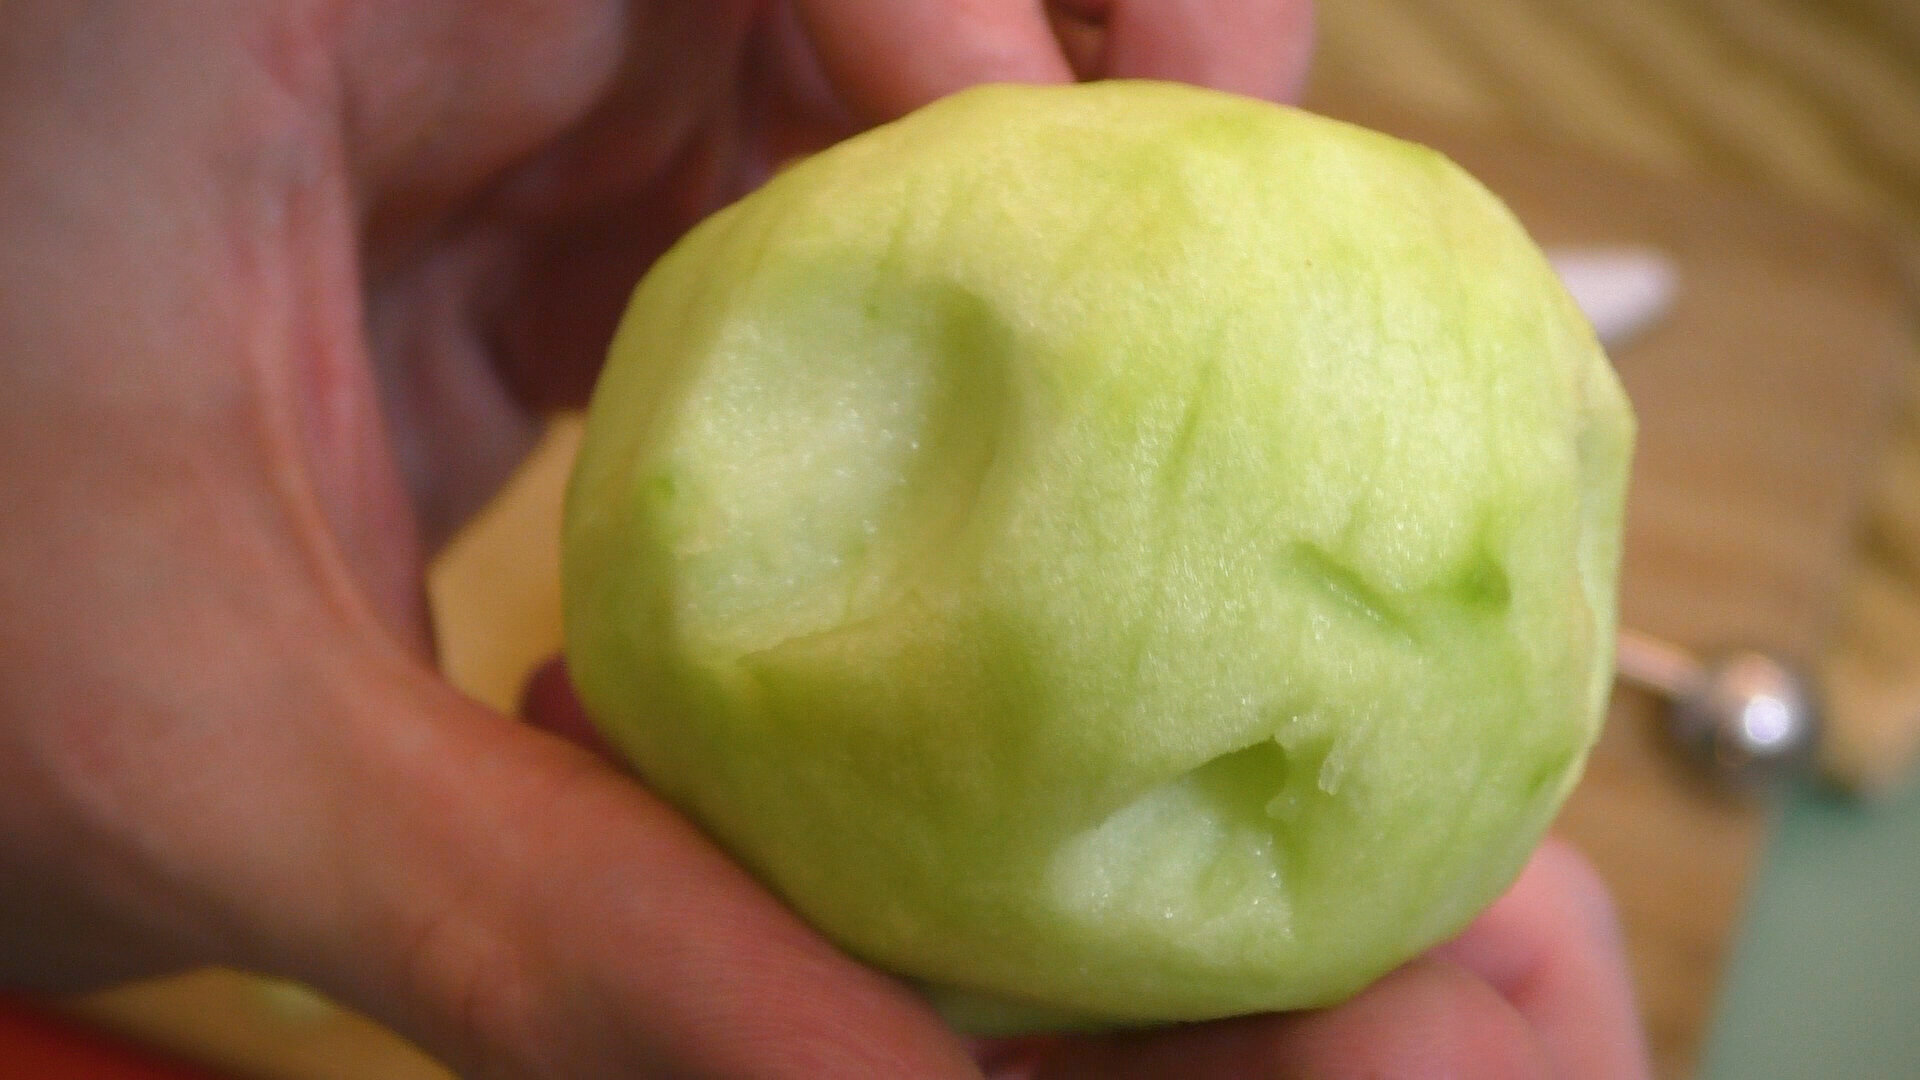
What you’re going to do is just take your melon baller and scoop out areas that you’ll want a rounded form. And use your paring knife to cut away areas where you want a harsher edge. You can use the paring knife to cut in more angular eyes, but I’m pretty partial to the big round eyes the melon baller gives you. The melon baller is also a good option for younger children to be able to do this craft since you’d have to really go out of your way to injure yourself with it.


As you carve your heads, you’ll want to set them in enough lemon juice, with a couple of pinches of salt mixed in, to submerge them for 15-20 minutes. This mixture should reduce the chances of the apples browning and molding. Then you’ll put them in the oven and recite the magical incantation:


Croak of frog, necrotic skin

Shroud of bog, weight of sin

Bone of dog, crocodile’s grin

Curse this head to the size of a pin


BakingShrunkenHeadApple.jpg


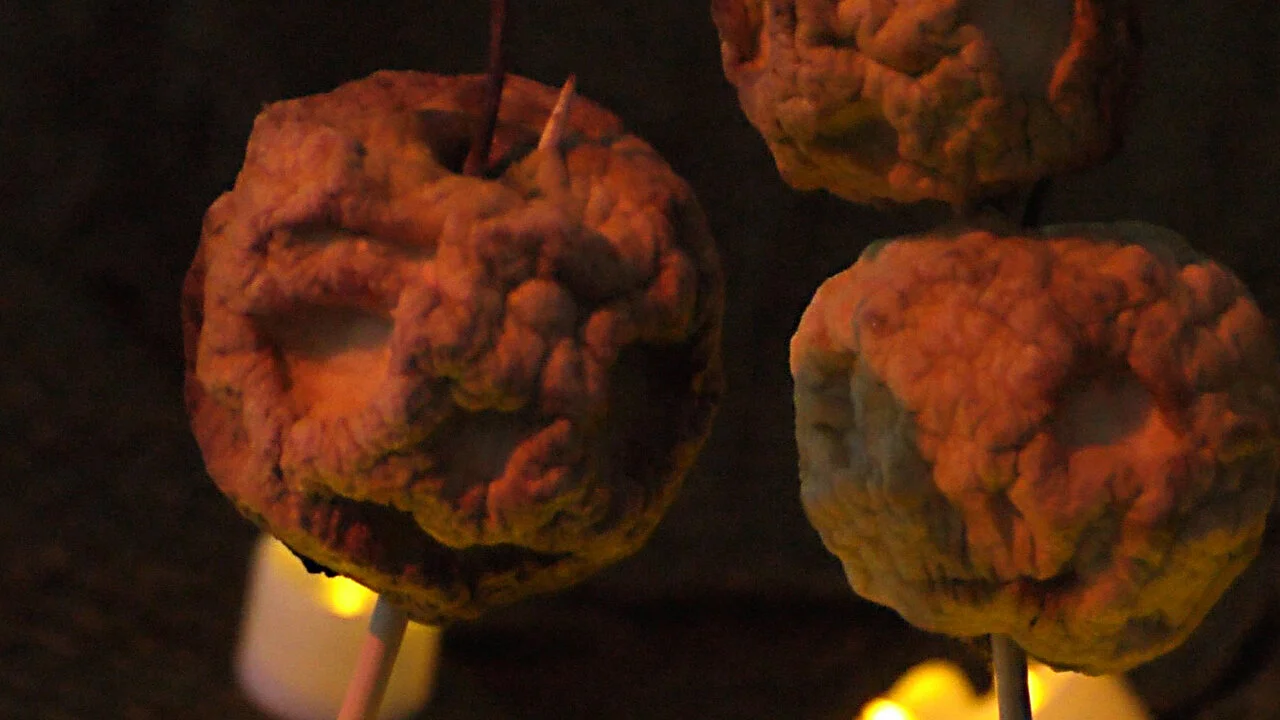
You want to run your oven at low heat, around 200 degrees Fahrenheit for several hours. I baked my shrunken heads for about 4.5 hours and let them cool in the oven overnight. Then you can either use them to decorate around the house, a spooky garland or wreath, just for the season or you could try preserving them with a varnish, lacquer, or any other method you might use to preserve real ornamental fruit.


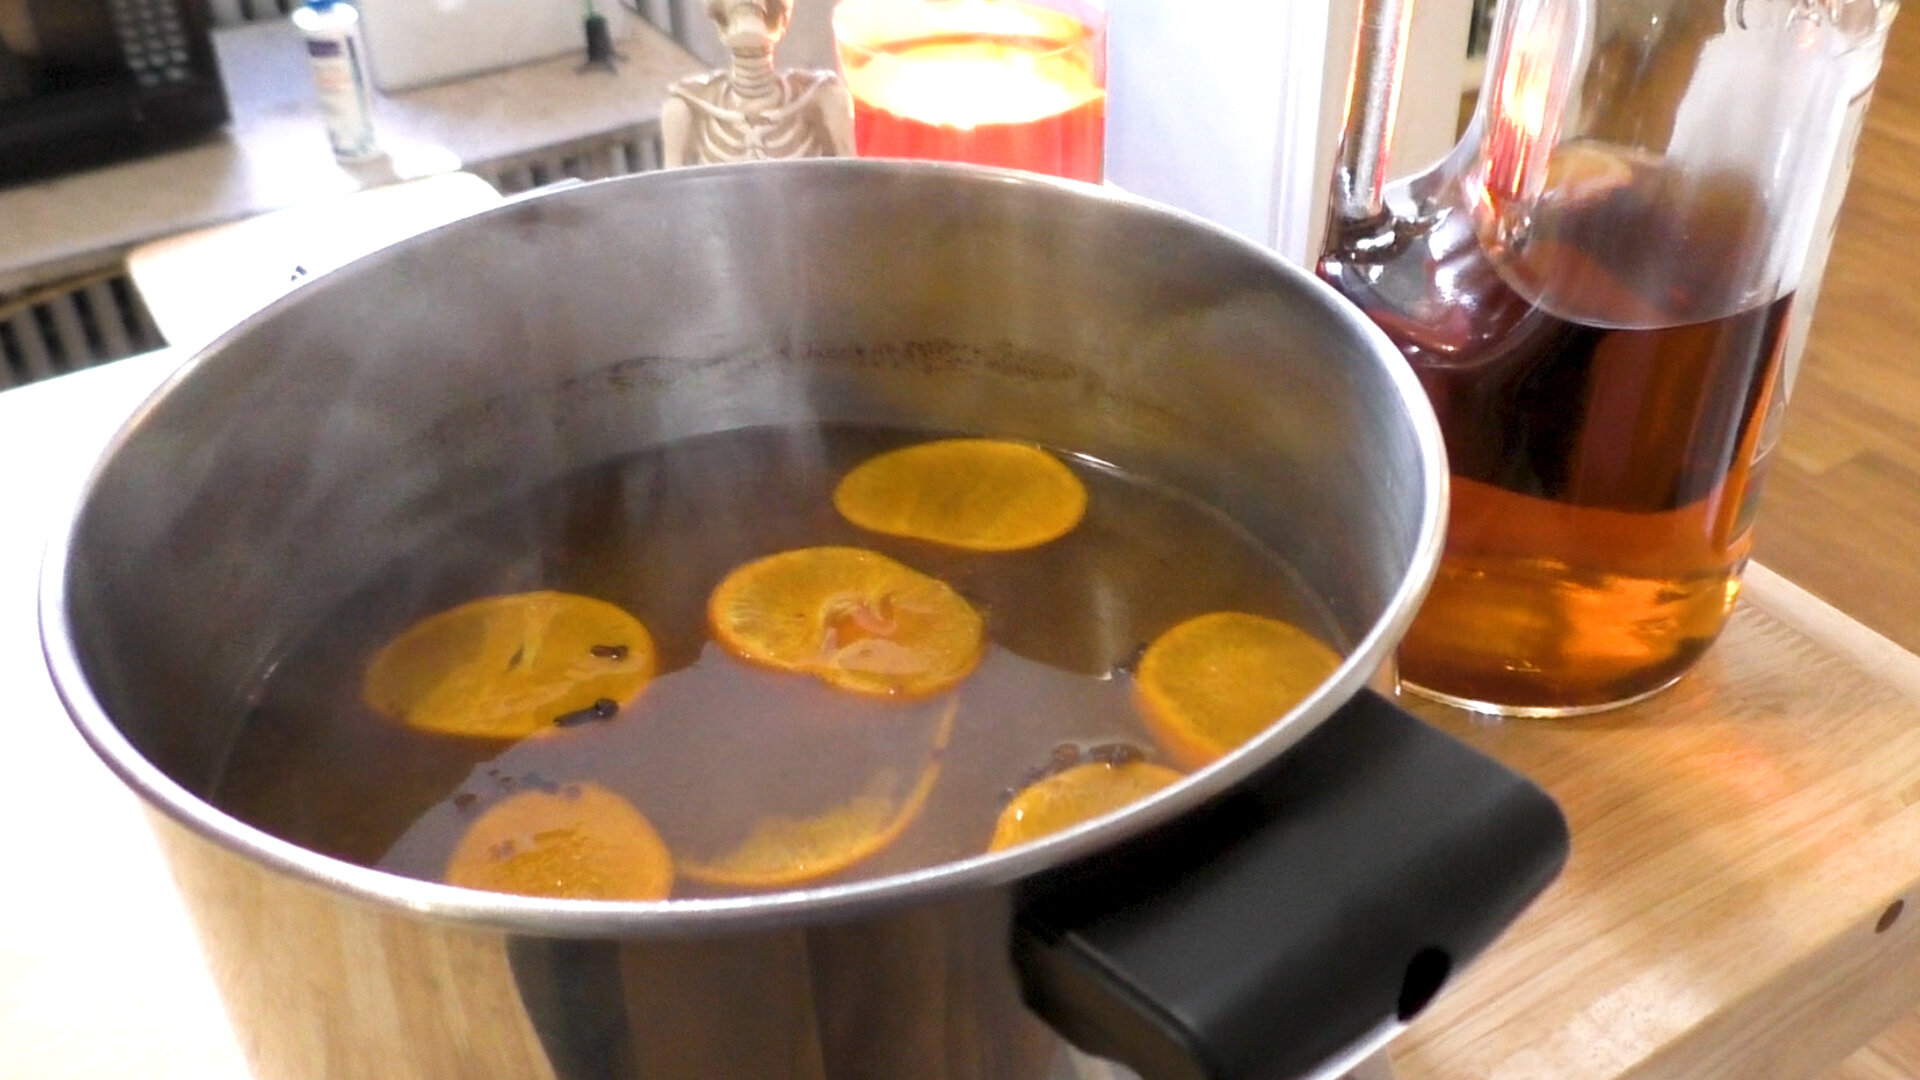
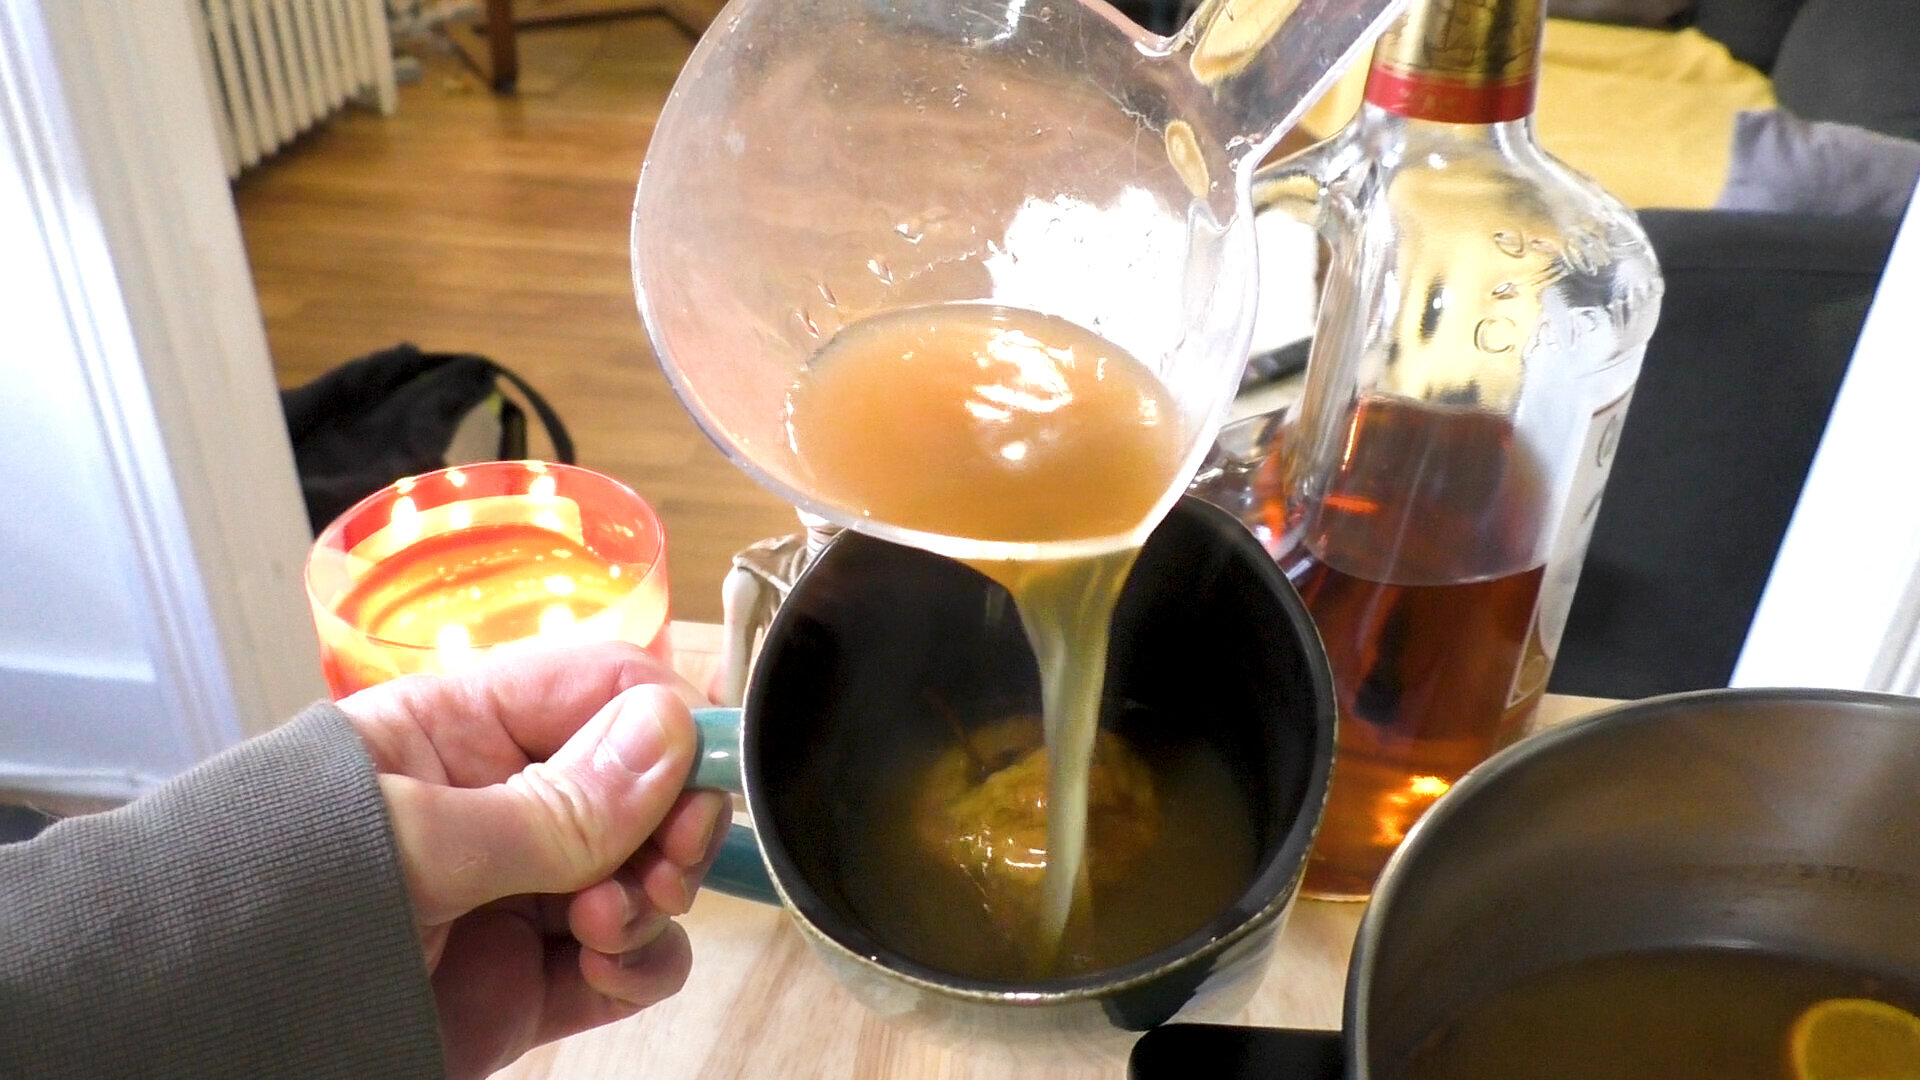
I had my heads chilled in the refrigerator until I was ready to serve them. My plan for these guys was to have them in some spiked hot cider beside a bonfire. Now all that’s left is to put a shrunken head in a mug and ladle your hot cider overtop of it.


AppleShrunkenHeads.FinishedProduct.jpg

Thanks for joining me so far and here’s to the adventures we have in future! To be the first to know when I launch new polymer clay art videos, be sure to subscribe to my YouTube channel and hit the bell icon. Catch all of my videos here: https://www.youtube.com/thedreamsyndicatearts.

You can also find many of the supplies I use in crafting here: https://www.thedreamsyndarts.com/supplies-gear/. And sign-up for my newsletter (in the sidebar) to get the latest studio goings-on! Thanks so much for joining me on this journey and until next time: Make. Believe!

𝐃𝐈𝐘 𝐏𝐨𝐬𝐞𝐚𝐛𝐥𝐞 𝐅𝐚𝐮𝐱 𝐌𝐄𝐓𝐀𝐋 𝐓𝐮𝐭𝐨𝐫𝐢𝐚𝐥 | 𝐀𝐫𝐭 𝐃𝐨𝐥𝐥 𝐀𝐜𝐜𝐞𝐬𝐬𝐨𝐫𝐢𝐞𝐬

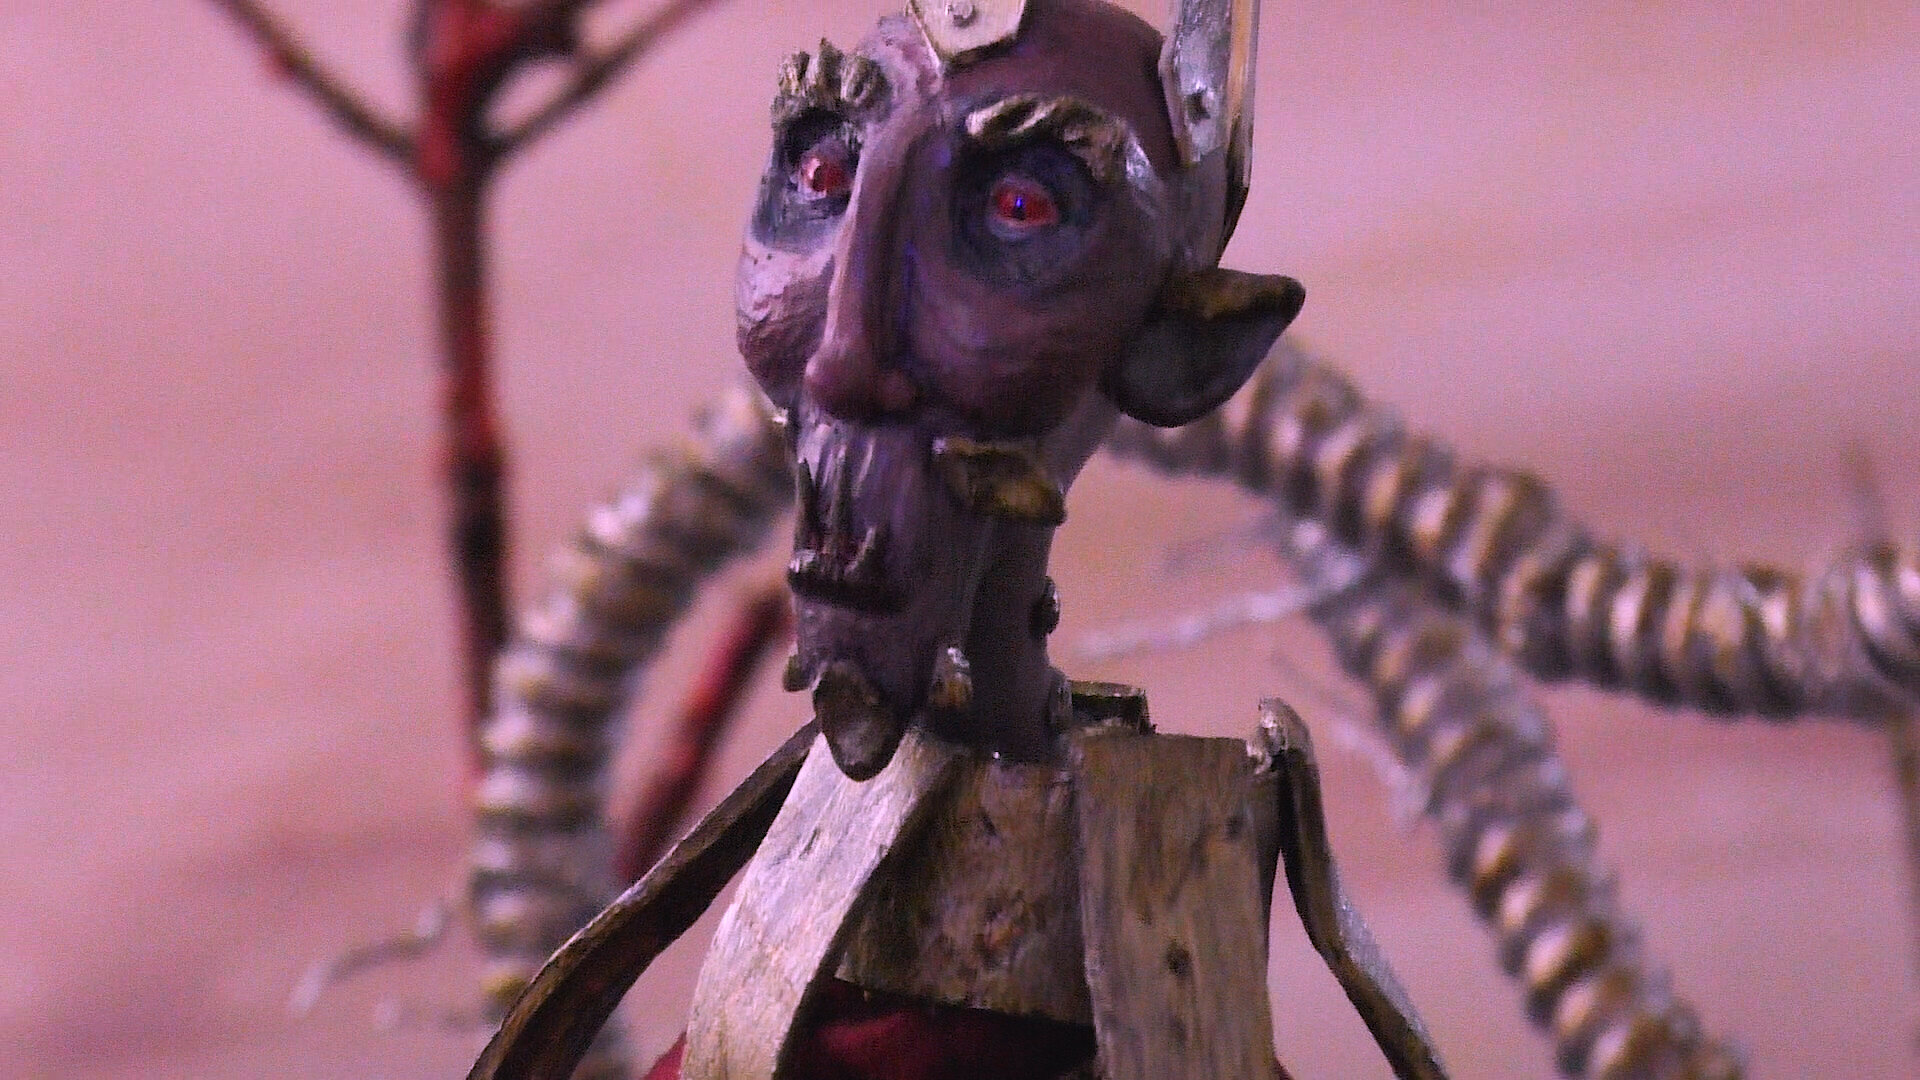
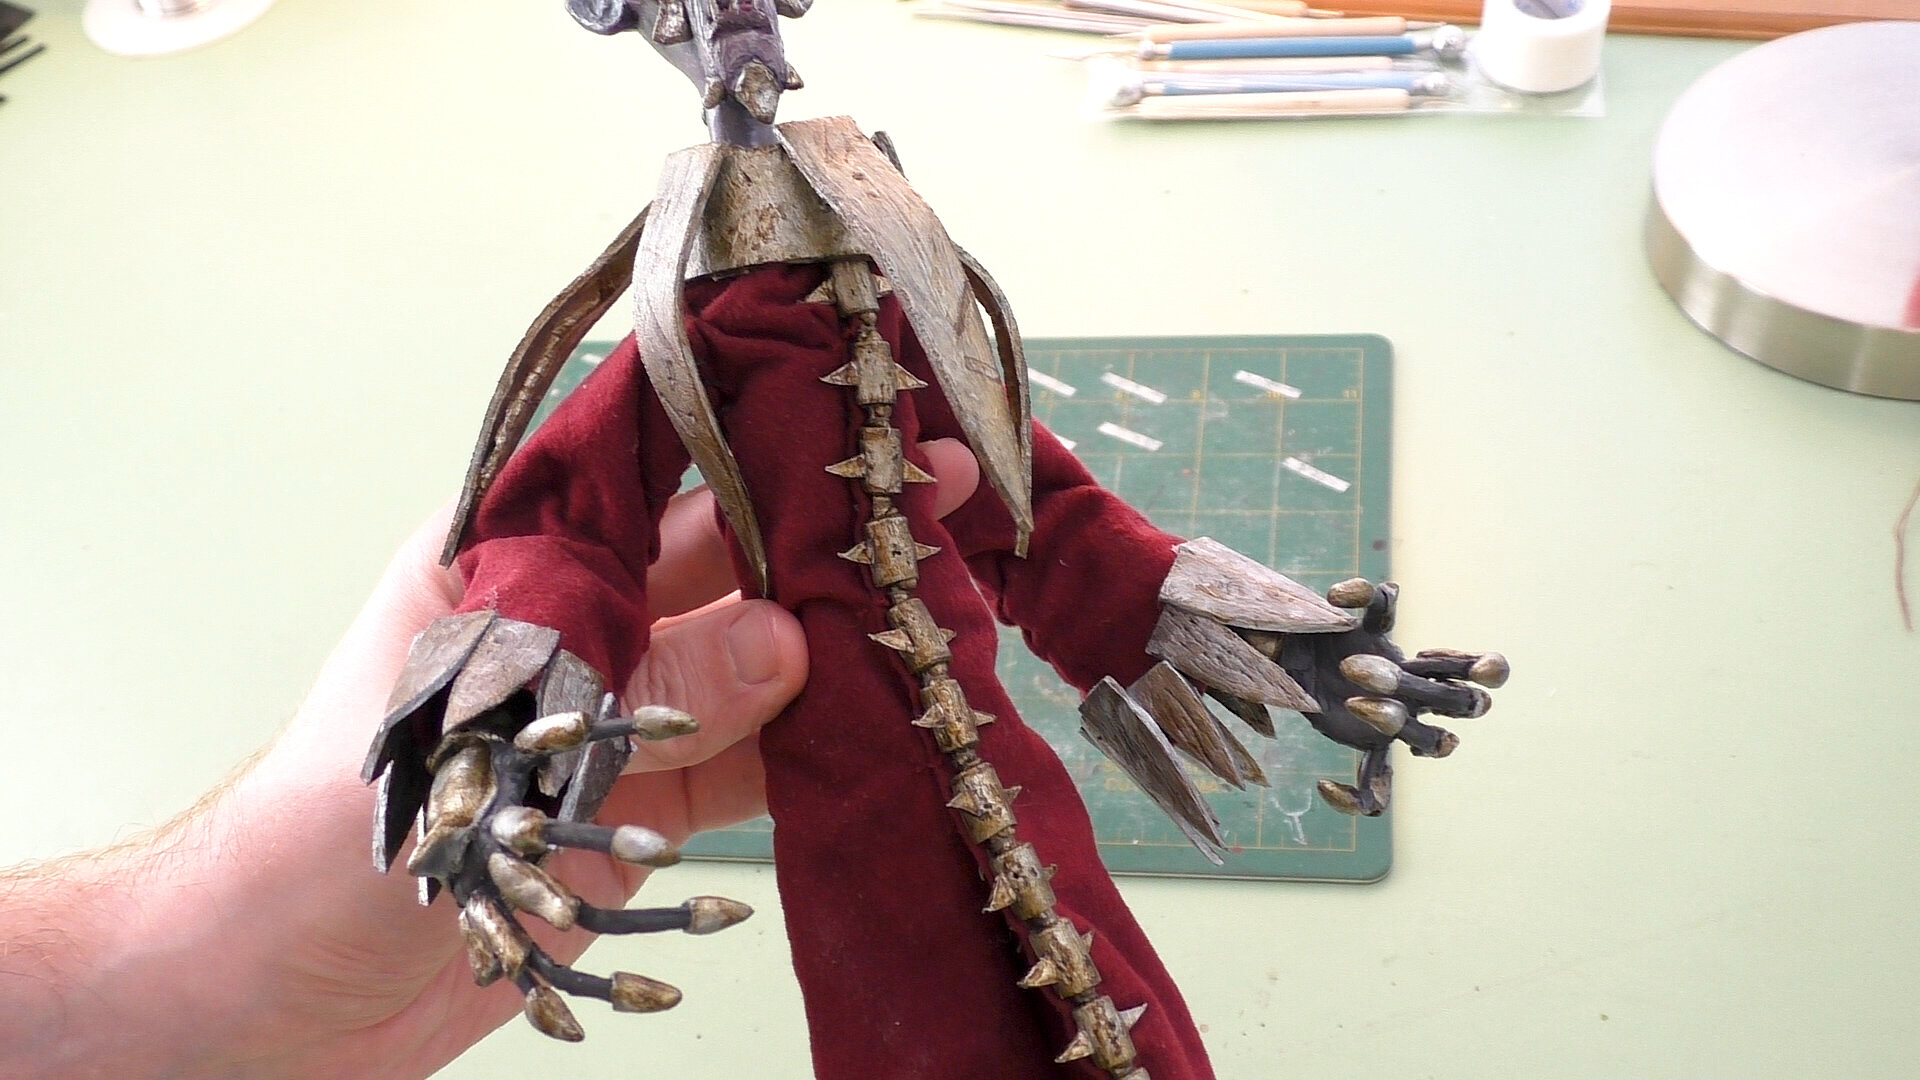
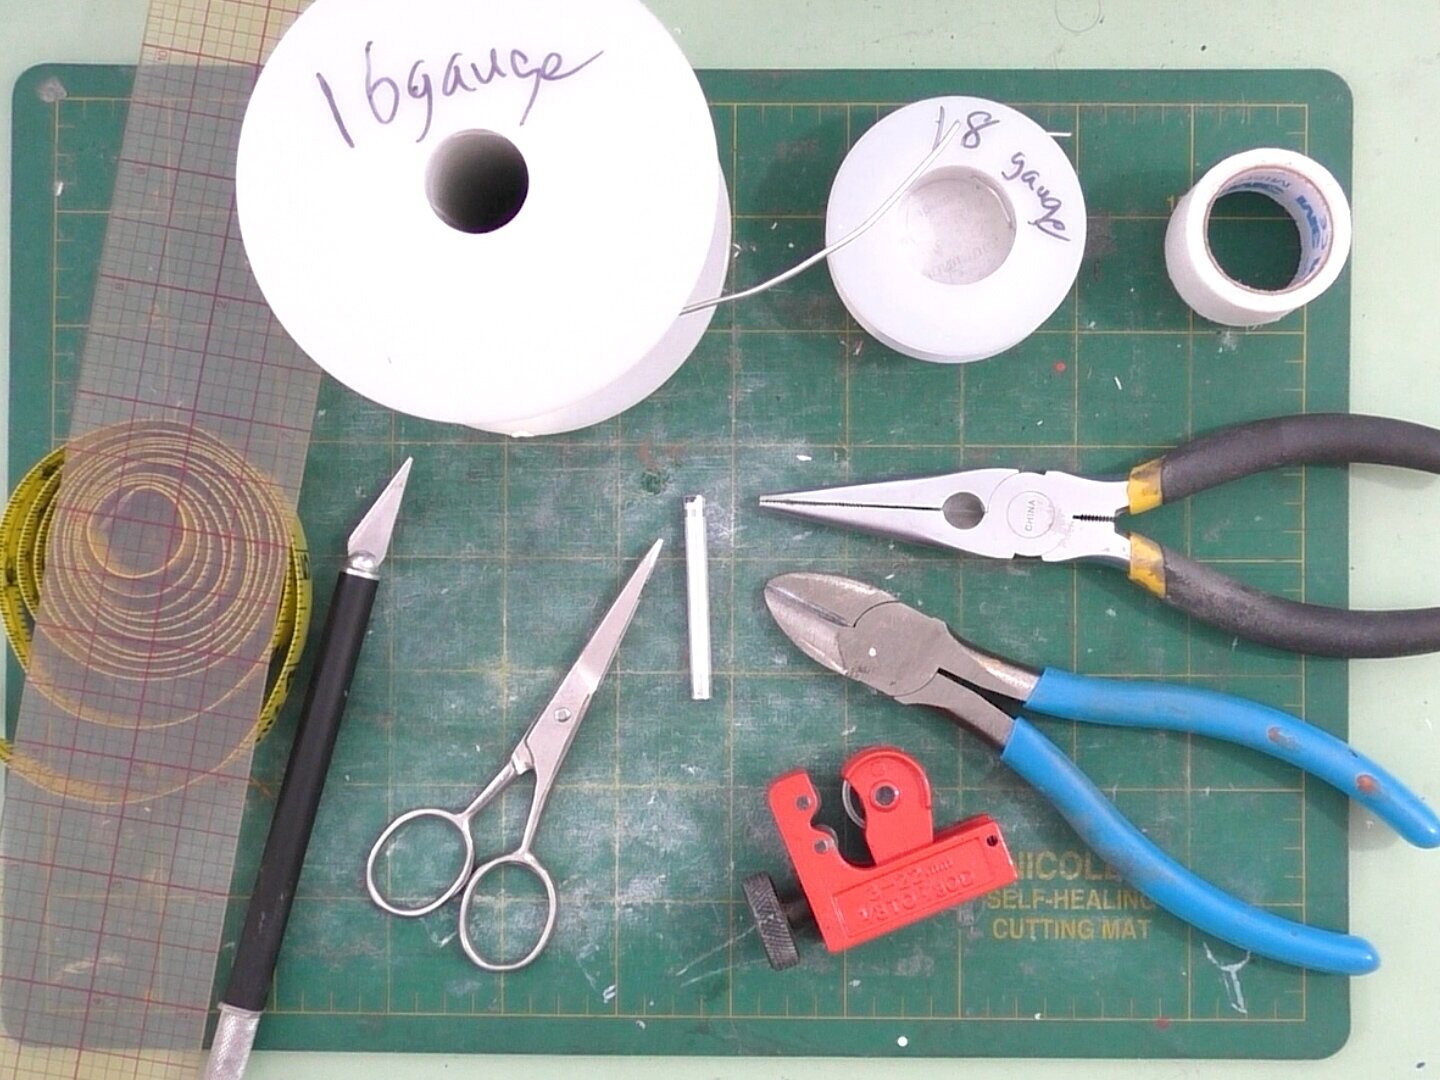
For my latest dimensional illustration, Lord Bledwall, I wanted his robe to have a poseable metal trim- it wasn’t utilized so much in this image I made with him, but if I decide to use him in future images, I’ve some variety of what I can do with the moveable faux metal piece. This technique can be used not just for metal clothing adornment for a variety of art doll accessories like fantastical weapons or maybe metallic tentacles. Making these DIY poseable faux metal elements only requires some basic supplies and tools as well as some handicraft skills. If you can measure and cut things, you can absolutely make these! You can find the necessary supplies, instructions, or even watch how they were made below.

Watch how they were made: DIY Poseable Faux Metal Tutorial | Art Doll Accessories


Click on any of the items below & you’ll be taken to a corresponding Amazon page, which helps support my art with no additional cost to you.

Click on any of the items below & you’ll be taken to a corresponding Amazon page, which helps support my art with no additional cost to you.

Texturing tools.

Texturing tools.

 
TwistingWire.jpg

We’ll start-off with a length of 18 gauge aluminum wire. I’m basing the length of the wire on about how long I think the art doll’s robe should be. We’ll twist it up with our pliers and depending on what you’re doing or if it’s visible, you might want to snip the uneven edge of the wire with your wire-cutters.


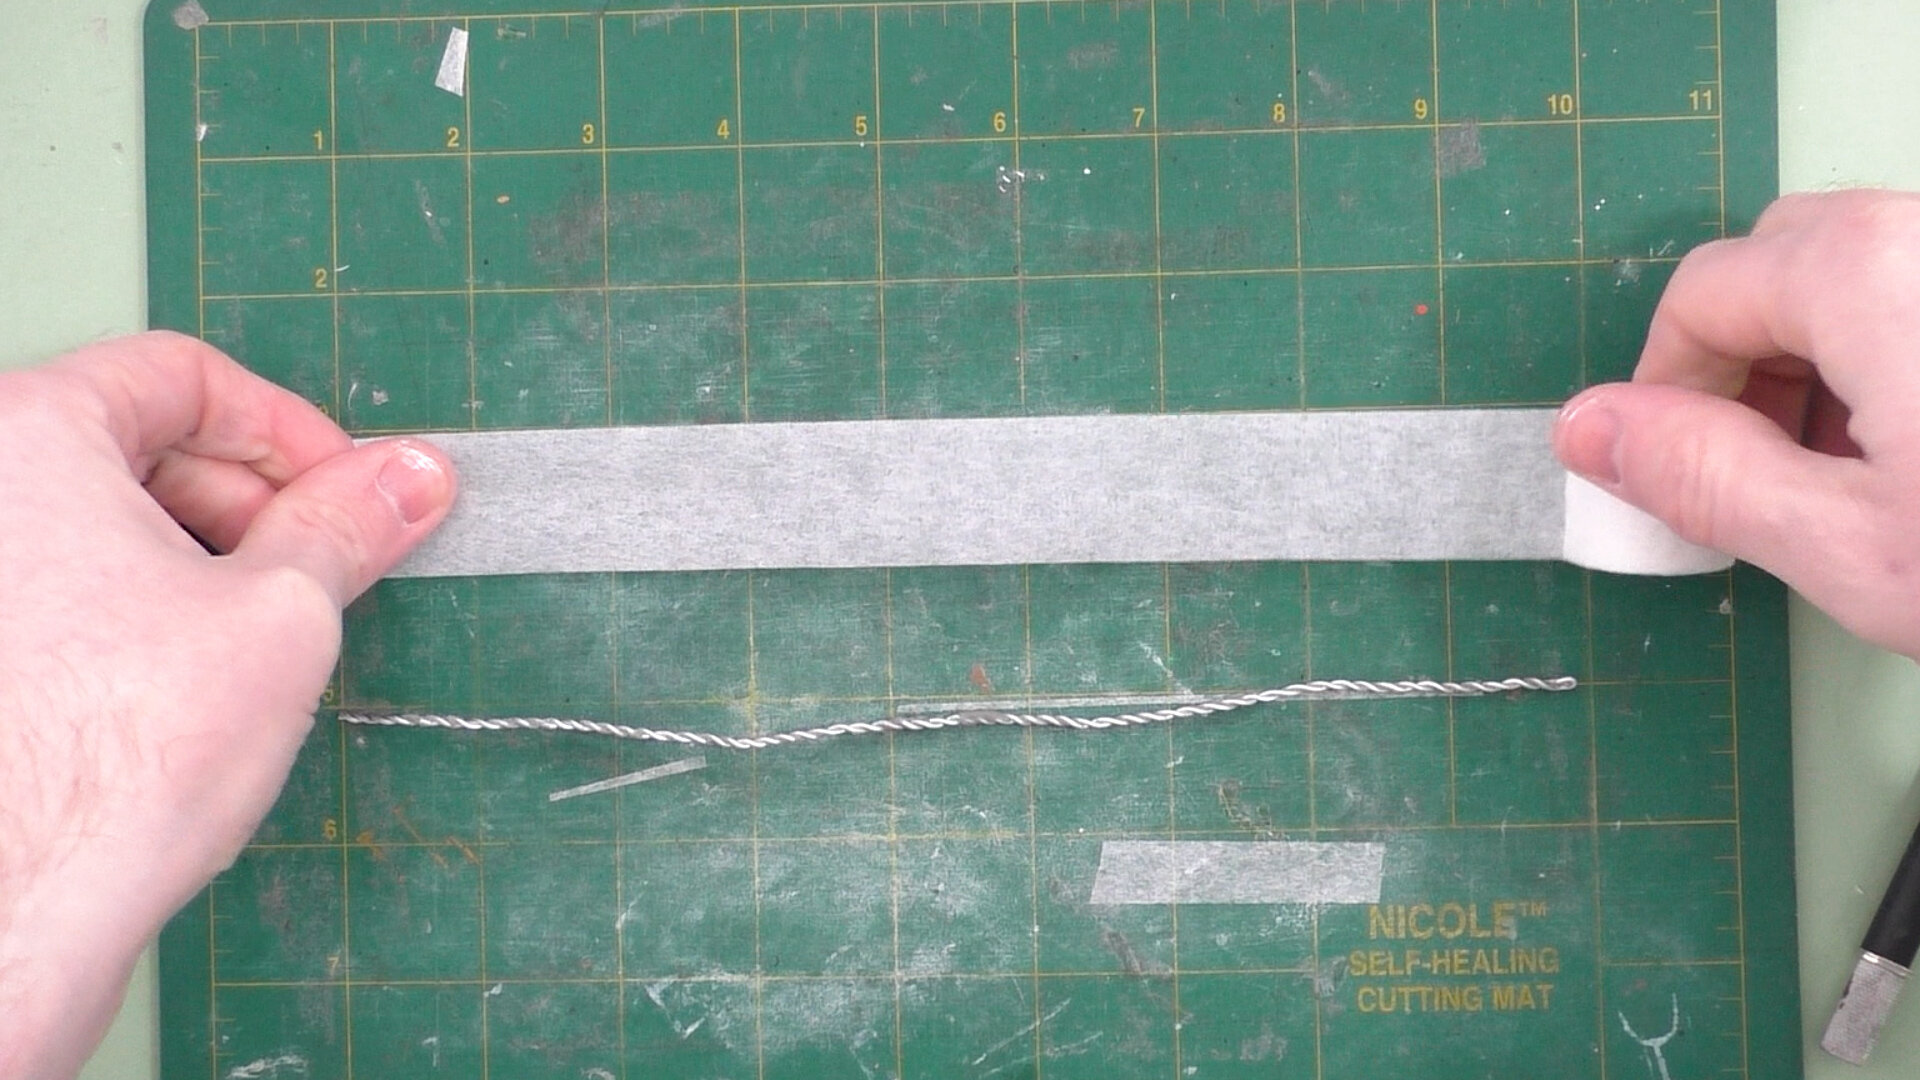
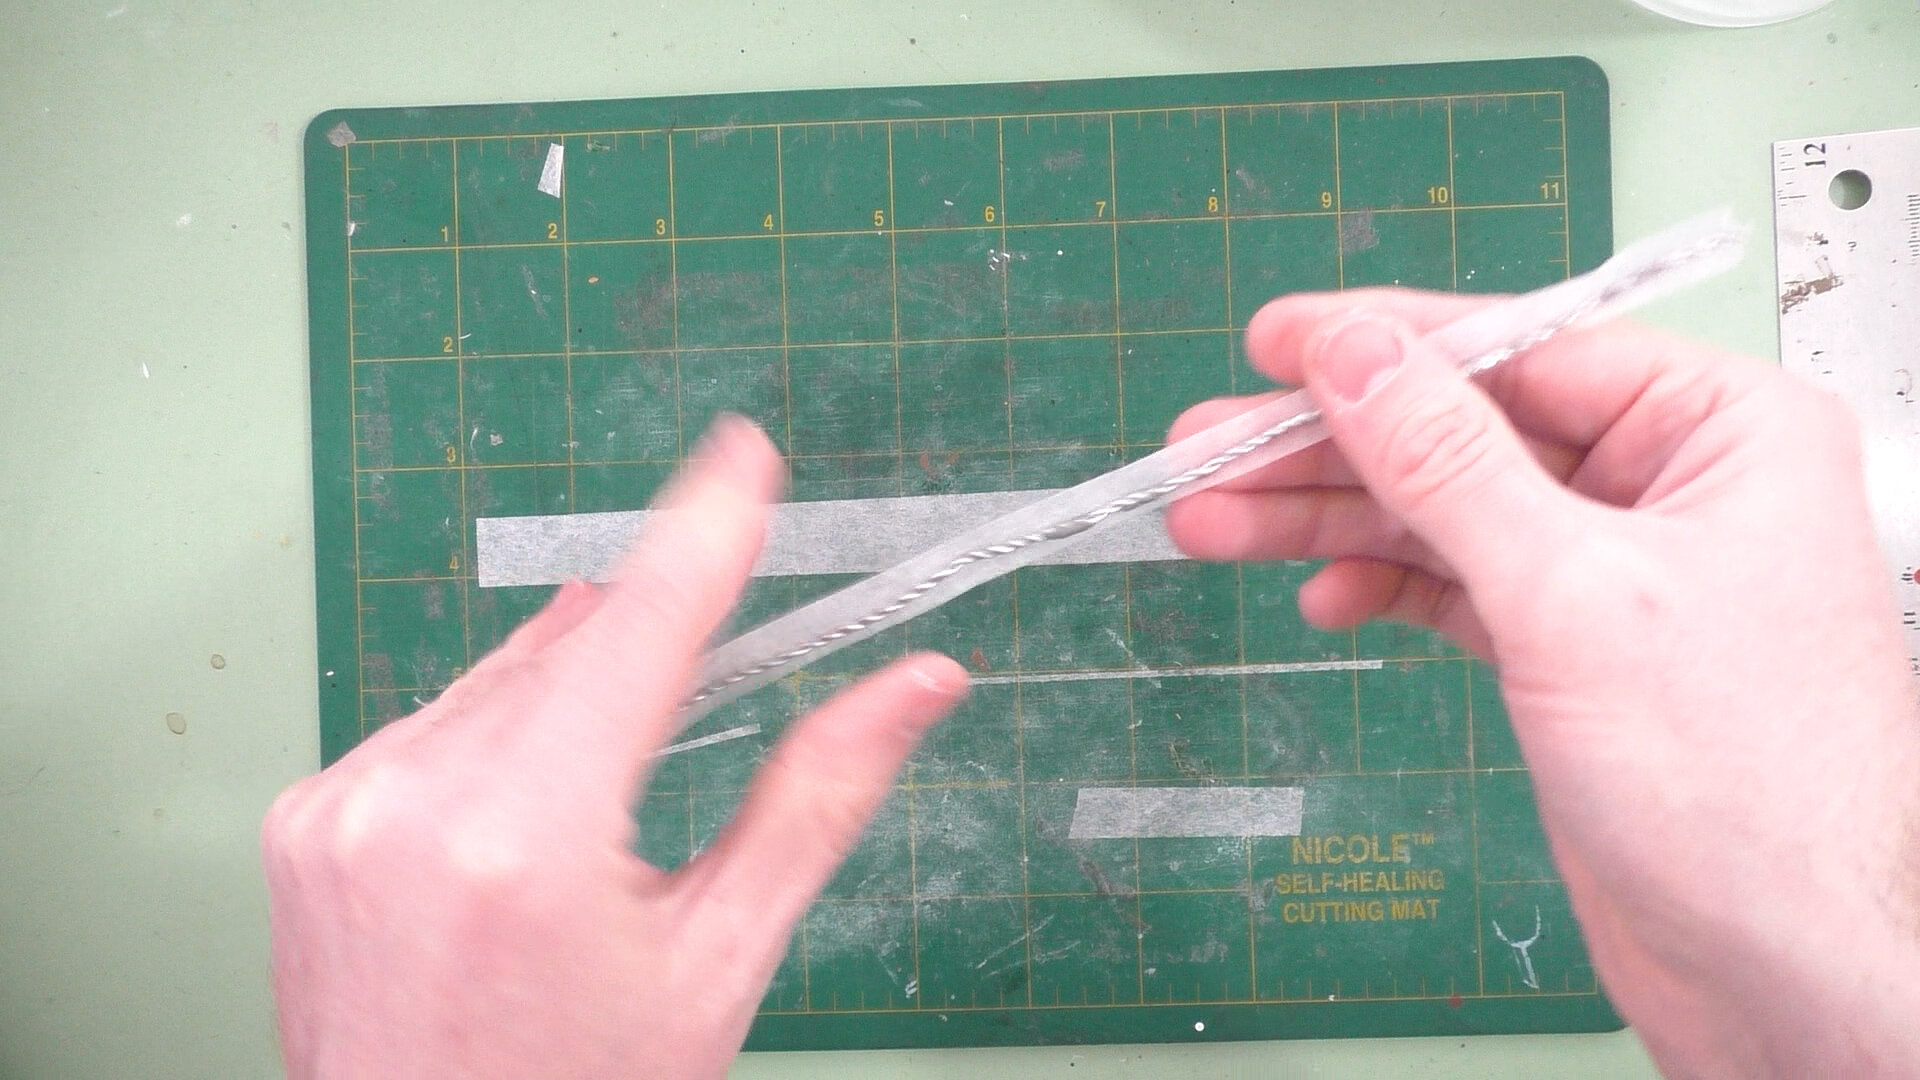
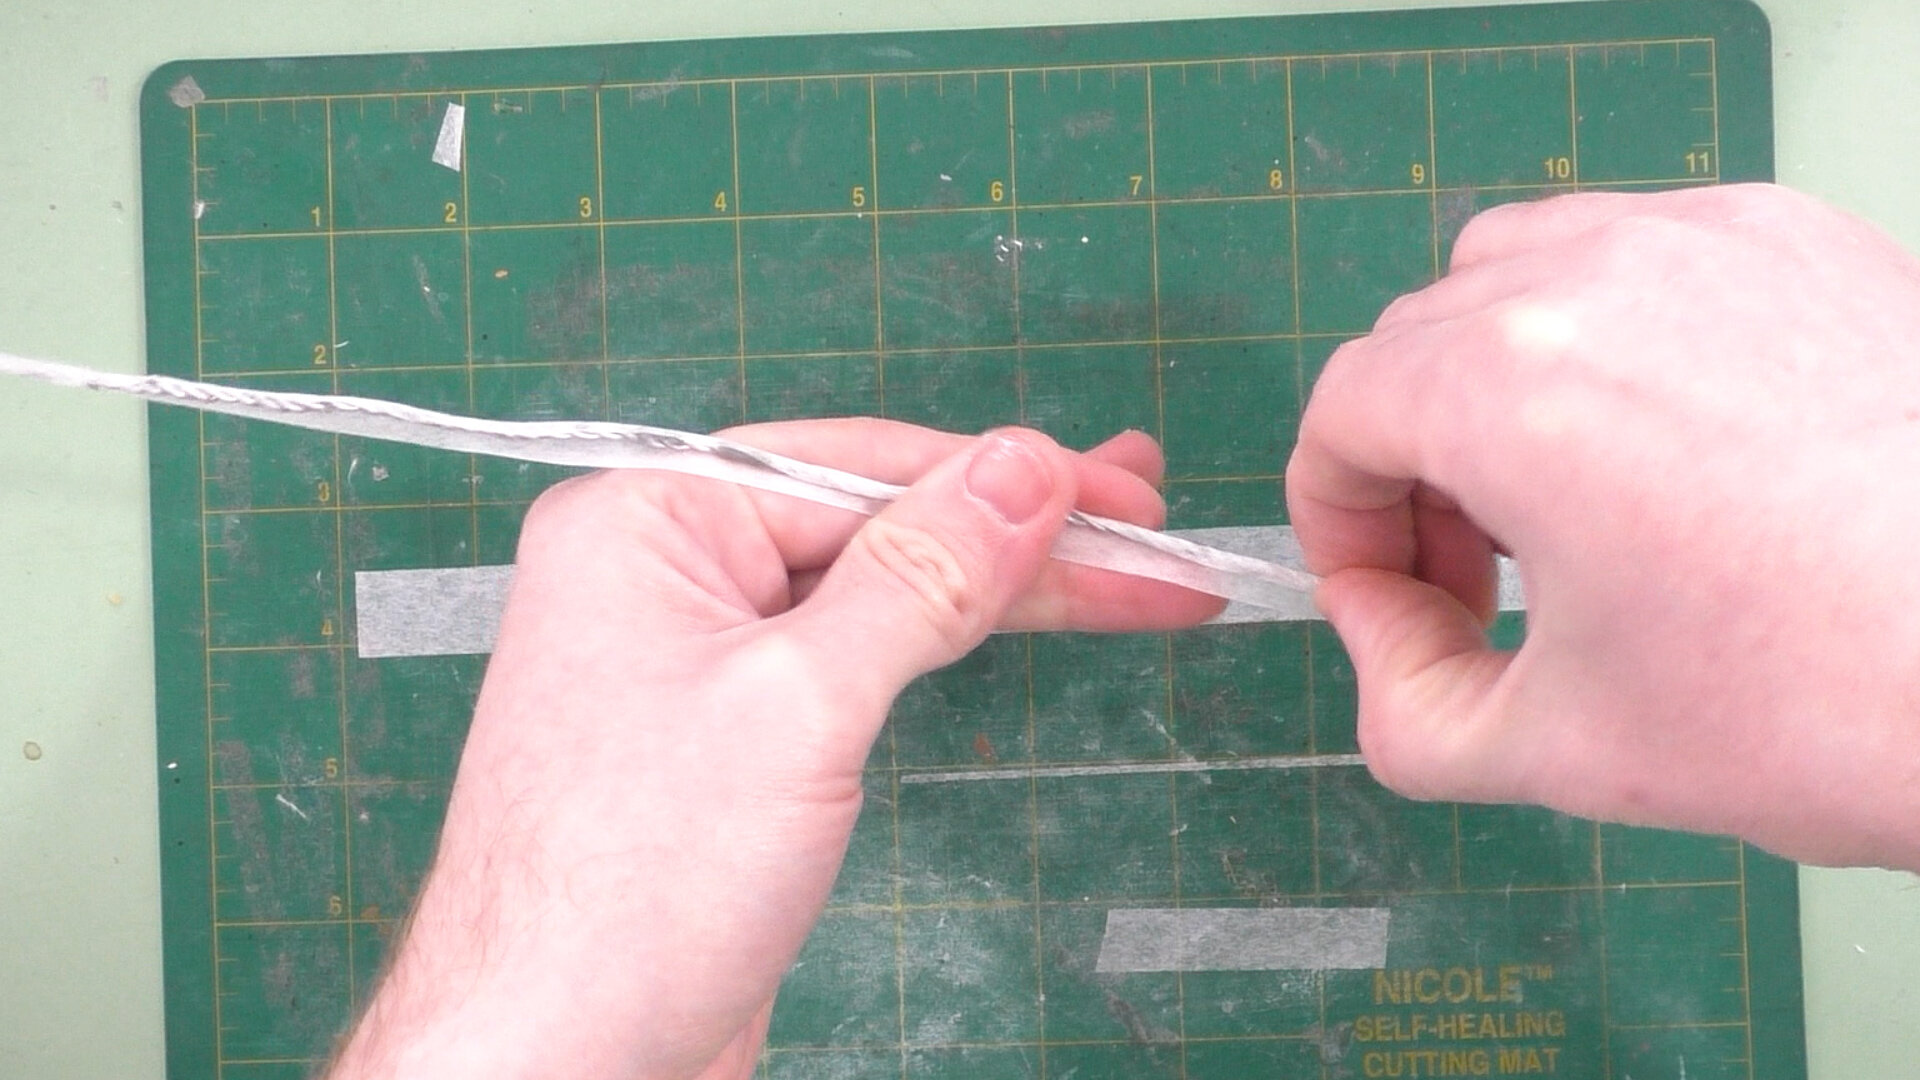
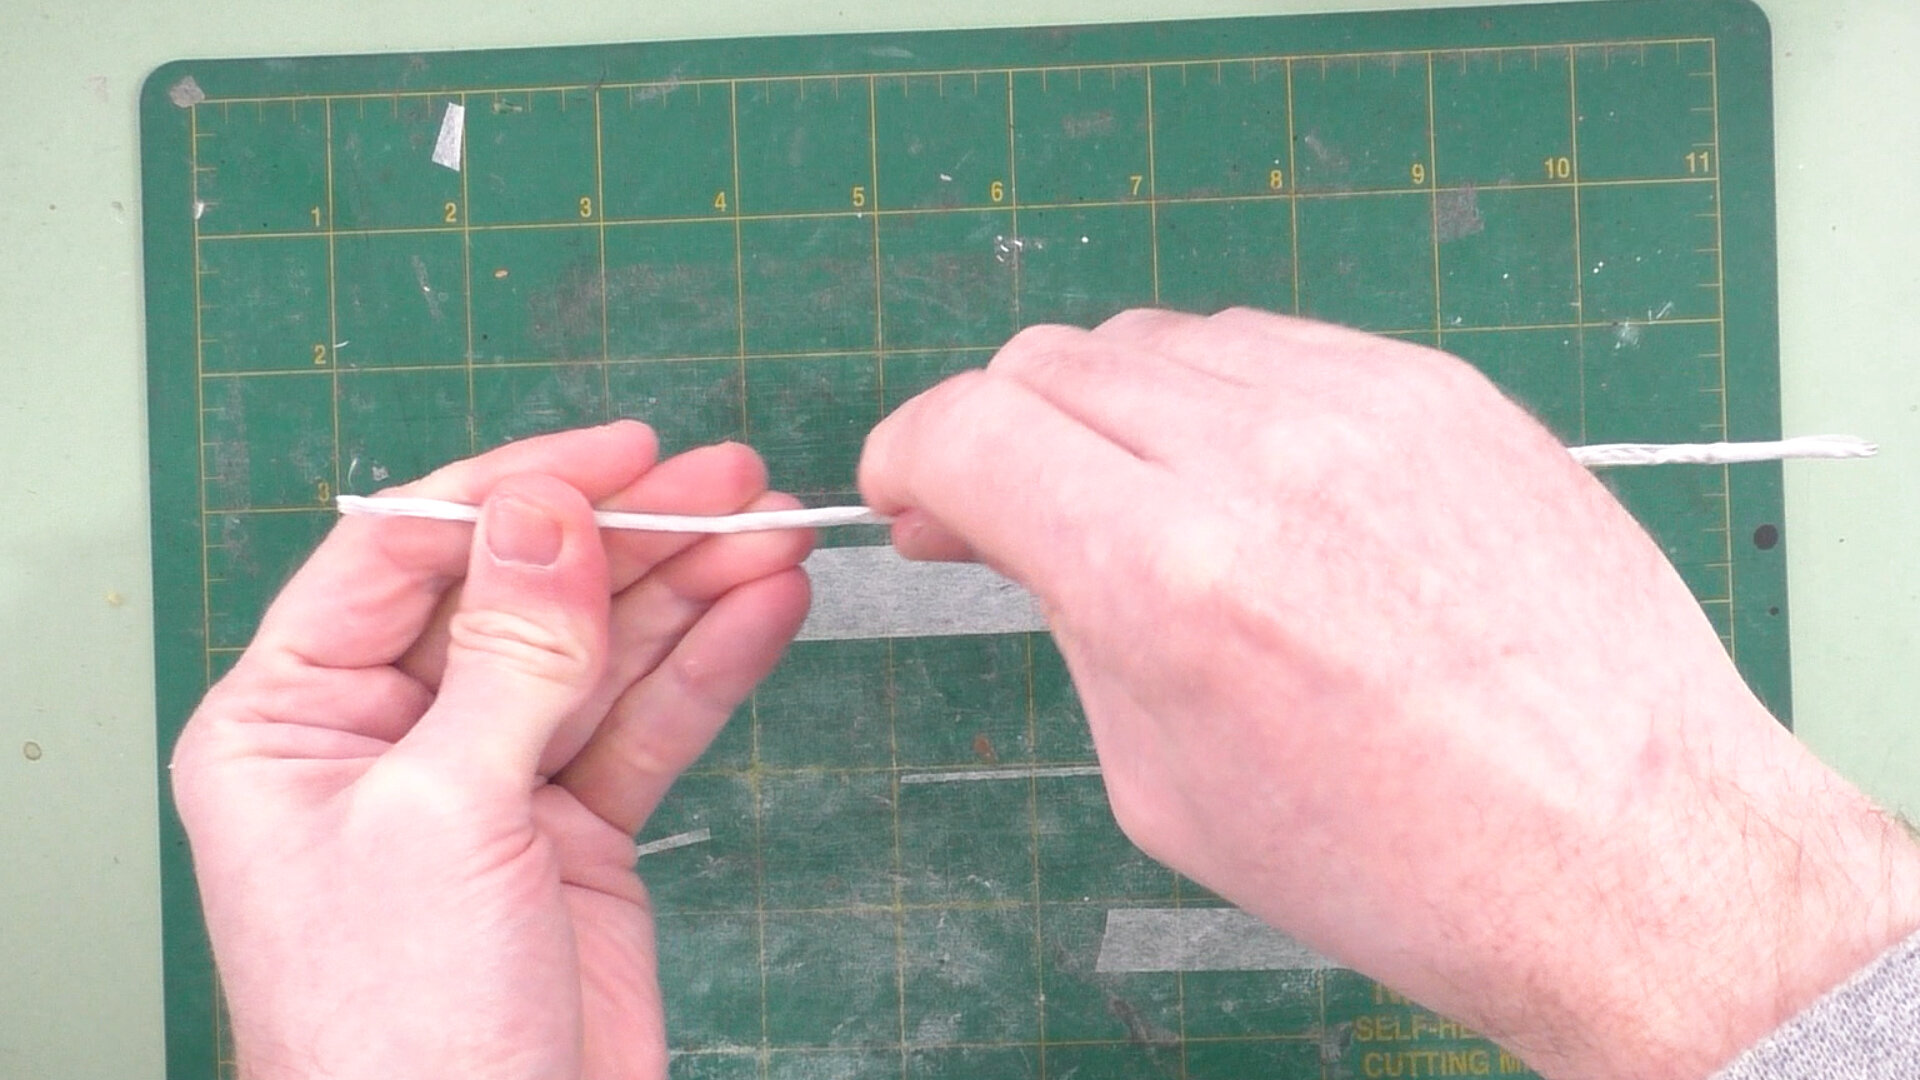
Once that’s done, we’ll roll out a length of medical paper tape. And cut it to size. I like to cut it so it's about as wide as 3-4 times the thickness and about as long as the wire. We’re going to wrap the paper tape around lengthwise… this part’s tricky because the paper tape wants to snag on itself (a little bit of this is OK though!). You want to make sure it’s wrapped around snug to the wire. We’ll wrap the wire two, maybe three times if desired.


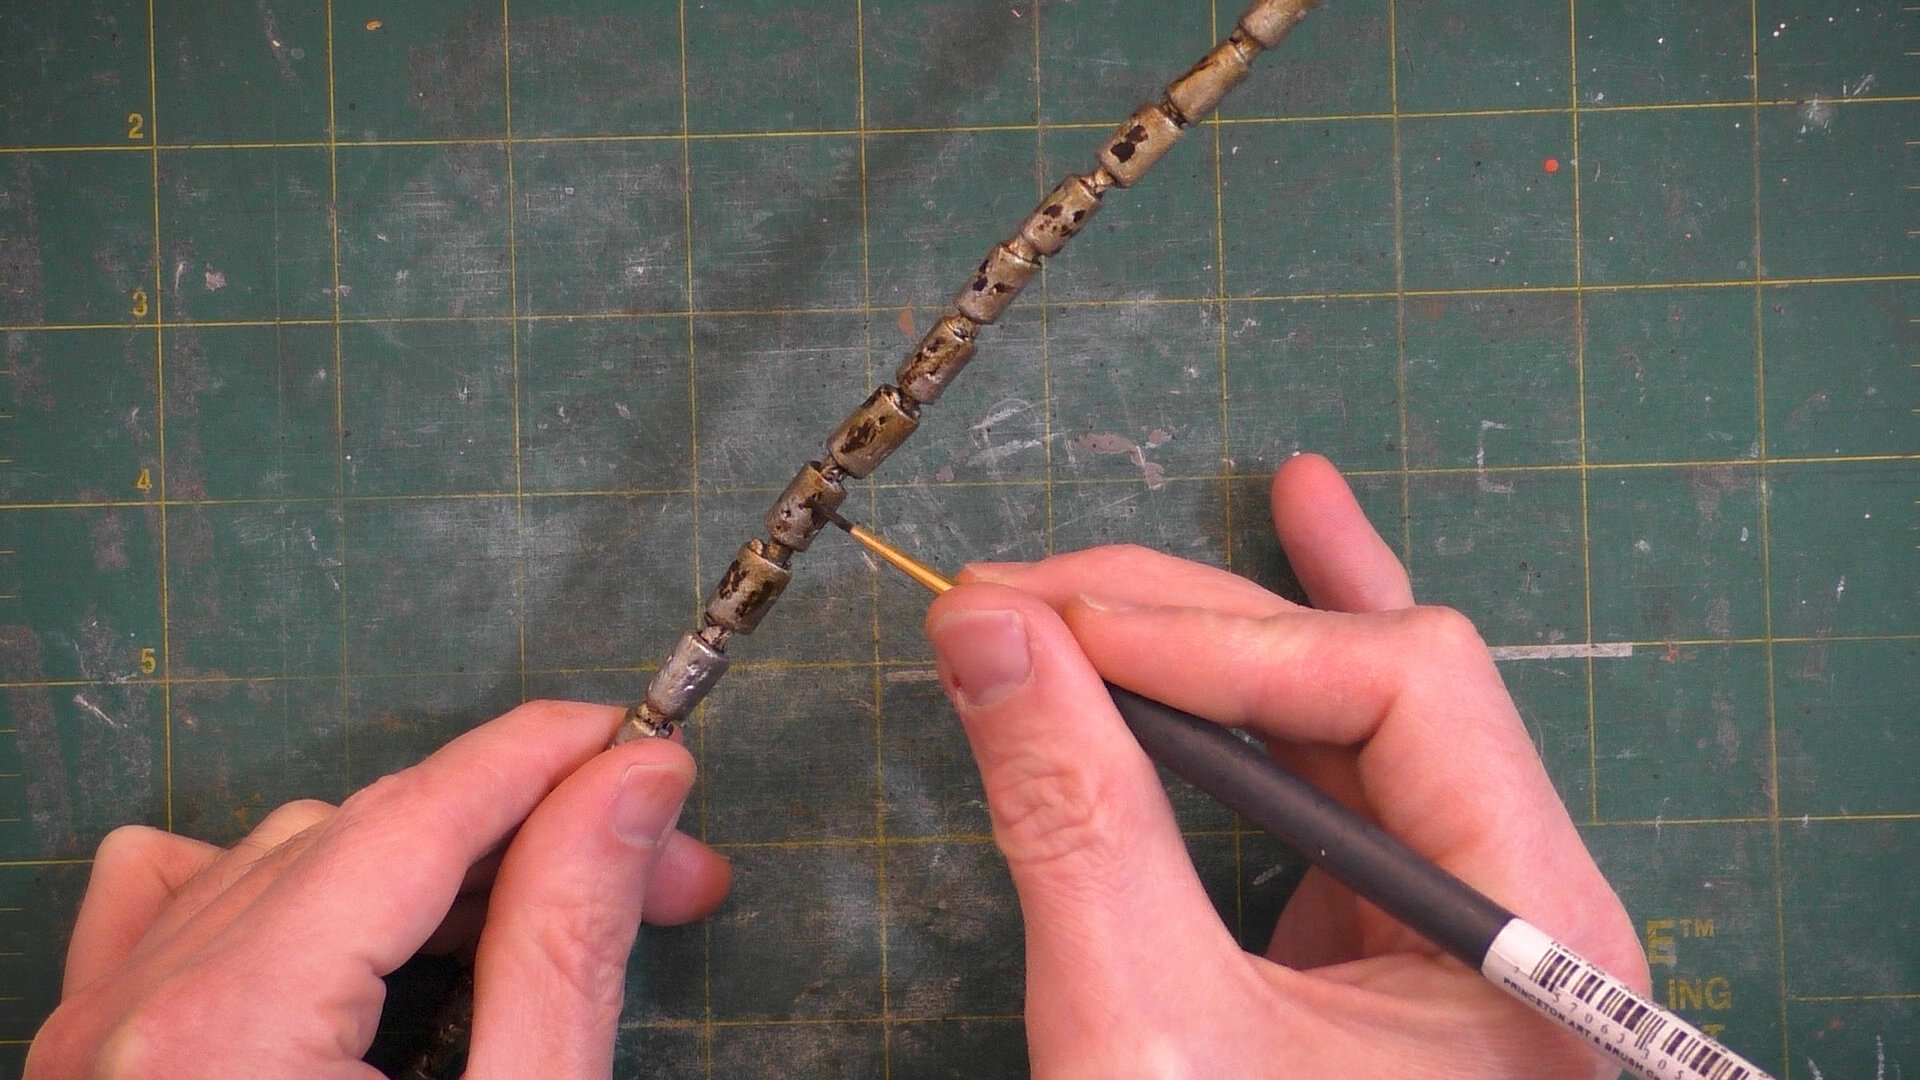
Then we’ll soak both ends of it in some water for a little while- anywhere from 10 minutes to an hour on either side to get the paper tape thoroughly saturated. Next we’ll spread some heavily Mod Podge diluted with water across it. I’ll do a couple more layers, letting the piece dry in-between, where I add in more and more silver acrylic paint and progressively less water with each subsequent layer. What that’s doing is seeping the pigment into the paper fibers of the tape. This is a similar method to how I go about creating my poseable art doll hands.


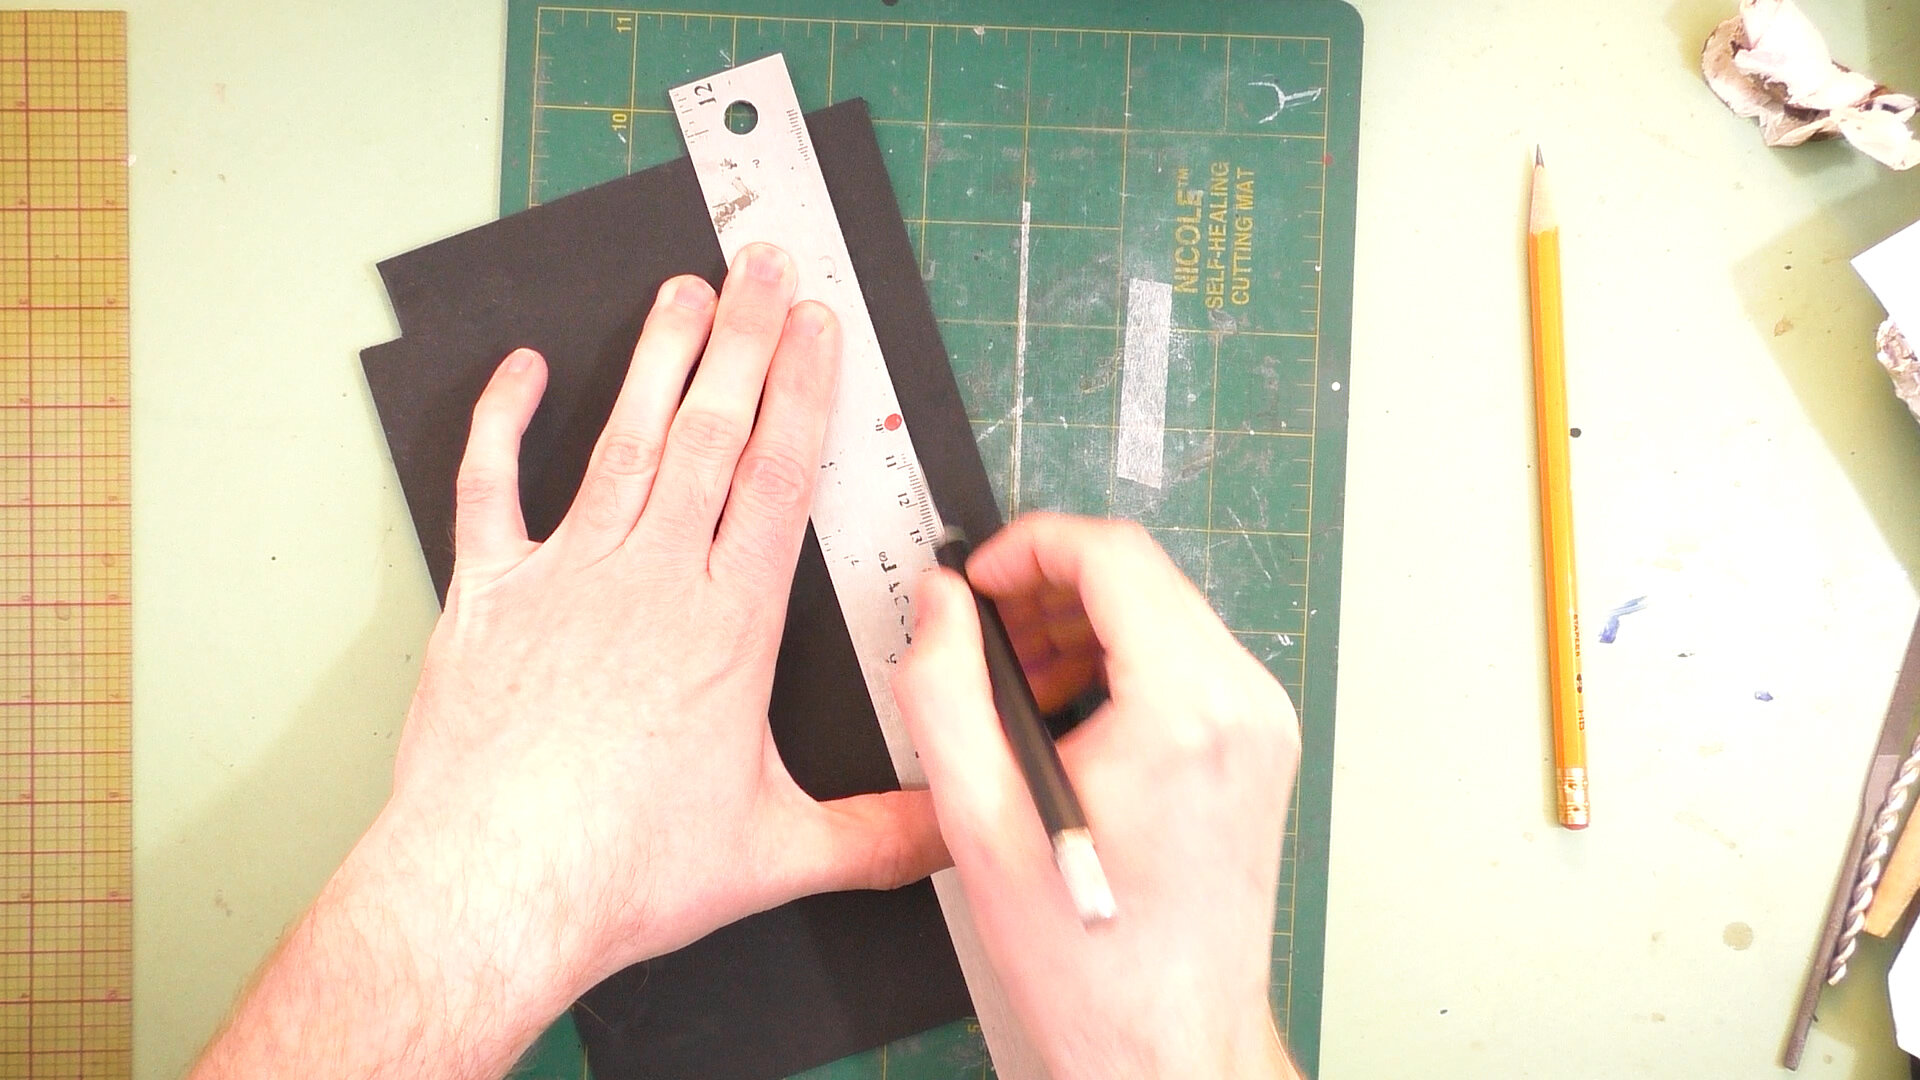
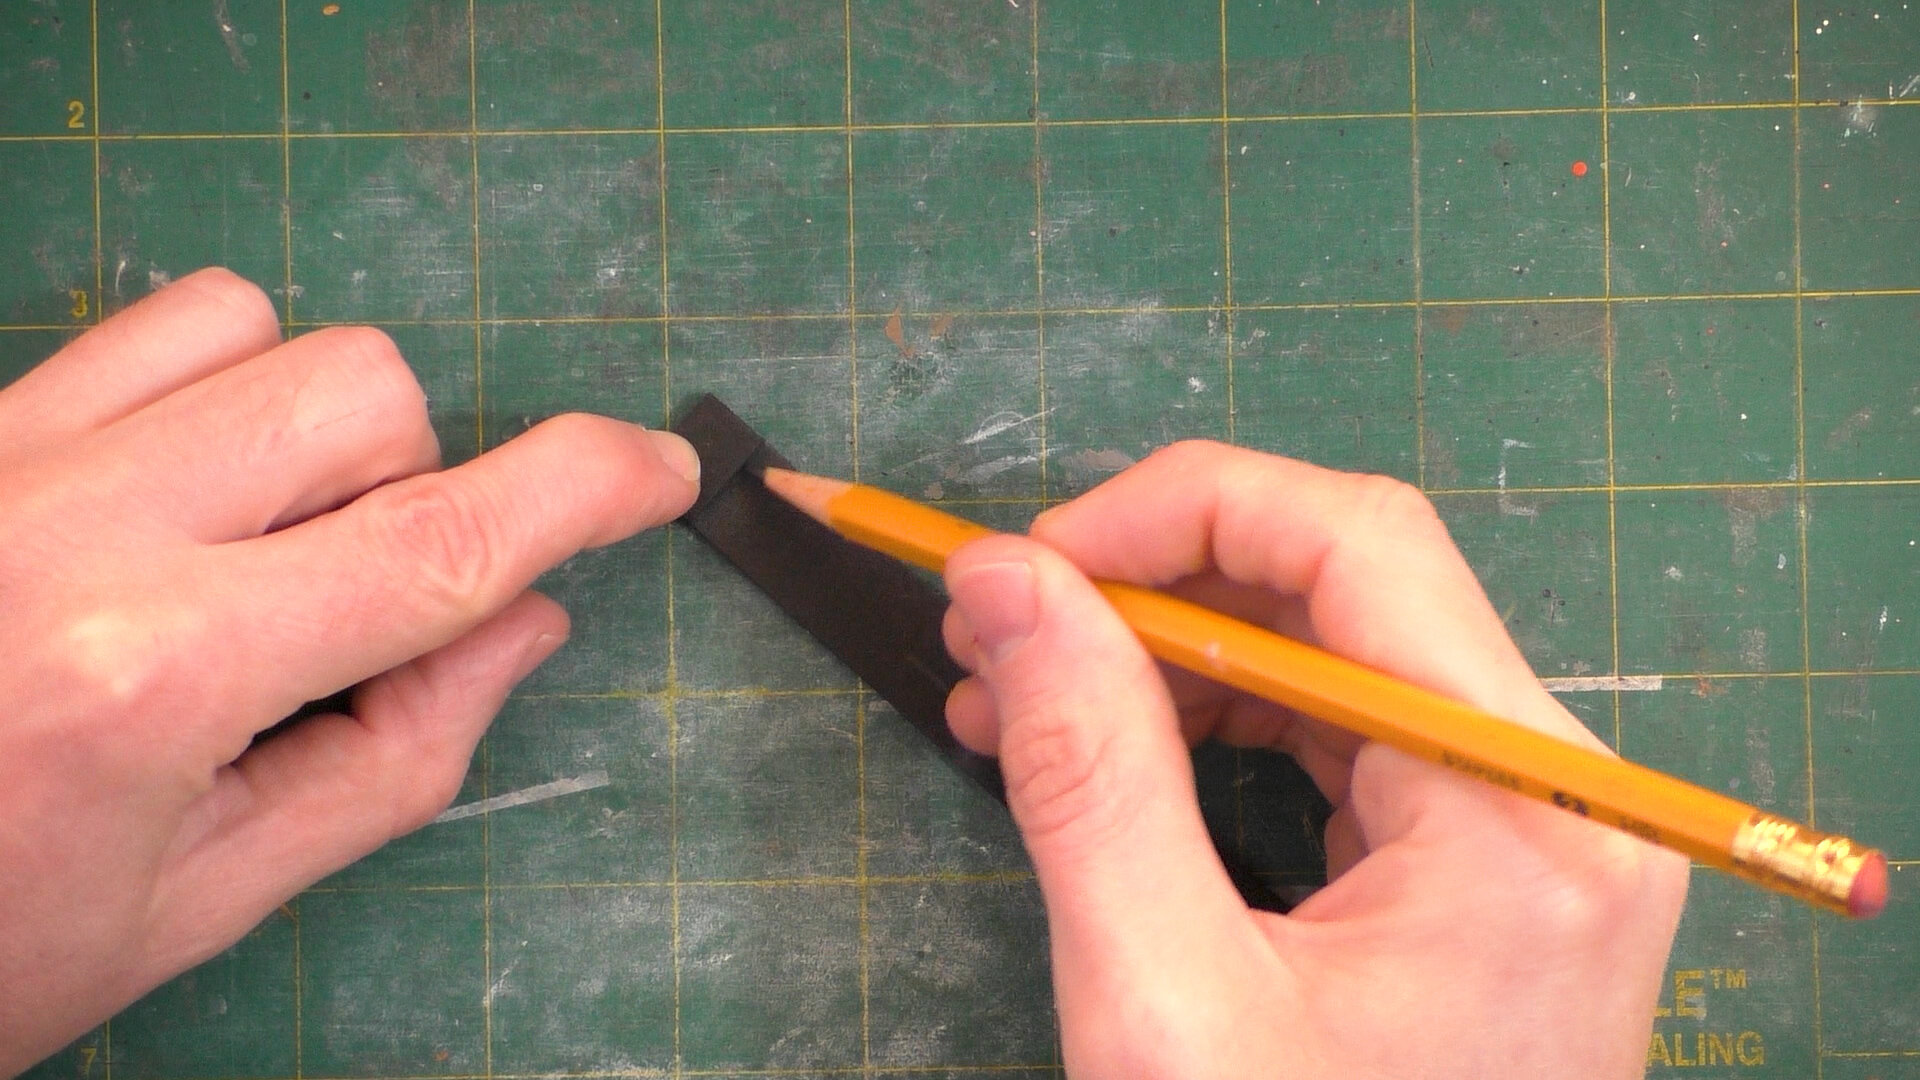
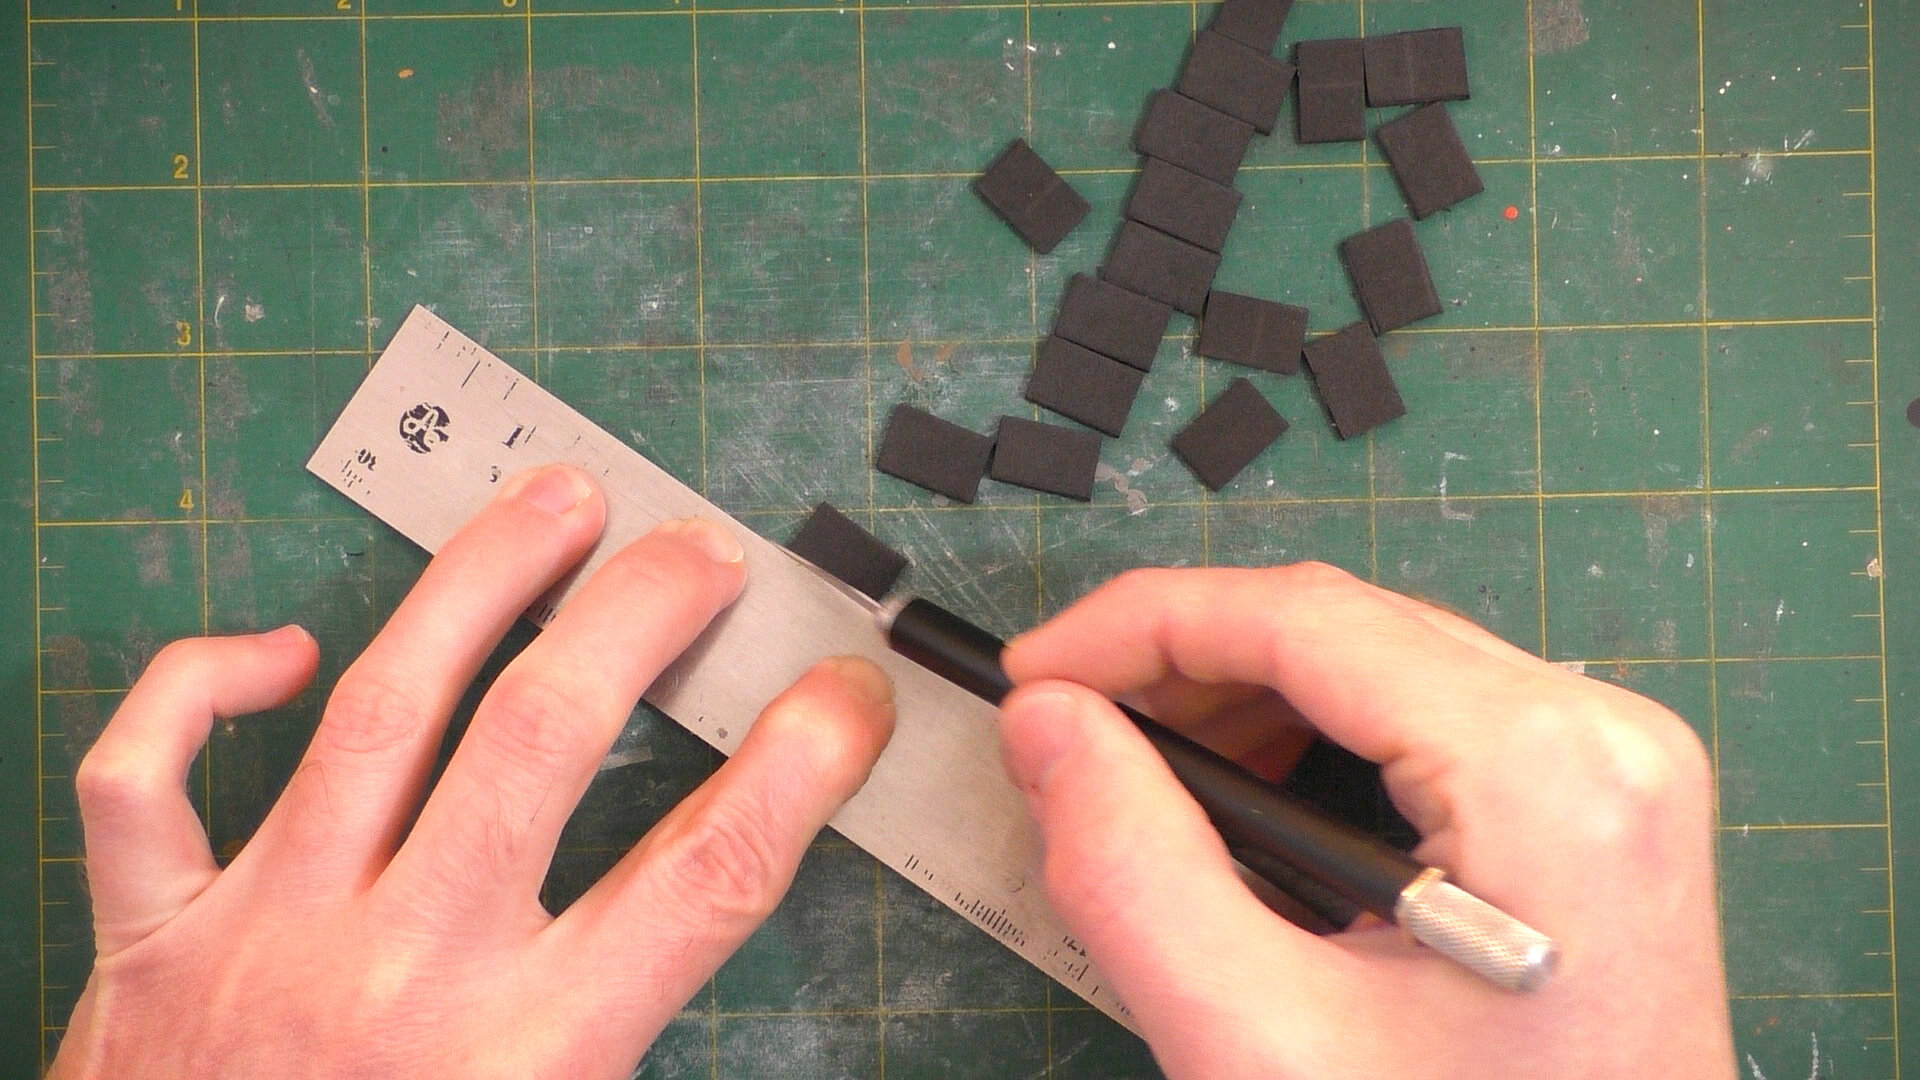
We’ll measure a thin strip of the a foam sheet, which is going to give us the segments of this sort of spinal shape that I’m making for this poseable faux metal trim.  I like using foam because it’s flexible and you can easily texture and paint it. We’ll make a thin strip. And another little strip that will serve as a template for the other pieces we’ll cut. And we’ll just trace it all down the length of the foam strip. Then we’ll cut them out with our X-acto.


Here’s a quick note on failure: I’d tried using 2 part resin epoxy (another adhesive that I commonly use. Use with caution) and for whatever reason, it didn’t seem to hold. I’m not sure if I messed up the timing on the set time or what… it just wasn’t seeming to work at all. It might be that it wasn’t the right adhesive for the job.

FabriTacOnWire.jpg

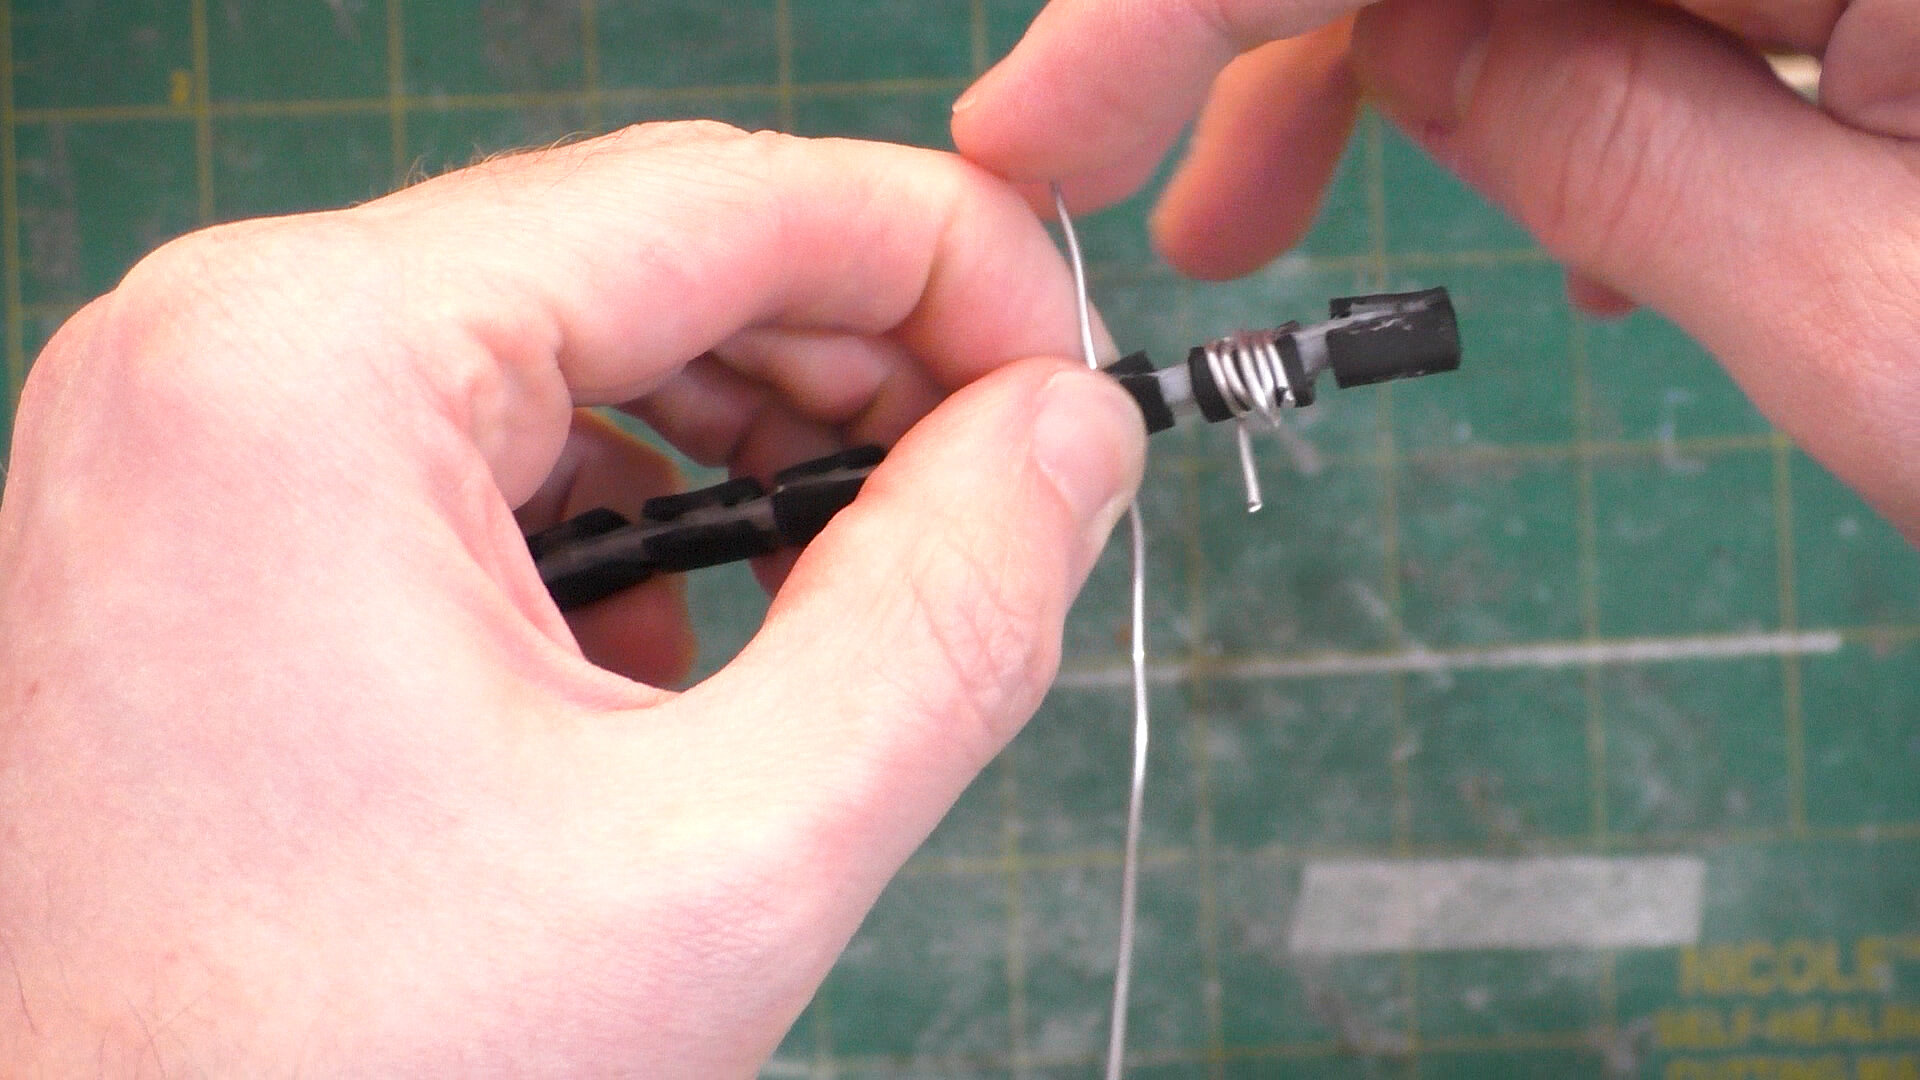
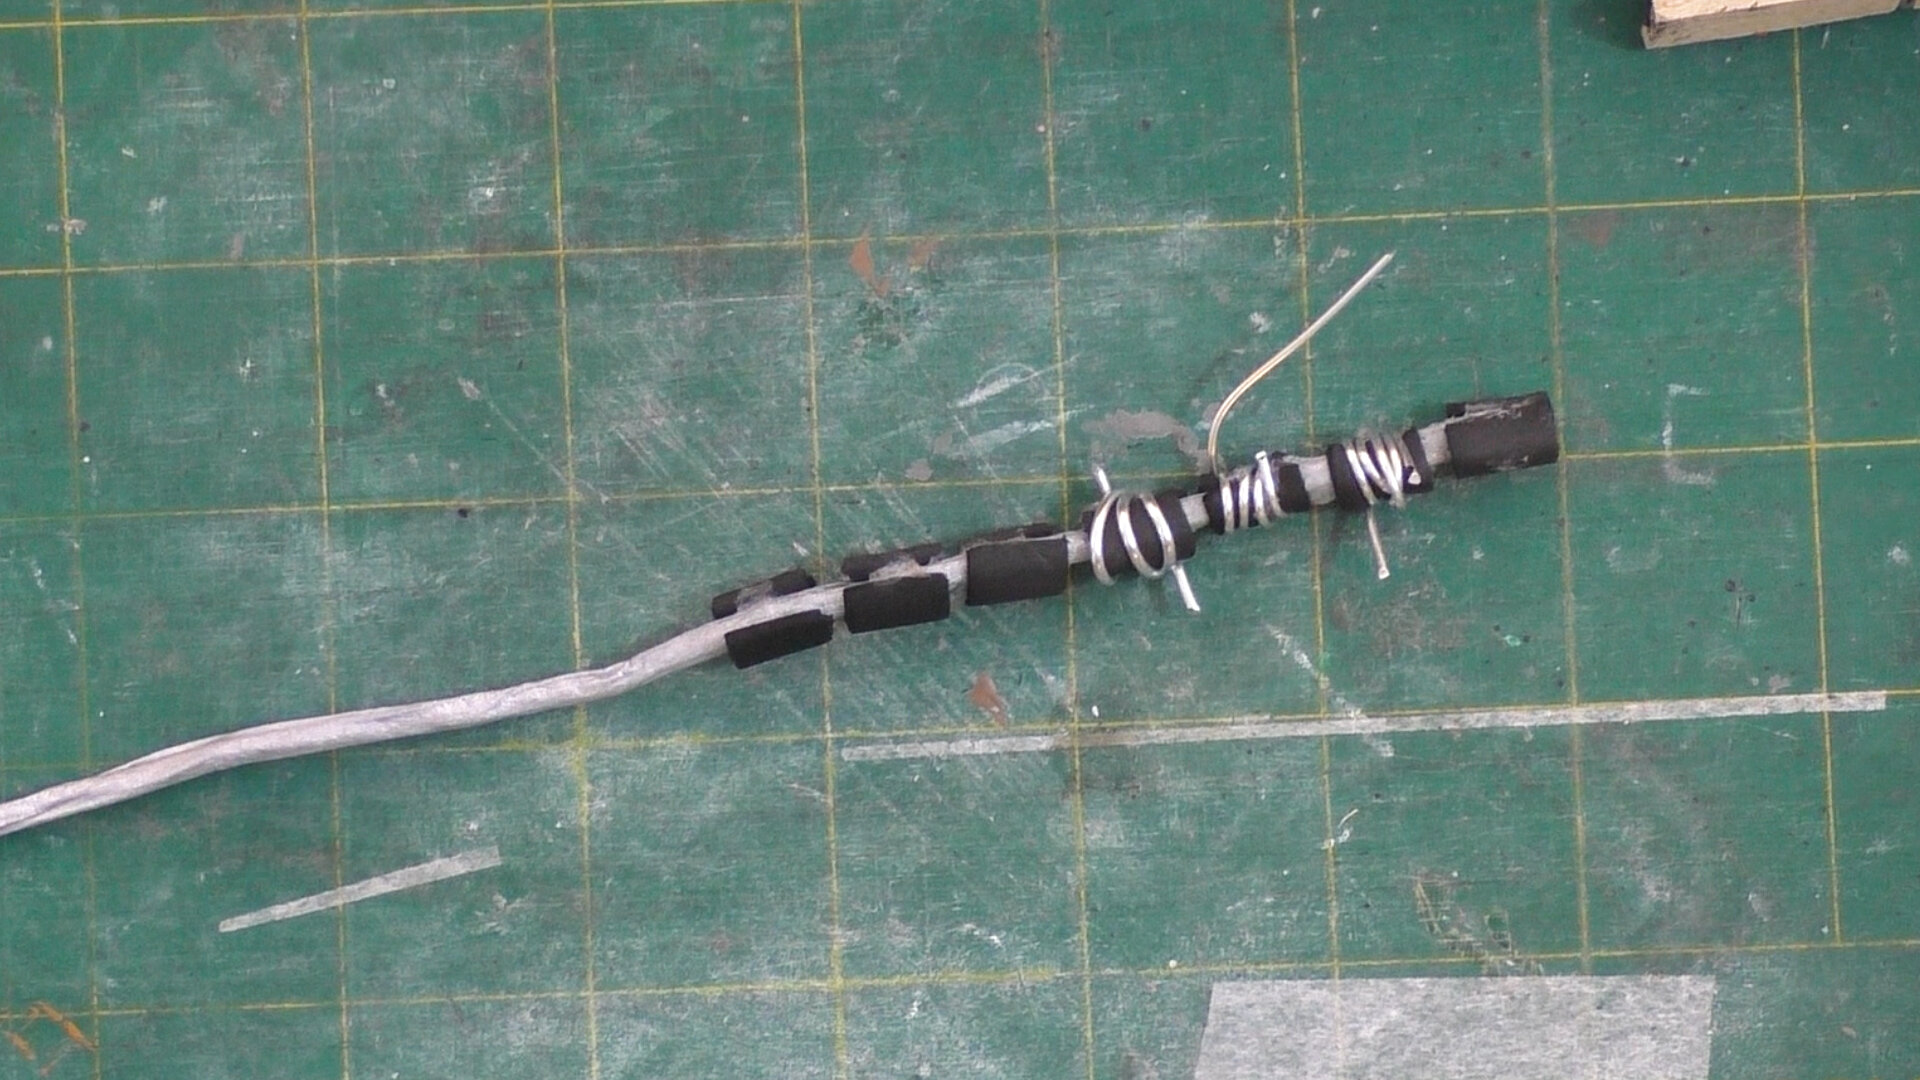
We’ll use some of an old bottle of Fabri-Tac- this was made clear by the way I need to fish it out with a bit of scrap wire. I tried clothes pins to hold the foam pieces on as I went, but didn’t think they held it on snugly enough. I found a better solution by wrapping them with tiny scraps of wire that I had lying around. Being a bit of a pack-rat for the win!


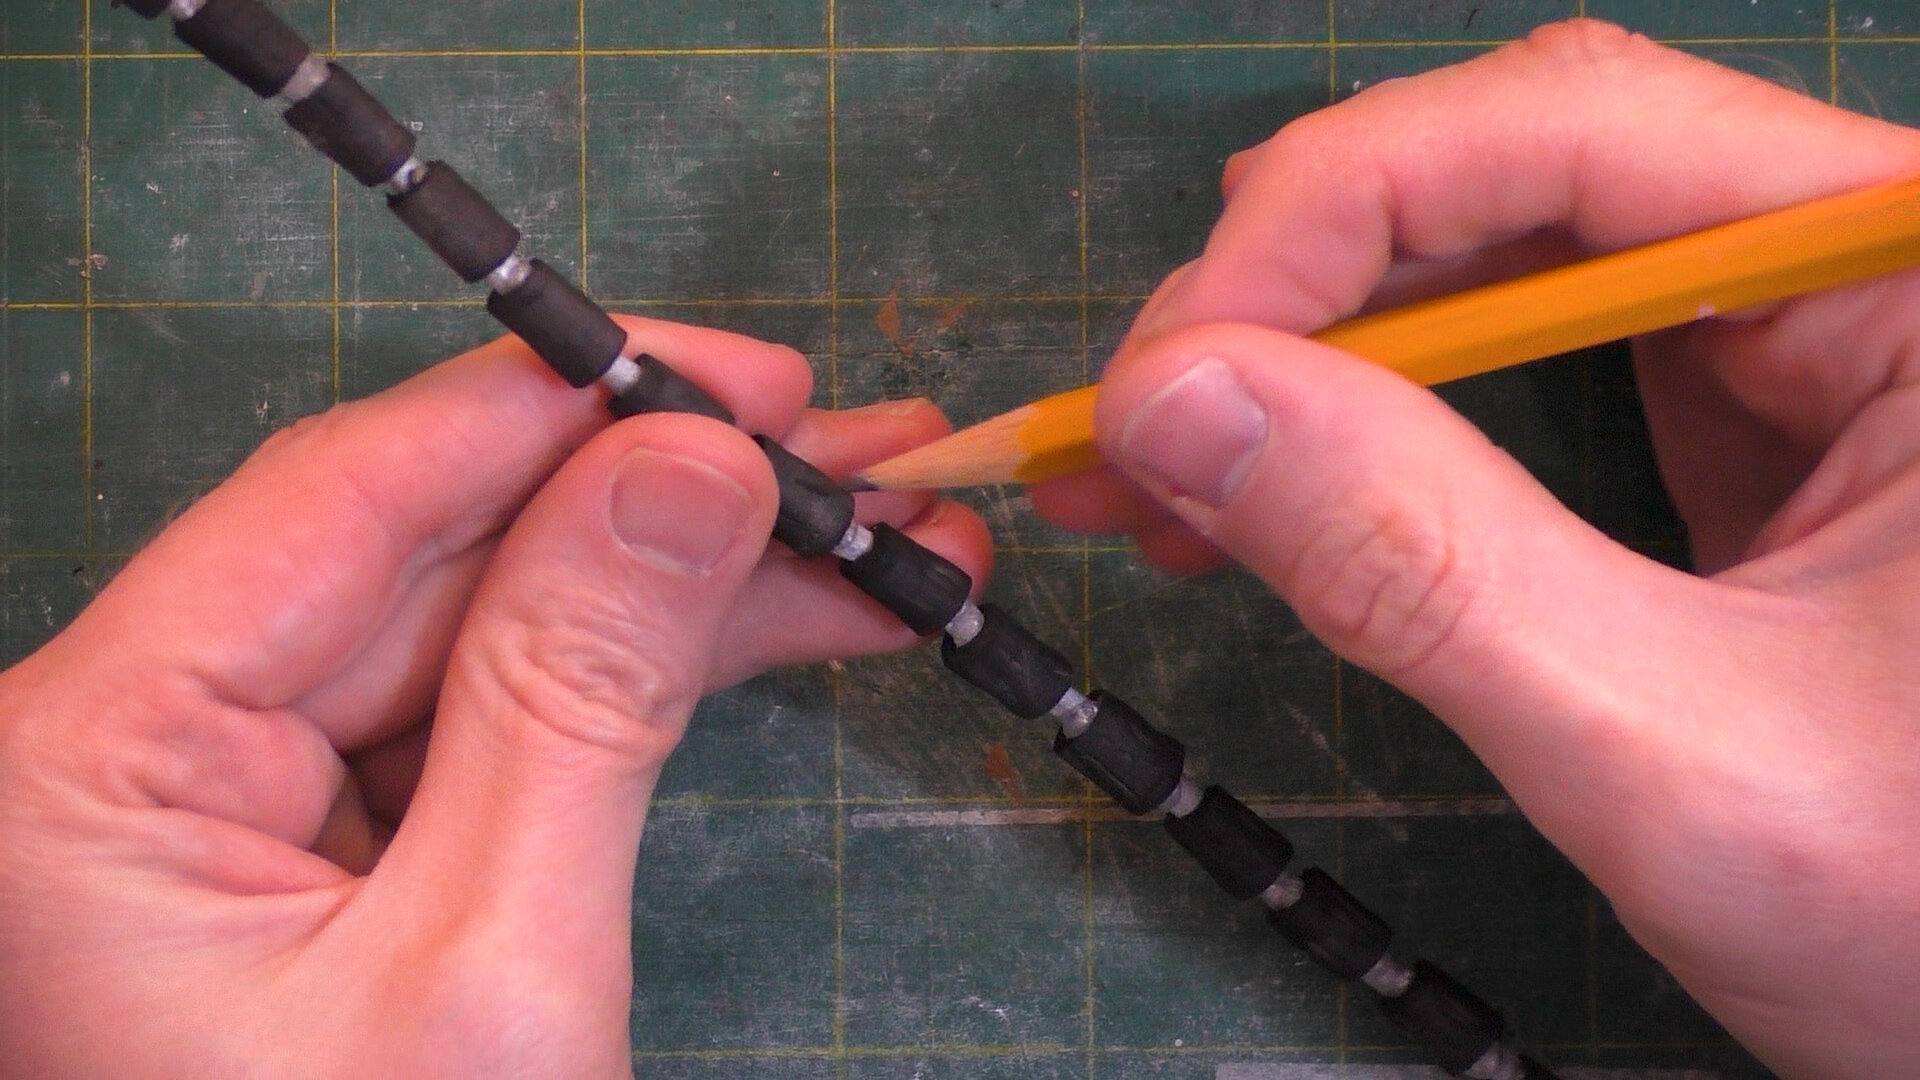
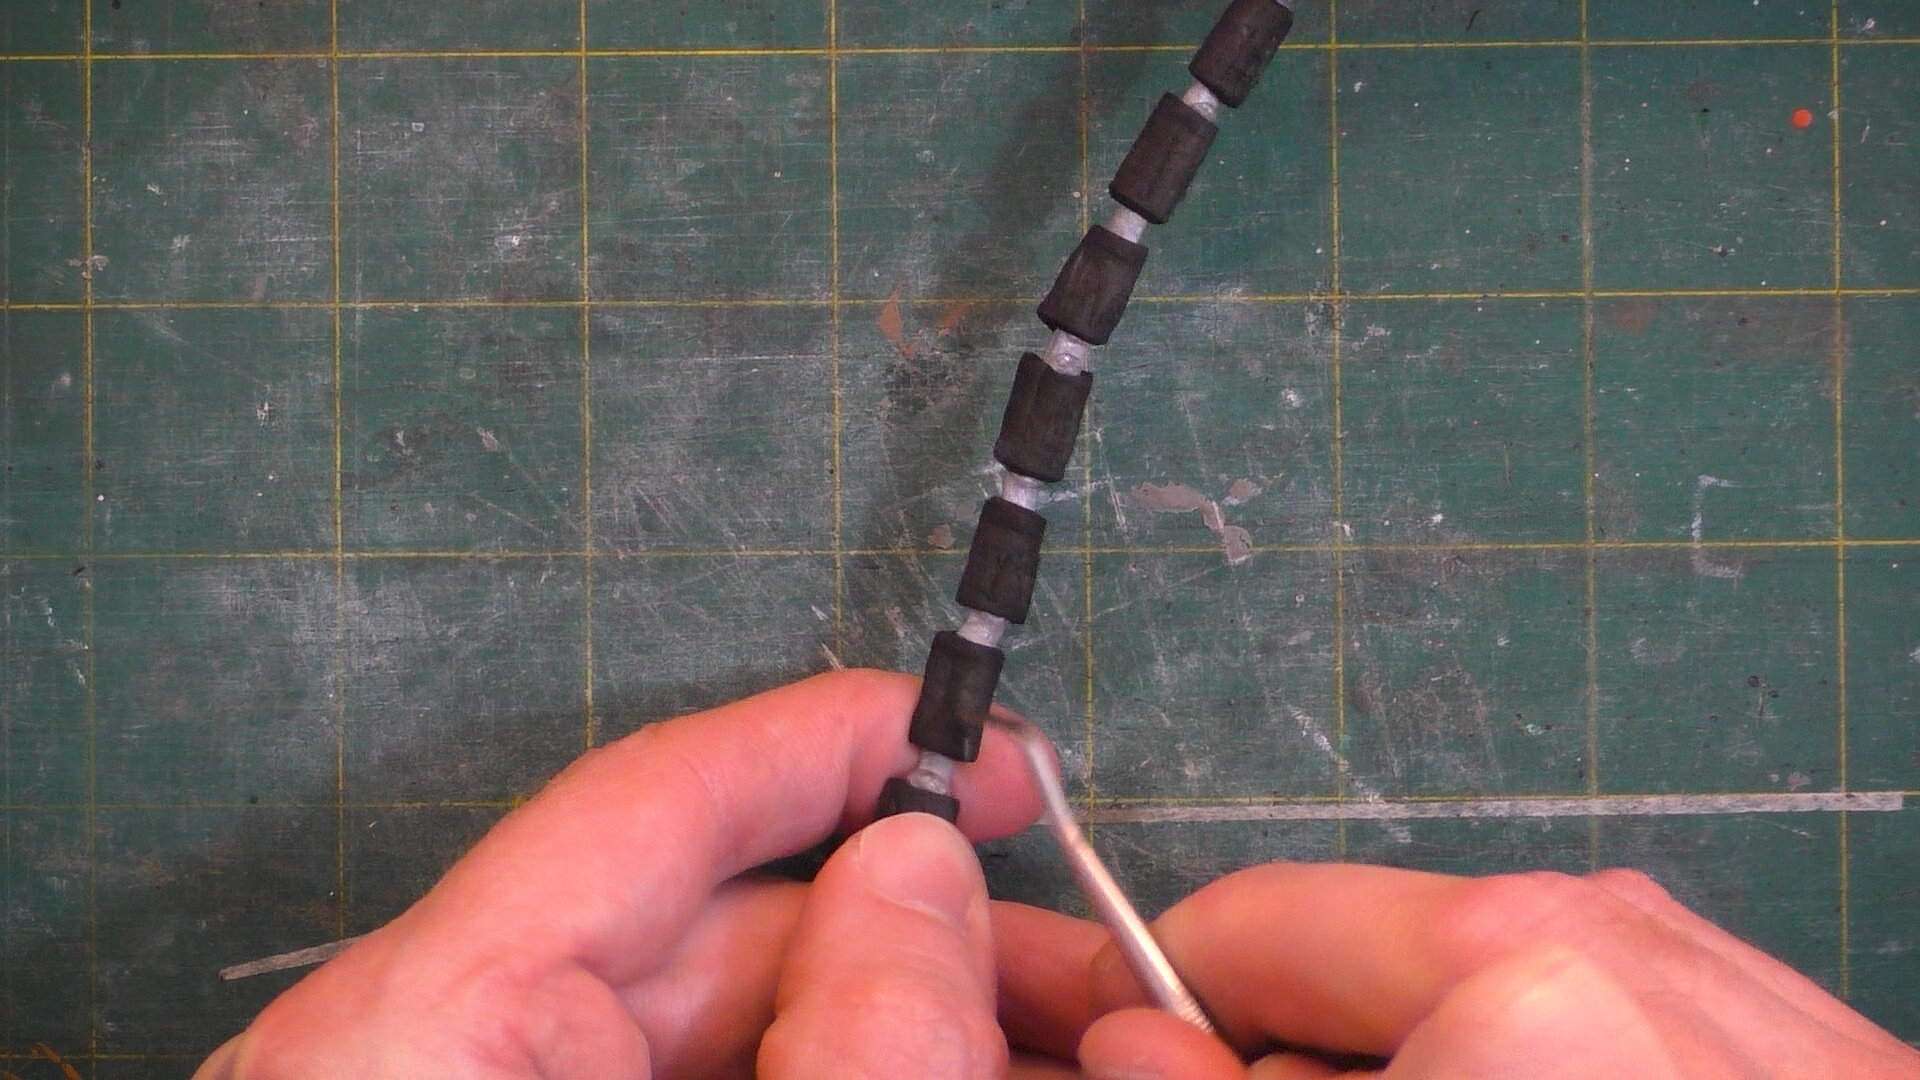
Now we’re just going to take a sharpened pencil and use it to indent into the surface, score into it a bit with a pointy clay tool, and I also got some interesting textures from using needle files like one would use in jewelry making.


poseablefauxmetalpainting

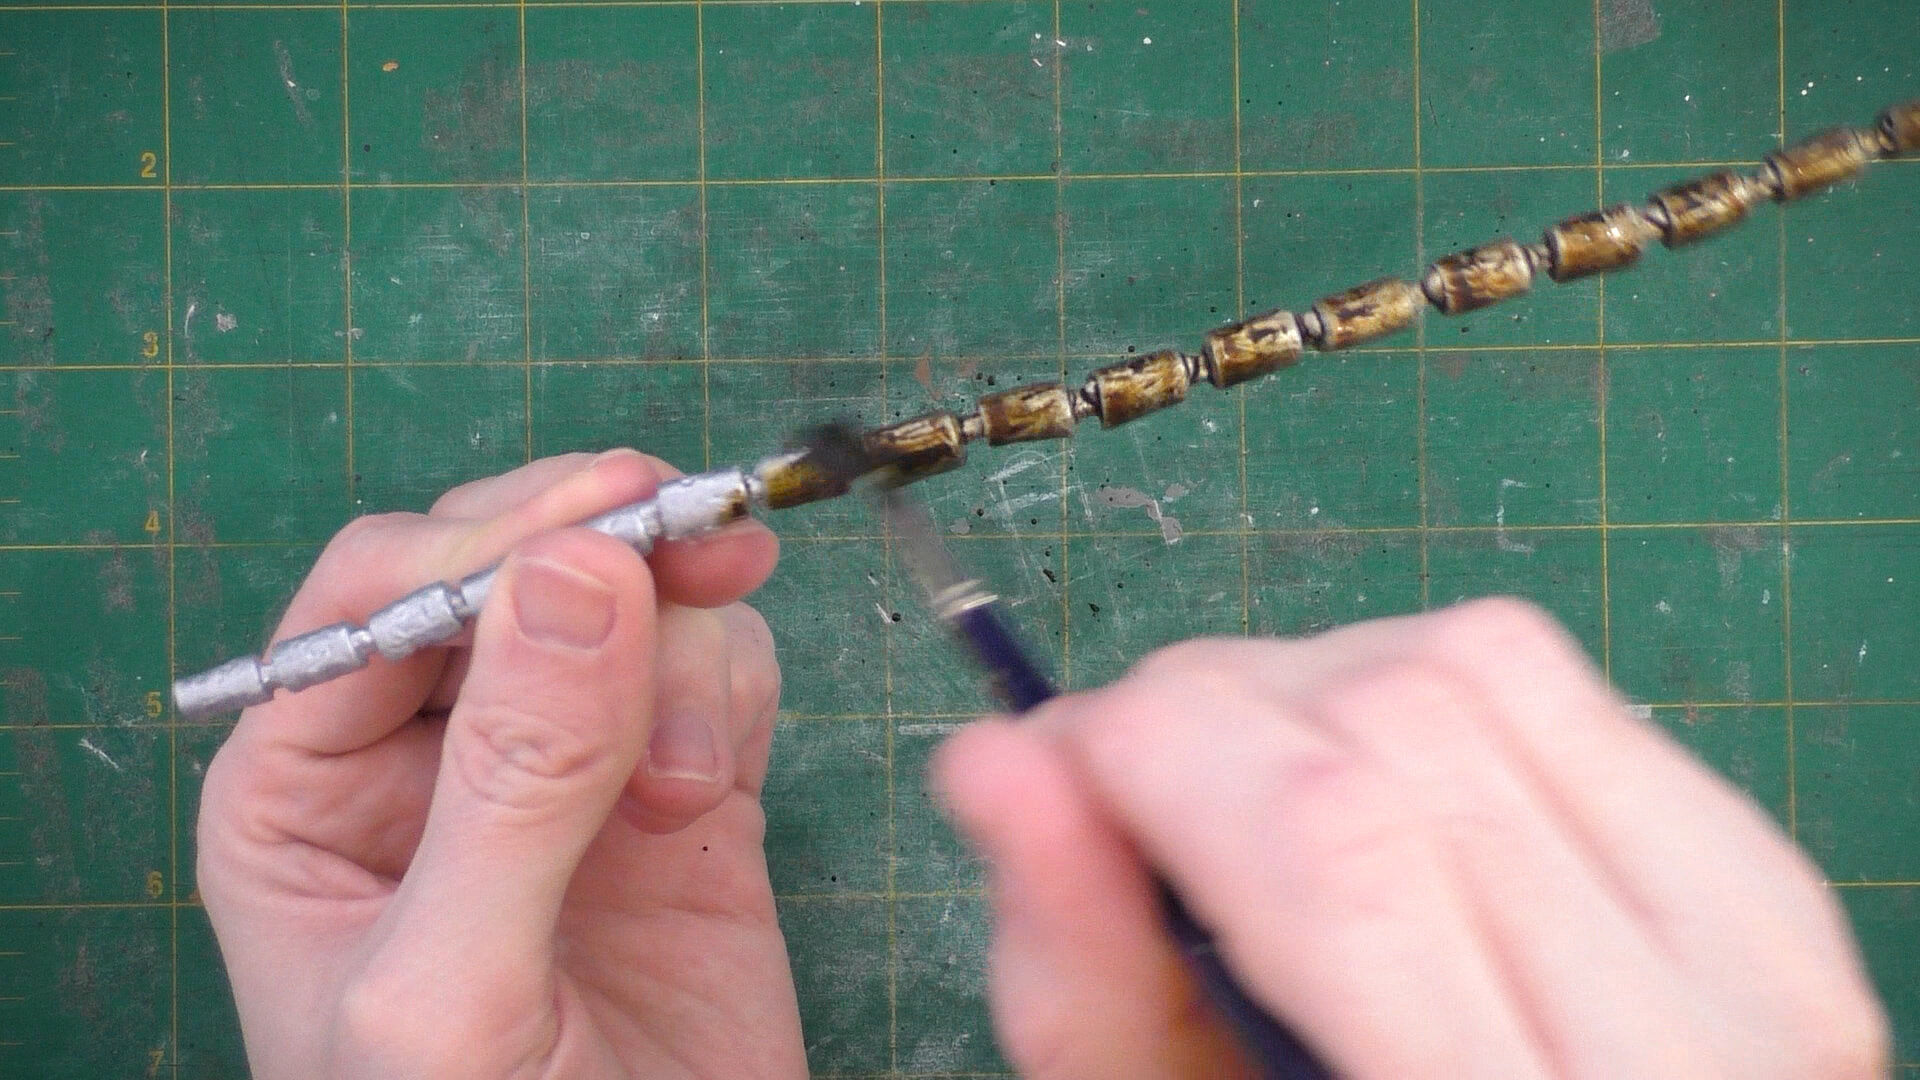
Then we’ll just go in with our silver acrylic paint onto the spinal form. One layer of metallic paint leaves a lot of the black of the foam showing through, which depending on what you’re doing, might be how you want it to look. I ended painting on three layers. You might consider using spray paint, but the propellant, what makes the paint shoot out of the can, tends to have a melting effect on a lot of foam-like surfaces. So that melting would either have to be a part of your design choice or you’d have to seal your foam in some way that also didn’t involve spraying the sealant on.


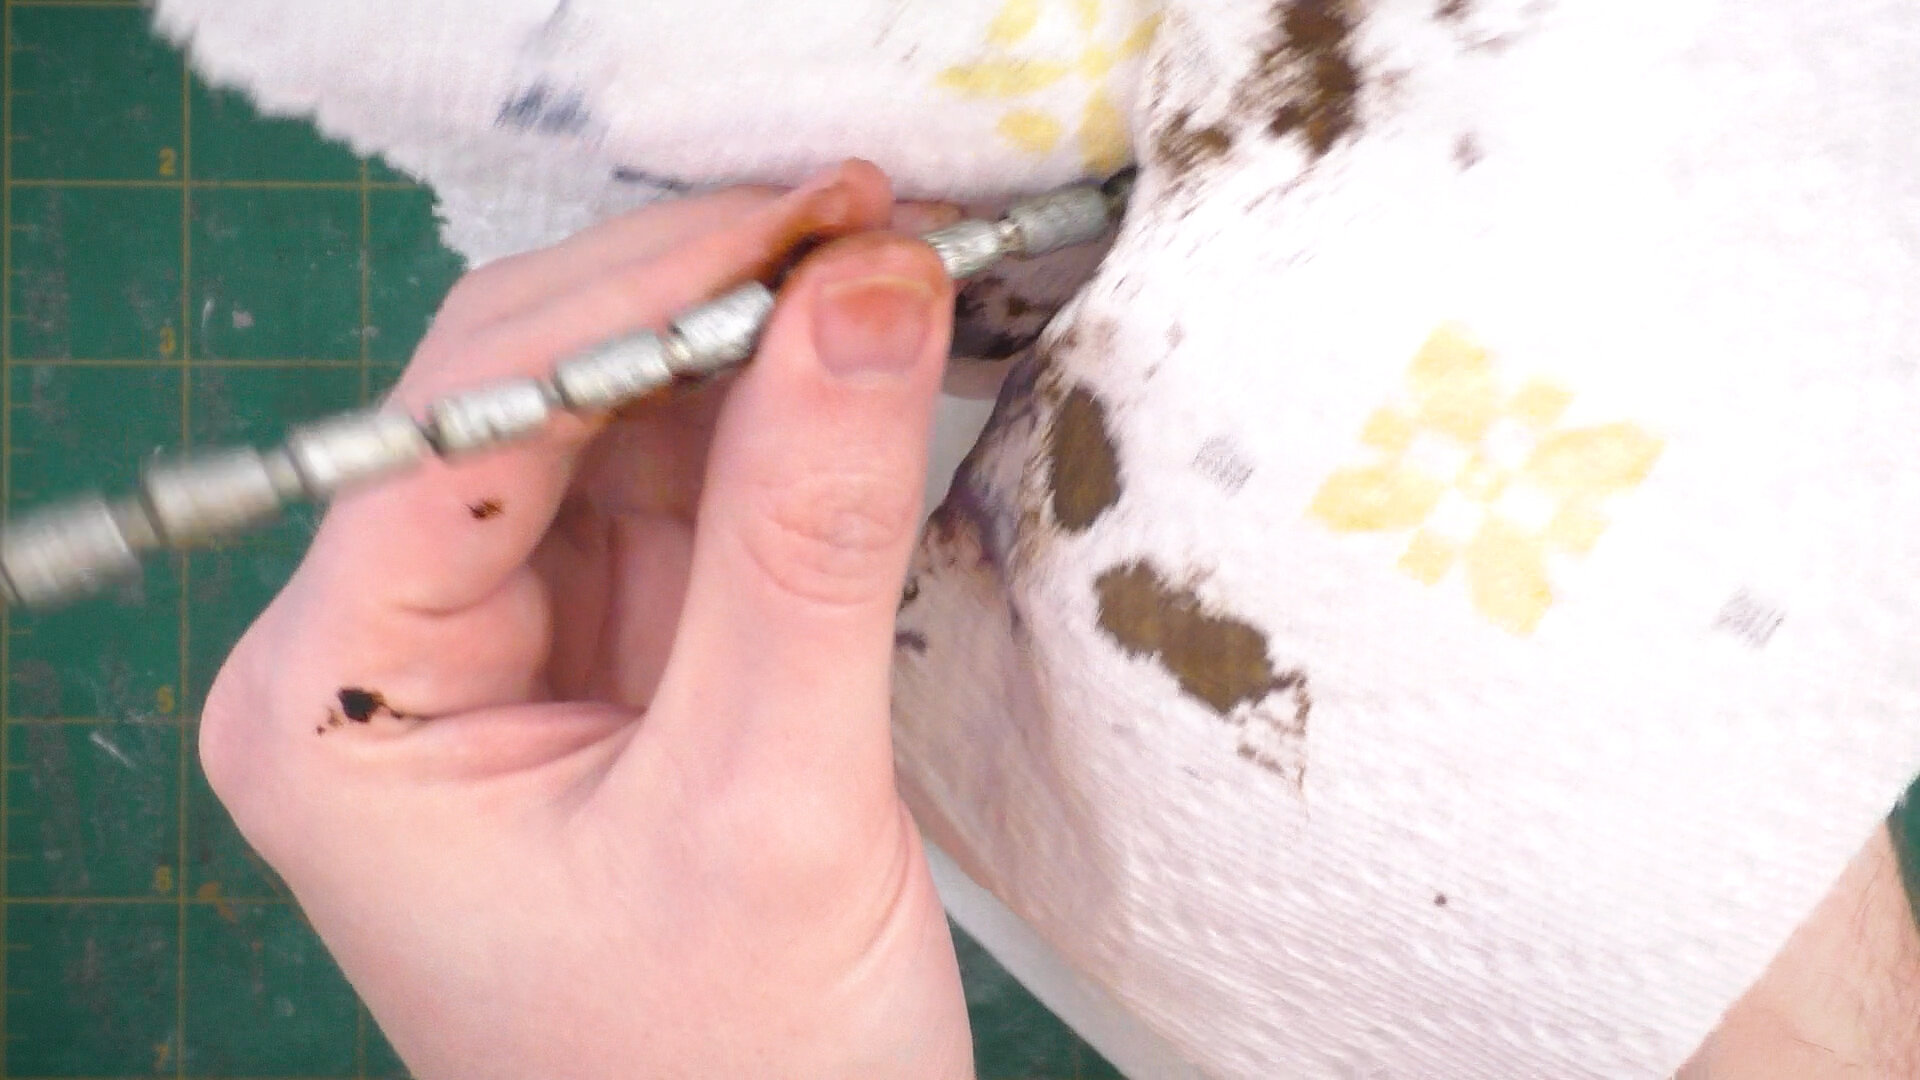
We’ll do an ink wash with this transparent raw umber. Unless I want a detail heavily accented, I tend to add a little water to the ink and even sometimes a tiny dab of dish soap. You can see how that ink wash is bringing up all the dents and scratches on the surface. After the ink’s been on the surface for a minute or two, we’ll wipe away the excess to make the details a little more subtle. We’ll repeat this process with each additional coating of ink. Since I liked the patina the ink was giving this, we’ll go ahead and do another wash. Each layer’s going to tint it just a bit darker. Another thing we can do is go back and put some ink inside some of the little holes and scratches to really bring them out. Here I’m using much more saturated ink and picking-out individual details.


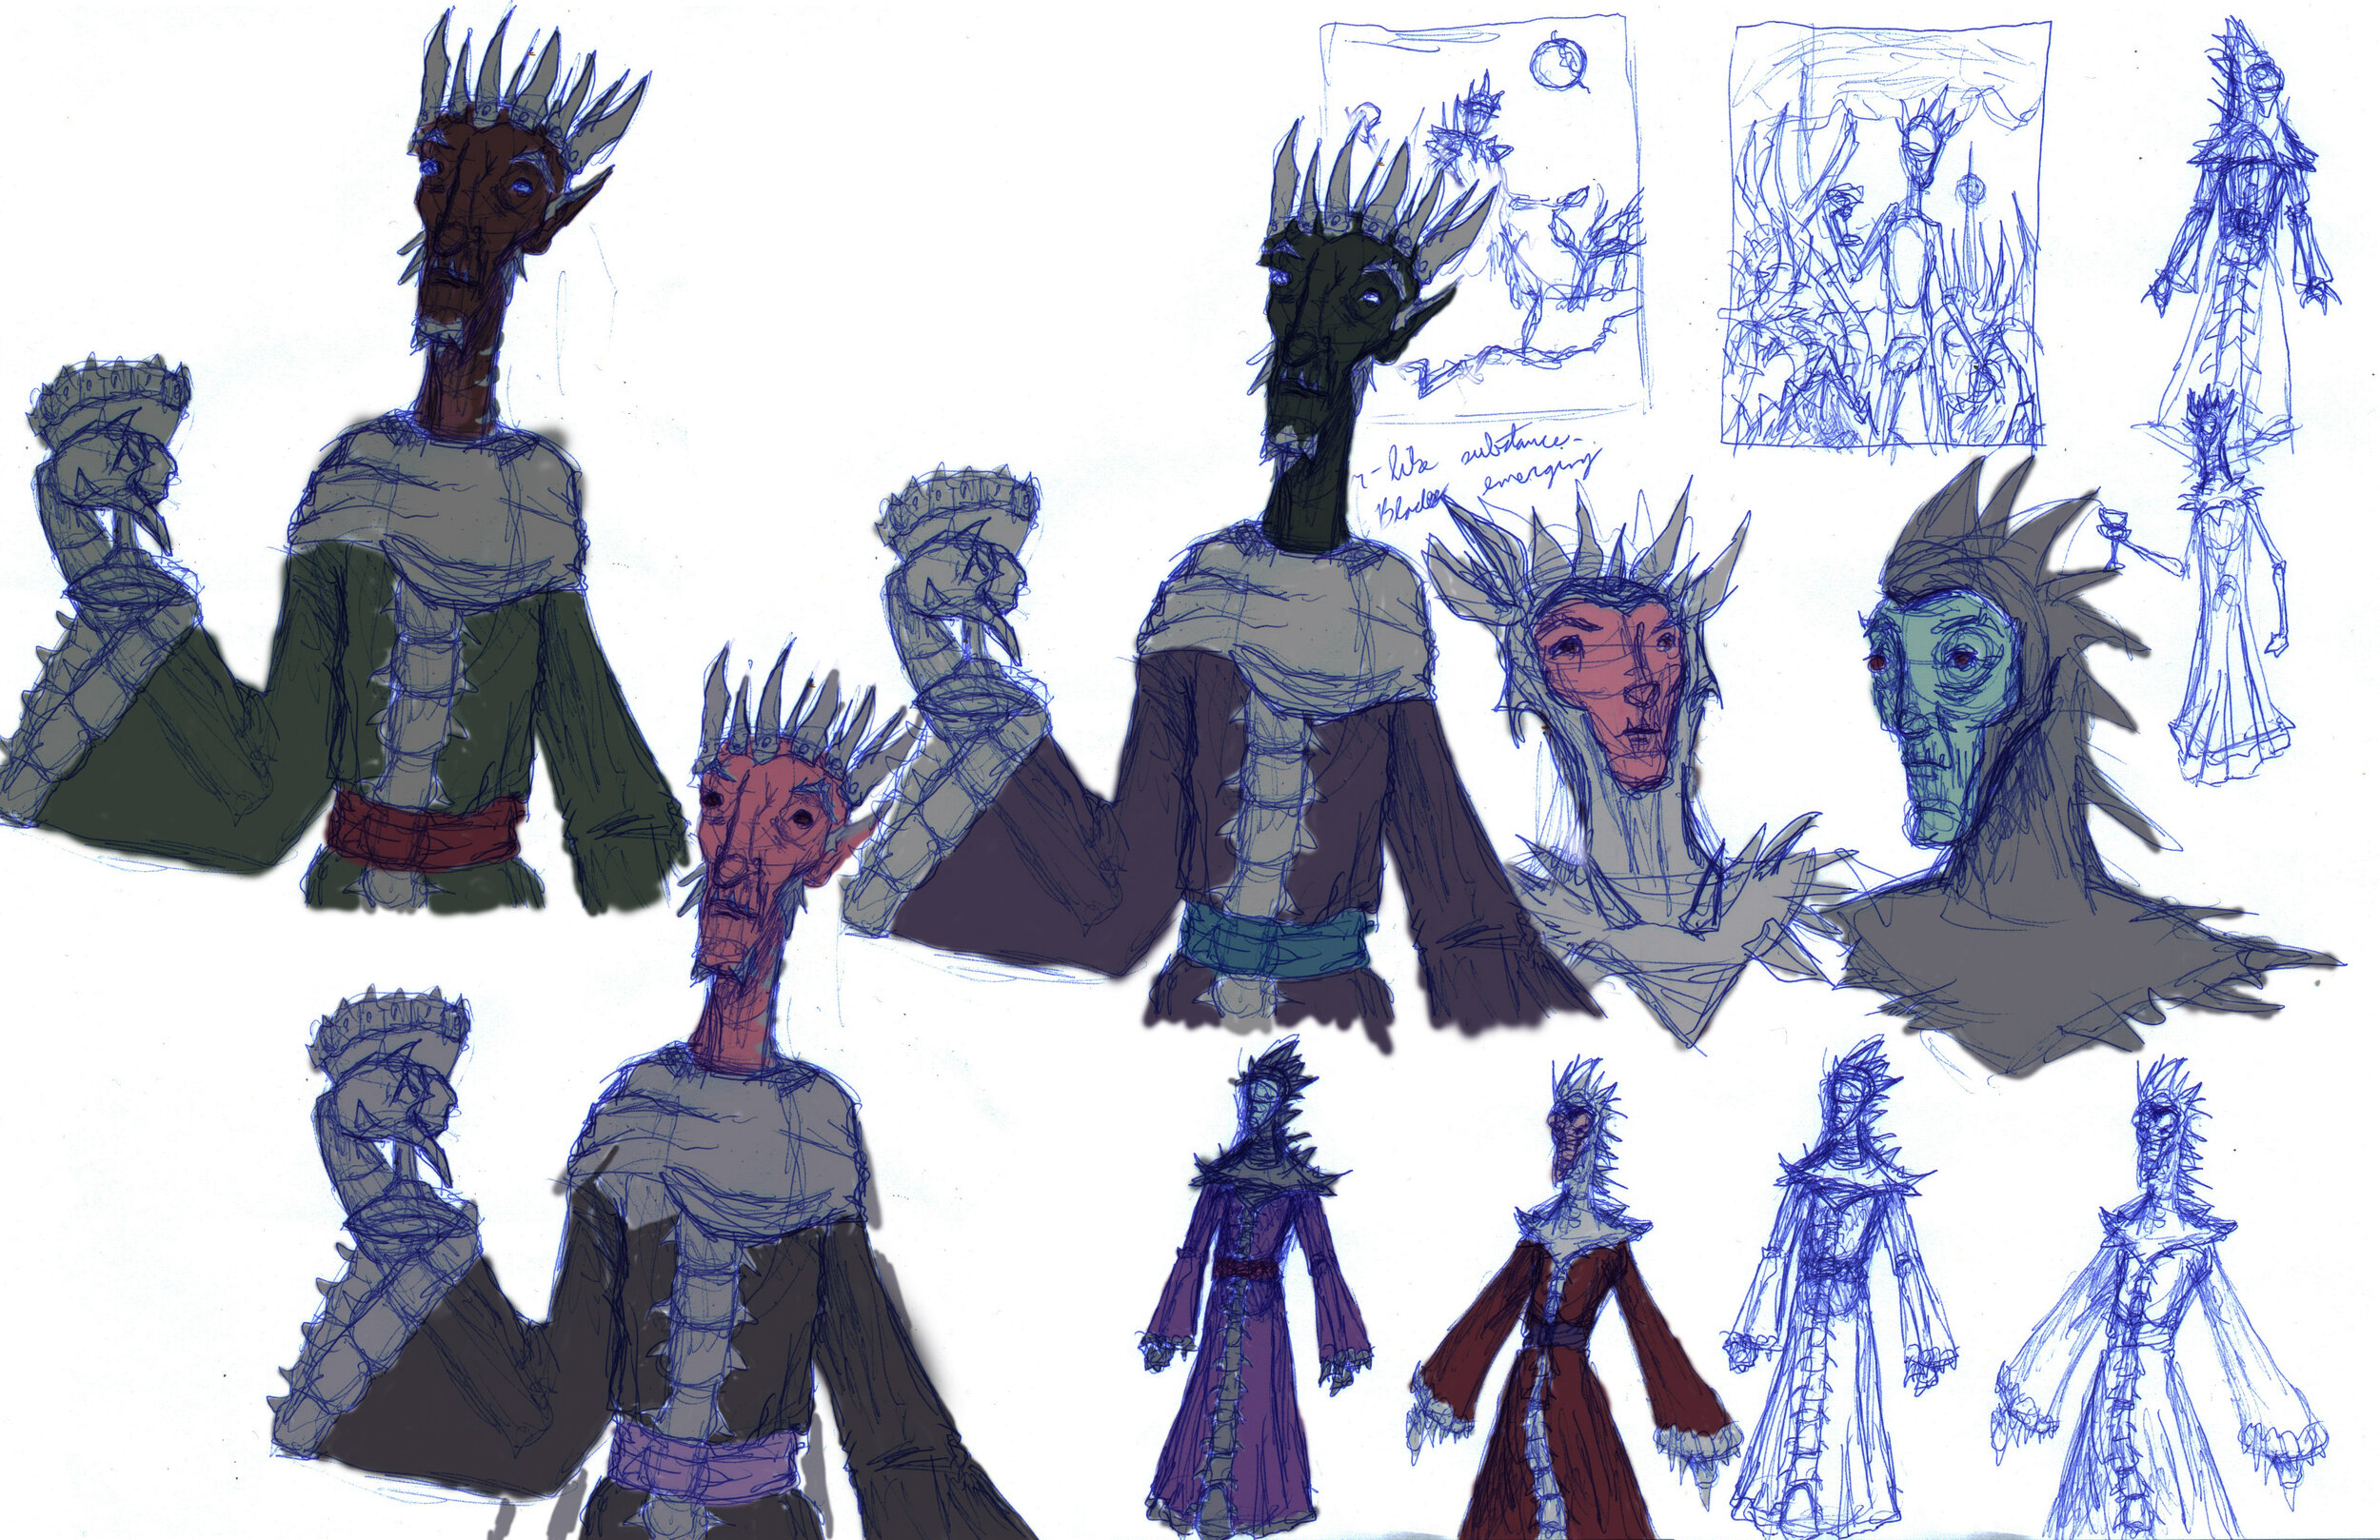
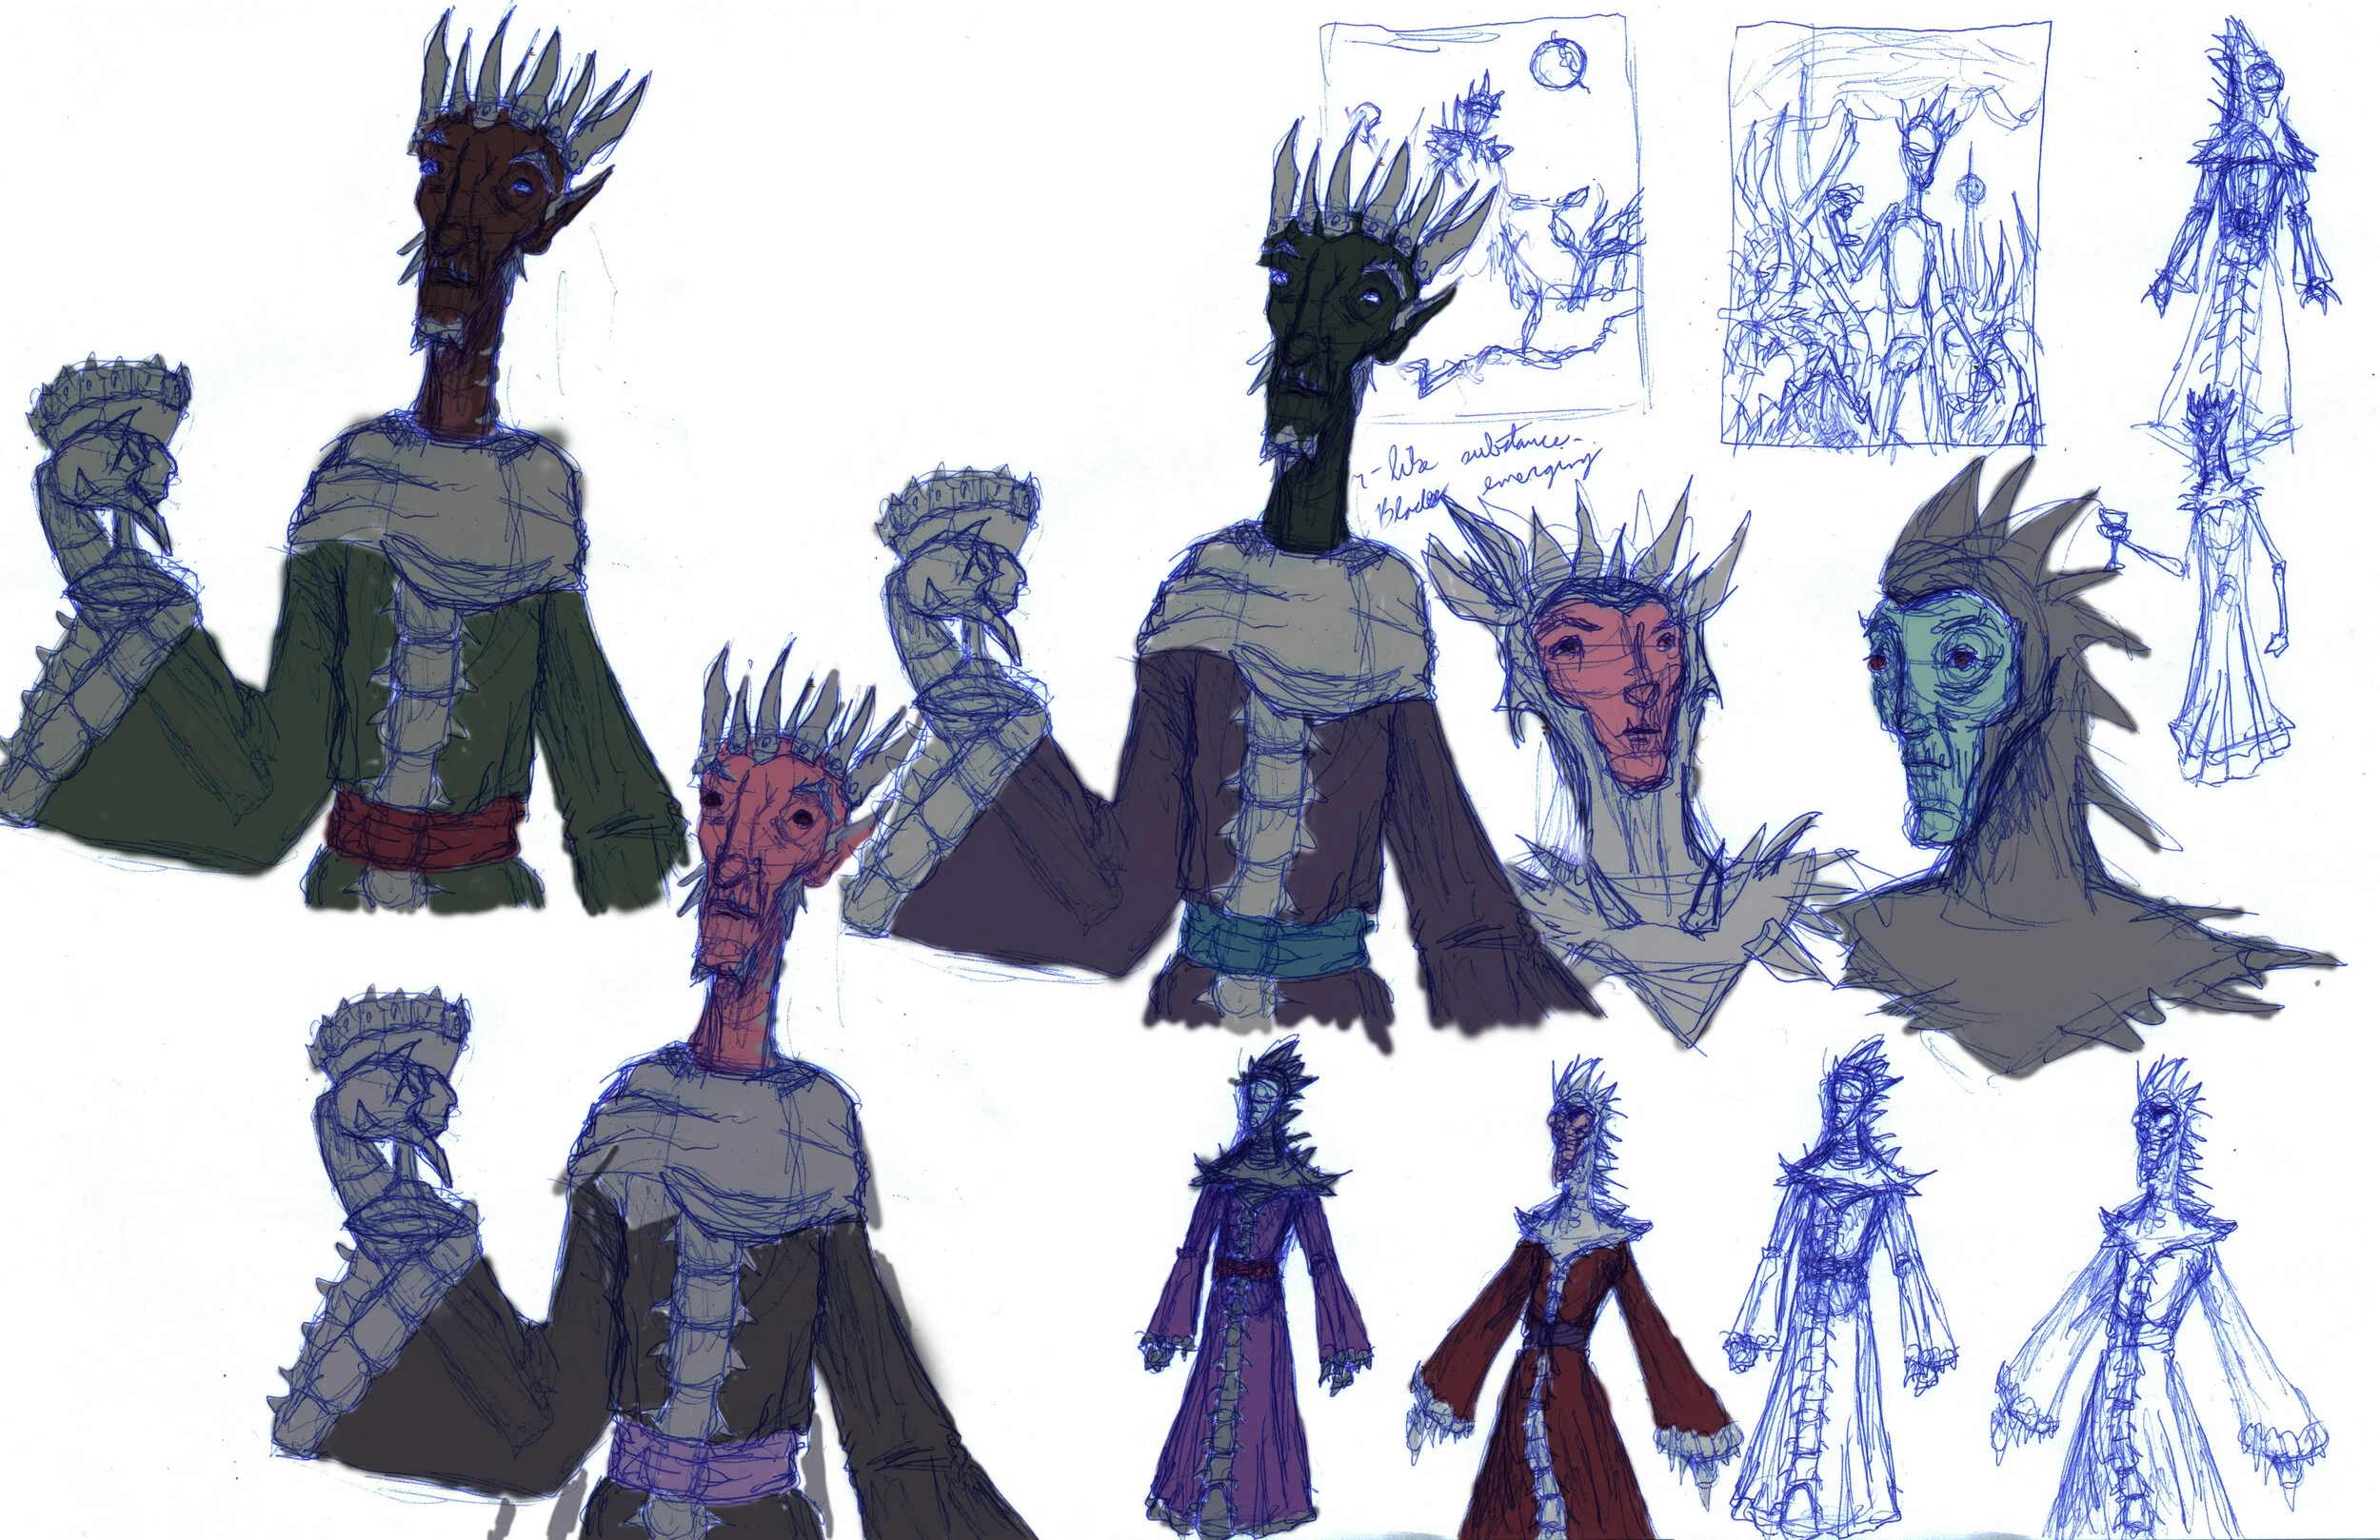
Lord Bledwall sketch/color study

Lord Bledwall sketch/color study


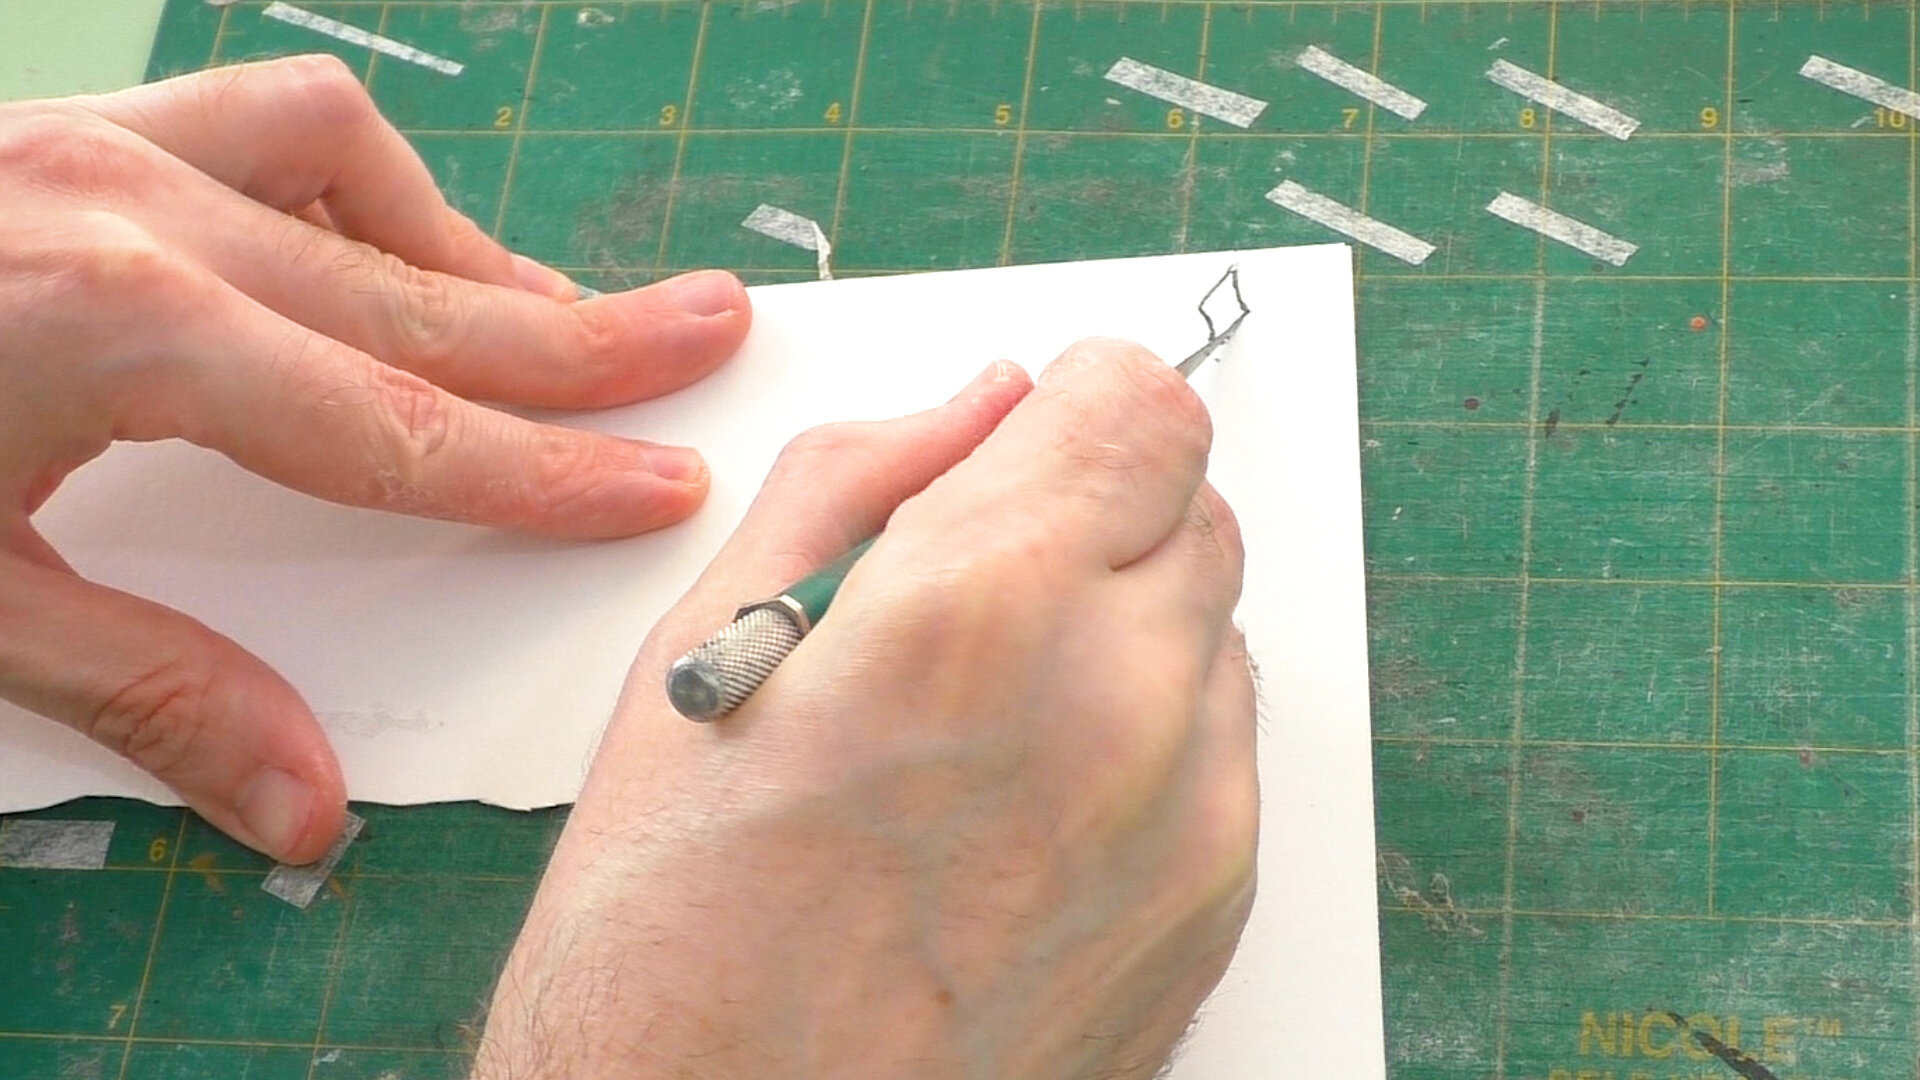
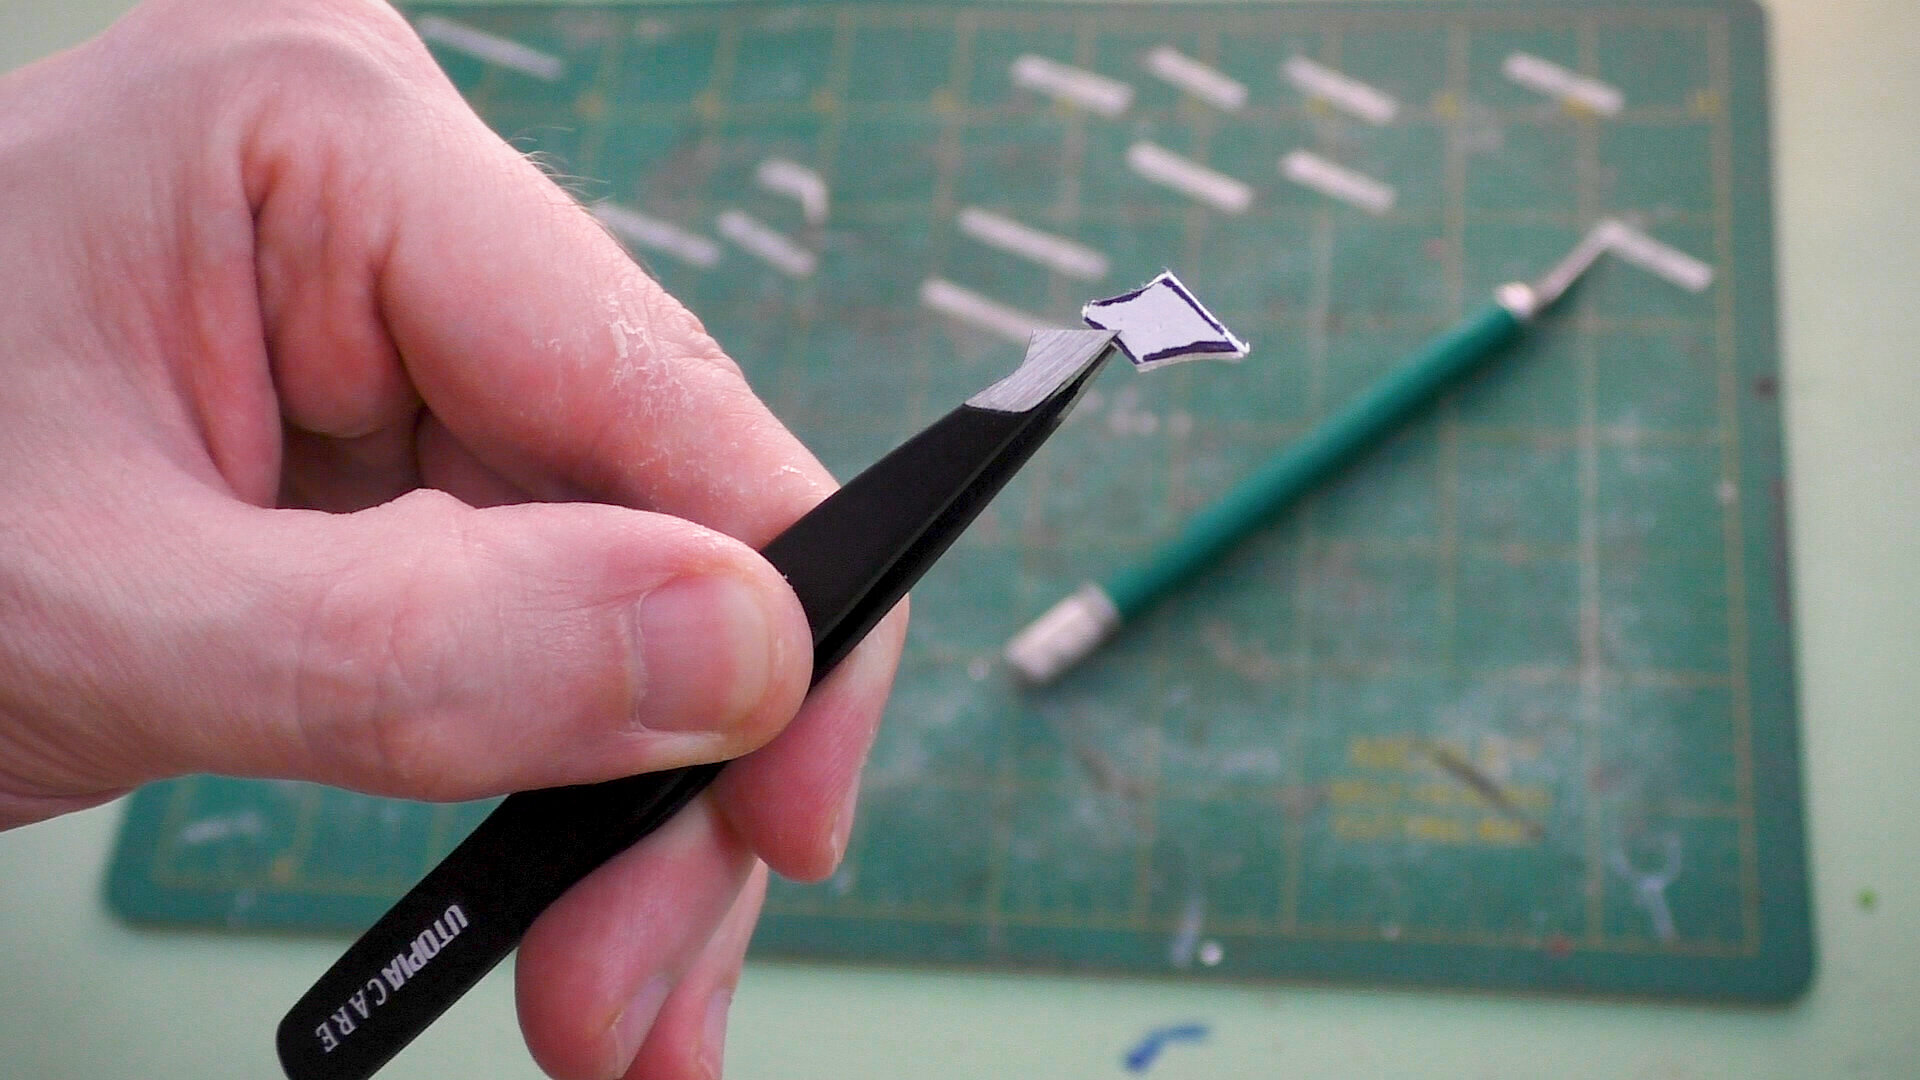
My sketch of Lord Bledwall had these blade bits sticking out the sides of the metal trim like a spinal column, I’d already gotten pretty far on this build (and should’ve put them in sooner).... so I was in a mental fight over risking messing up what I’d already done (and really liked) and also my laziness didn’t want to do anymore work… or I could make this a bit cooler by spending the time to add them on. It was a hard fought battle, but “making it cooler” won, so I cut bits of blade out of some Bristol board, sliced tiny grooves that I could put the narrower ends of the blades into, and used resin epoxy both inside the grooves, and thinly applied it to the narrow end of the blade form. Once the two part resin epoxy set, I then carefully painted and ink washed the blades.


As a warning: pretty much everything in creativity’s a conflict of “good enough” and saving some amount of hours of work versus “putting in a bit more effort and making the thing cooler”.


Sewing faux metal trim with coordinating thread.

Sewing faux metal trim with coordinating thread.

Having made the thing sufficiently cooler, we’ll attach the metal trim by sewing it on with a gray thread that will sort of blend-in with the paint job we’ve done. We’ll sew in from the back, make a loop, tie off our thread a few times, cut it, and repeat that process up the length of the trim. Here you can see what it looks like once it’s all attached.

FakeMetalTextureTrimFullyAttached.jpg


Lord Bledwall’s also has a faux metal texture bladed mantle that I’ll do a “making of” process blog and video similar to this one if you want to see how that was made. When it’s ready, you’ll be able to click here. If you use techniques you learned from any of my posts, I’d be happy to take a look. You can tag me on whatever social media platform you’re posting to. You can find my links below!

If you would like a print of Lord Bledwall, you can purchase it here.

If you would like a print of Lord Bledwall, you can purchase it here.

PRINTS AVAILABLE

A print of the final dimensional illustration’s available through my print shop as an open edition.

Thanks for joining me so far and here’s to the adventures we have in future! To be the first to know when I launch new polymer clay art videos, be sure to subscribe to my YouTube channel and hit the bell icon. Catch all of my videos here: https://www.youtube.com/thedreamsyndicatearts.

You can also find many of the supplies I use in crafting here: https://www.thedreamsyndarts.com/supplies-gear/. And sign-up for my newsletter (in the sidebar) to get the latest studio goings-on! Thanks so much for joining me on this journey and until next time: Make. Believe!

𝐋𝐨𝐫𝐝 𝐁𝐥𝐞𝐝𝐰𝐚𝐥𝐥 𝐚 𝐏𝐨𝐬𝐞𝐚𝐛𝐥𝐞 𝐄𝐯𝐢𝐥 𝐖𝐢𝐳𝐚𝐫𝐝 𝐀𝐫𝐭 𝐃𝐨𝐥𝐥 | 𝐓𝐢𝐦𝐞𝐥𝐚𝐩𝐬𝐞 𝐌𝐢𝐱𝐞𝐝-𝐌𝐞𝐝𝐢𝐚 𝐀𝐫𝐭 𝐃𝐨𝐥𝐥 𝐓𝐮𝐭𝐨𝐫𝐢𝐚𝐥

Much like dharklings, I’ve made another more nefarious aspect of my world, Lord Bledwall (you can learn more about how he arrived at his powers further below). He’s one of my world’s Manifest, wizard caste beings who have power far above and beyond what most inhabitants of The Dream Syndicate possess. He’s an evil wizard figure who has the ability to manipulate these bladed, vine-like growths that accompany him, known as The Bleedwall. The mixed-media poseable art doll’s meant to be imposing, menacing, with his sharp, angular features and withered appearance.


Watch the Making of Lord Bledwall, a Poseable Evil Wizard Art Doll | Timelapse Mixed-Media Art Doll Tutorial


LordBledwallEvilWizardArtDoll

As an adolescent, I’ve always been fond of the design of villains and I can see much of that fondness echoed in this character. When drawing the mouth of the poseable art doll’s design, I was thinking of the toothy maw of a crocodile. Some more obvious features to jump-out at you would be the look of “The Lord of the Rings” ring wraiths (even before the Peter Jackson’s films, many artist’s renderings of these creatures had much in common) and the look of Shredder from various iterations of the Teenage Mutant Ninja Turtles. In much the same way that these villains are encased and adorned in metal, so is the warlord figure of Lord Bledwall. The substance of the Bleedwall that he commands is an ever-expanding, invasive species that will either corrupt, harm, or kill whatever it comes into contact with.

Open edition prints of "Lord Bledwall” are available here.

Open edition prints of "Lord Bledwall” are available here.

Prints of “Lord Bledwall” are available here:

Open edition print: https://www.inprnt.com/gallery/thedreamsyndicate/lord-bledwall-wizard-fine-art-print/

The more the wall hungered
The more that the enemy bled
The more the wall hungered


Lord Bledwall rules a land that was at war with a neighboring kingdom and he loses his son to the conflict. In his anger and grief, he happens upon a large, strange seed that calls to him. He nurtures it with his hatred and desire for revenge and day by day, month by month, it grows into this bladed and barbed barrier along his lands that comes to be called The Bleedwall.

The wall hungers and attacks friend and foe alike, maiming or killing anyone that comes within it’s lethal, sinuous reach. The Bleedwall ever expands and Lord Bledwall ever becomes concerned with assuaging it’s bottomless hunger. This caused the majority of his kingdom’s subjects to flee and how Lord Bledwall got his name, to be forever associated with that accursed wall.


Thanks for joining me so far and here’s to the adventures we have in future! To be the first to know when I launch new polymer clay art videos, be sure to subscribe to my YouTube channel and hit the bell icon. Catch all of my videos here: https://www.youtube.com/thedreamsyndicatearts. You can also find many of the supplies I use in crafting here: https://www.thedreamsyndarts.com/supplies-gear/. And sign-up for my newsletter (in the sidebar) to get the latest studio goings-on! Thanks so much for joining me on this journey and until next time: Make. Believe!


Find me elsewhere online:

INSTAGRAM: instagram.com/dream_synd_arts/

FACEBOOK: facebook.com/TheDreamSynd/

TWITTER: twitter.com/Dream_Synd

PINTEREST: pinterest.com/TheDreamSyndicate/

WEBSITE: www.thedreamsyndarts.com/


Adventures in Mold Making & Resin Casting | Making My First (Serious) Mold

Adventures in Mold Making & Resin Casting | Making My First (Serious) Mold

I thought it might be helpful to share my experience and some lessons learned. Although this round of mold-making and resin casting wasn’t perfect, I’m really happy with the resin castings that I made and I’d call it a success!

Read More

𝐌𝐚𝐧𝐢𝐟𝐞𝐬𝐭 𝐋𝐚𝐥𝐨𝐫𝐚 𝐚 𝐏𝐨𝐬𝐞𝐚𝐛𝐥𝐞 𝐖𝐢𝐳𝐚𝐫𝐝 𝐅𝐚𝐧𝐭𝐚𝐬𝐲 𝐀𝐫𝐭 𝐃𝐨𝐥𝐥 | 𝐓𝐢𝐦𝐞𝐥𝐚𝐩𝐬𝐞 𝐌𝐢𝐱𝐞𝐝-𝐌𝐞𝐝𝐢𝐚 𝐀𝐫𝐭 𝐃𝐨𝐥𝐥 𝐓𝐮𝐭𝐨𝐫𝐢𝐚𝐥

𝐌𝐚𝐧𝐢𝐟𝐞𝐬𝐭 𝐋𝐚𝐥𝐨𝐫𝐚 𝐚 𝐏𝐨𝐬𝐞𝐚𝐛𝐥𝐞 𝐖𝐢𝐳𝐚𝐫𝐝 𝐅𝐚𝐧𝐭𝐚𝐬𝐲 𝐀𝐫𝐭 𝐃𝐨𝐥𝐥 | 𝐓𝐢𝐦𝐞𝐥𝐚𝐩𝐬𝐞 𝐌𝐢𝐱𝐞𝐝-𝐌𝐞𝐝𝐢𝐚 𝐀𝐫𝐭 𝐃𝐨𝐥𝐥 𝐓𝐮𝐭𝐨𝐫𝐢𝐚𝐥

I recently wrapped-up making a piece called “Manifest Garden” that featured a poseable wizard art doll as the main character. The fantasy art doll, who I named Manifest Lalora, is crafted in my usual mixed-media process and there’s a fairly extensive timelapse tutorial if you would like to see how she was made. The Manifest wield the power to shape and manipulate reality in the fantasy world that I’ve been tinkering away on.

Read More

𝐌𝐚𝐤𝐢𝐧𝐠 𝐏𝐨𝐬𝐞𝐚𝐛𝐥𝐞 𝐀𝐫𝐭 𝐃𝐨𝐥𝐥 𝐇𝐚𝐧𝐝𝐬 𝐰𝐢𝐭𝐡 𝐏𝐀𝐏𝐄𝐑?! 👐

Today I’m going to share my process for making poseable art doll hands with… get this, paper! Well, more accurately, I use medical paper tape to make the hands for my mixed-media art dolls in a technique that’s sort of half-assed paper mache. This technique’s suitable not only for art dolls, but also for stop-motion animation puppets.

You can watch how I make this poseable wire armature hands on YouTube and I’ll also try to give as brief summary of how I craft these hands as possible. I’ll also put links to where you can get the supplies you need for this project. This method will allow you to craft a variety of hand shapes and forms and when you become well-practiced at it, you might be able to make a new set of art doll hands in about two and a half hours.


Watch Making Poseable Art Doll Hands with Paper?! 👐 Timelapse Art Doll Tutorial 👐


The supplies you’ll need for this art doll hand tutorial

The supplies you’ll need for this art doll hand tutorial

Poseable Art Doll Hands Supplies

Aluminum tubing that will compose the character’s forearm and also hold the wires for the hands

Aluminum tubing that will compose the character’s forearm and also hold the wires for the hands

 
Here I’m twisting wire to form the shape of the hand

Here I’m twisting wire to form the shape of the hand

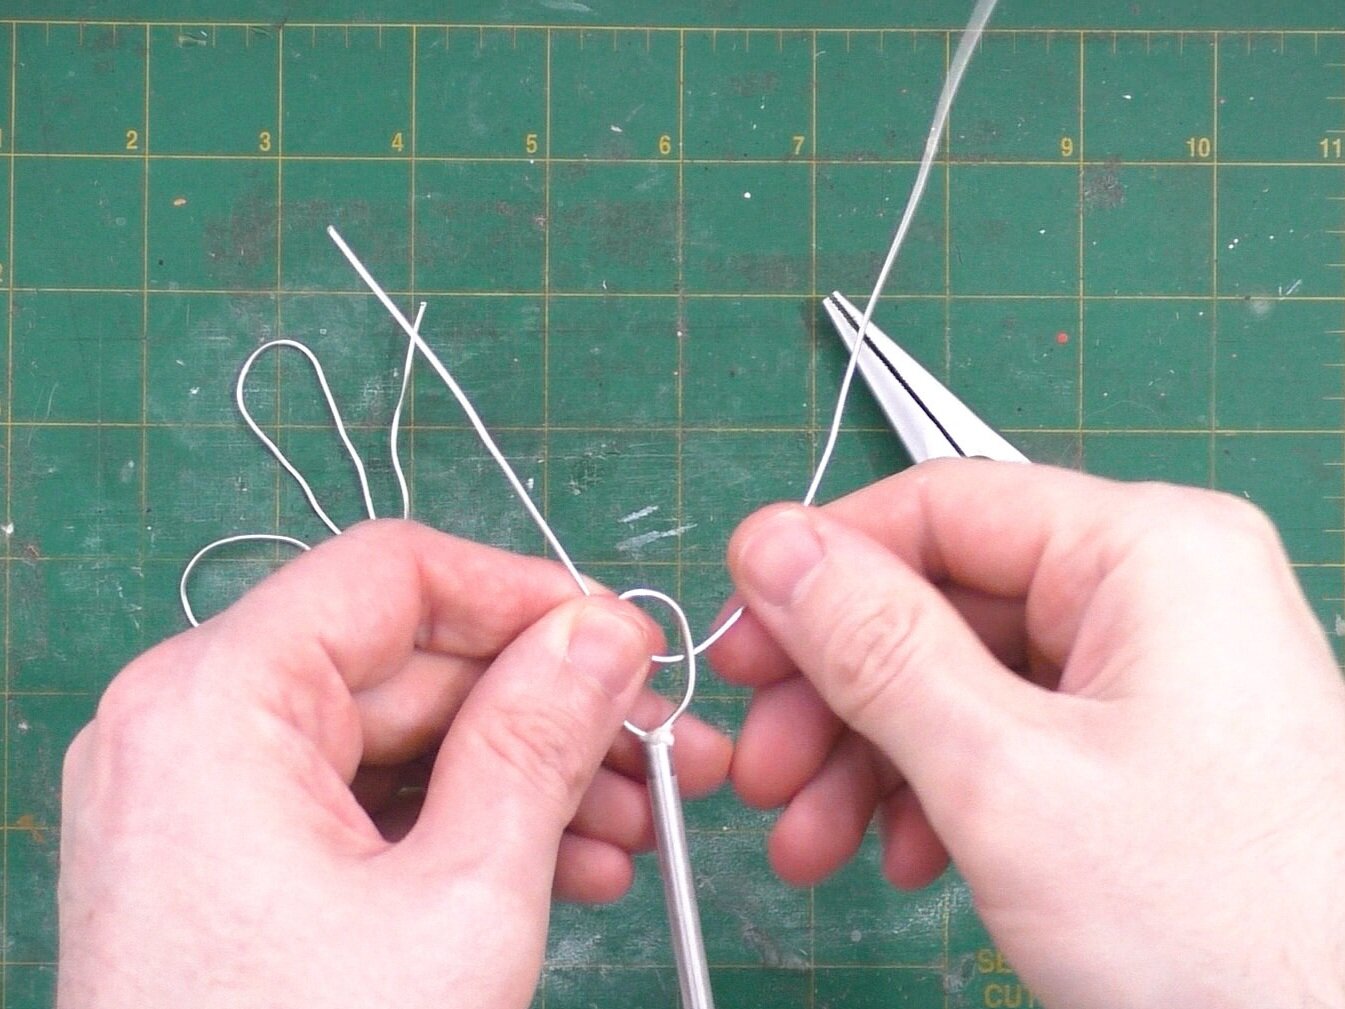
For purposes of this poseable art doll tutorial, I used 16 and 18 gauge wire and a particular diameter of aluminum tubing, but you can adjust the size of the materials you’re using to accommodate whatever proportions you would like. The first thing you’ll do is use your pipe-cutter to cut lengths of the aluminum tubing that will form you character’s forearms. Afterward, cut two pieces of your thicker gauge wire at about 5-6” long (though whatever scale you’re crafting at will effect this measurement), create a loop- this will determine the size of the art doll or stop-motion puppet’s palm and back of hand, and then braid the two ends of wire.

Basic shape of the hands attached in aluminum tubing

Basic shape of the hands attached in aluminum tubing

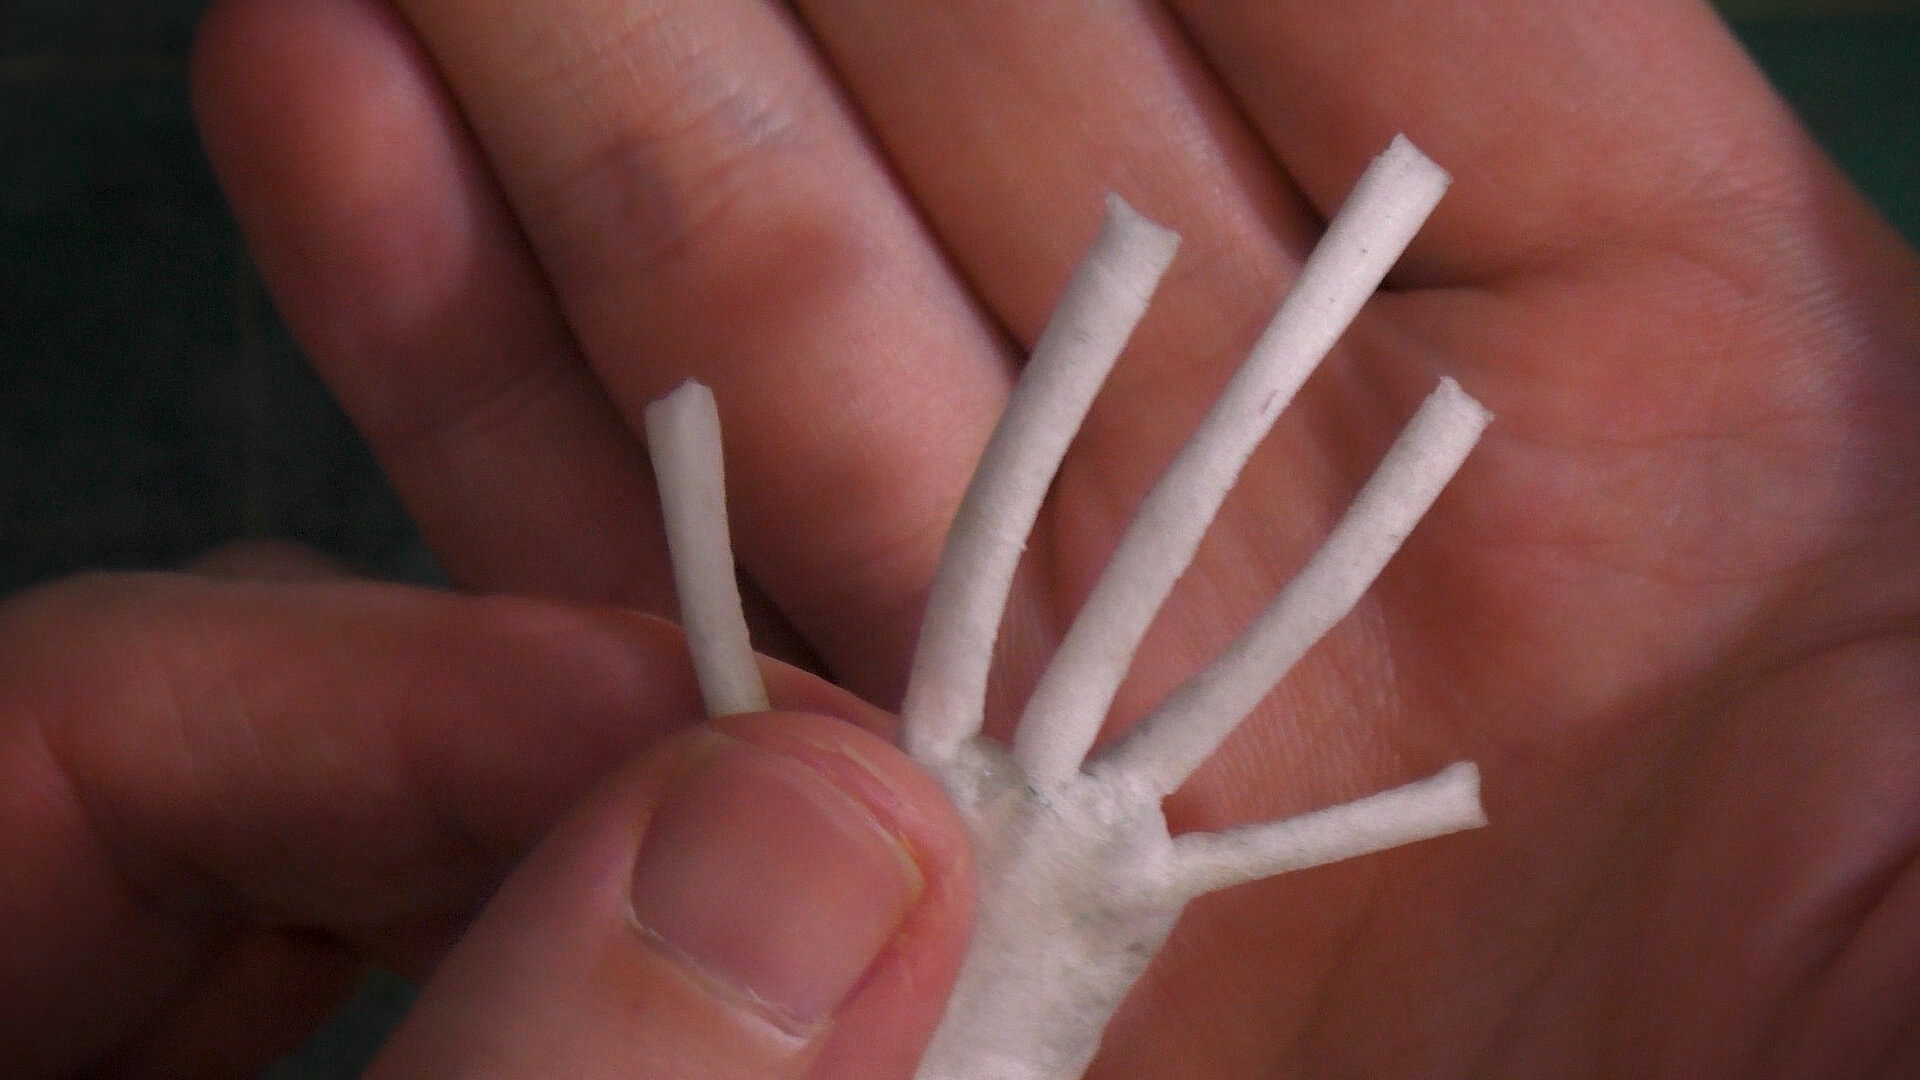
You can then cut the braided ends of these loops so that there’s a piece left almost as big as your pinky across. You’ll then wrap the medical paper tape around this piece and you want to place this inside of the aluminum tubing pieces. You want this to fit in the tubing snugly, such that if you lightly pull, the hand wire won’t come out.


“U” shape to form the art doll’s pinky and thumb fingers

“U” shape to form the art doll’s pinky and thumb fingers

Next cut a longer length of wire, about 14-16” (I typically use the tip of my middle finger to the crook of my arm as a rough measurement), this piece is going to form the character’s fingers. You’ll leave a length of wire for the pinky finger, wrap the wire around the thicker gauge hand wire, have the wire create a gentle “U” shape, and then wrap this wire around the hand wire with it’s placement roughly where the thumb would go. I typically find the outermost fingers’s placement, the pinky and the thumb, as I craft the art doll’s hands. In all cases when you’re wrapping the finger wire around the hand wire, you want this wire to wrap around tightly- you may want to use your pliers to help in this process.


Completed art doll hand armatures

Completed art doll hand armatures

Now we’ll find where we want the index finger, wrap the finger wire around the hand wire. This will create a broad partial oval shape and the index finger and thumb will be connected. Next loop the finger wire around the “U” shape and back up to the hand, then wrap it around to create the placement for the middle finger. Then you’ll create another oval shape, winding a bit of the remaining finger wire around the hand wire and snipping off any excess with your wire-cutters.


Paper tape helping to lock the finger locations into place

Paper tape helping to lock the finger locations into place

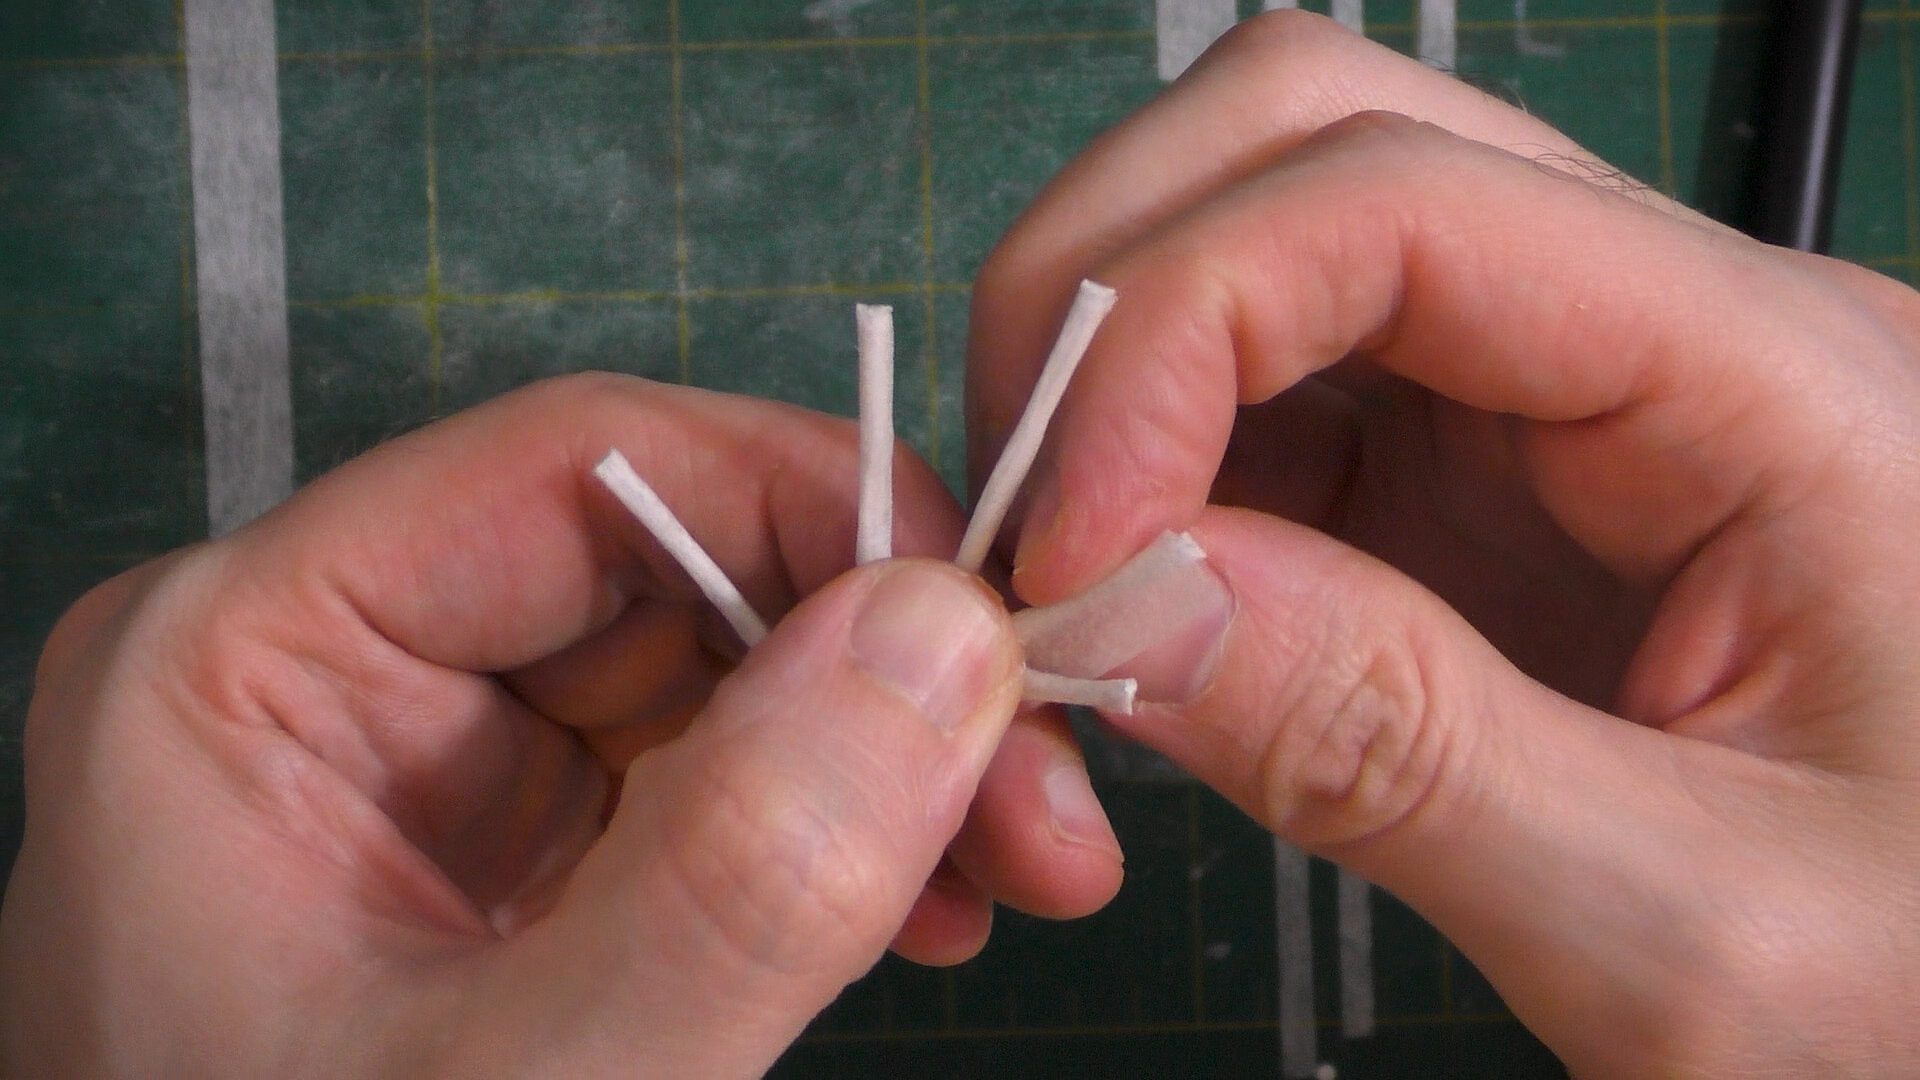
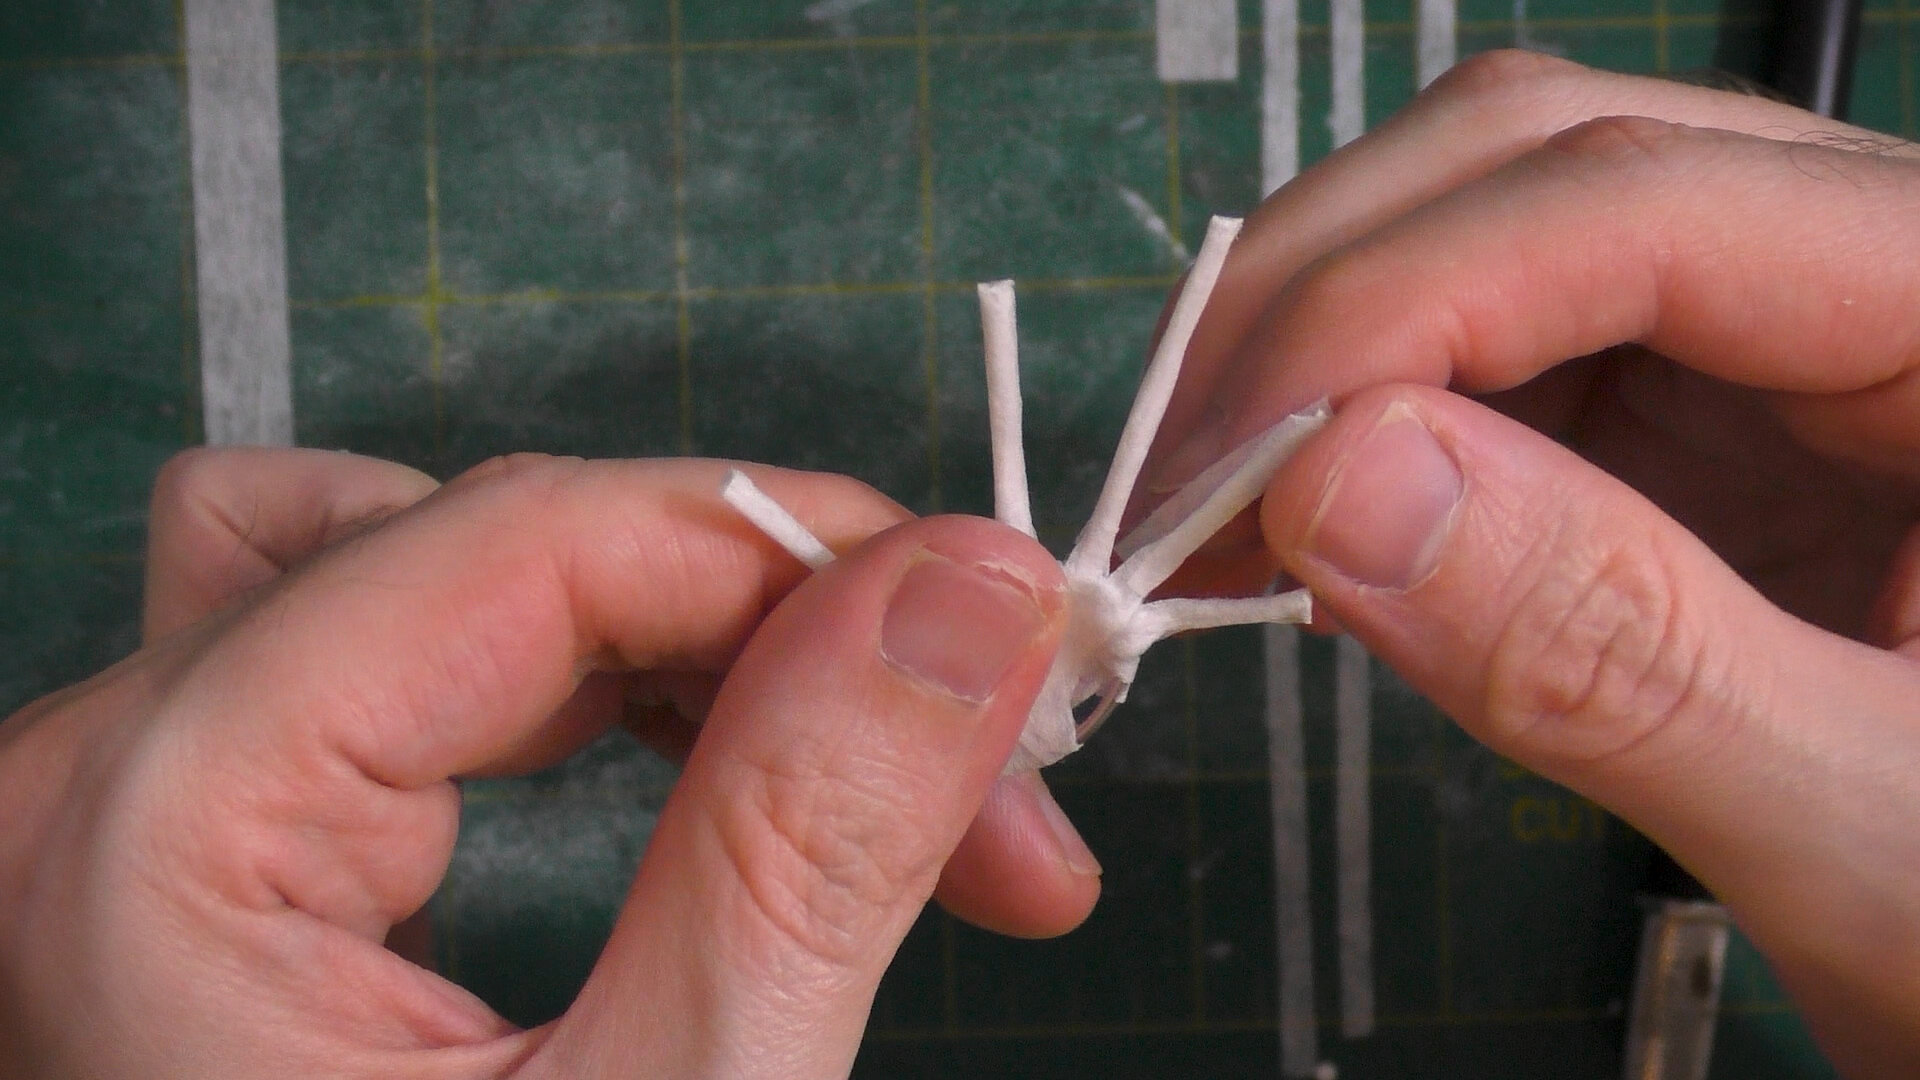
You can adjust the spacing between the fingers, possibly even clamping them down with your pliers. Once that’s done cut thin strips of paper tape, and place them such that about the middle of it goes across the hand wire and each strip is going between our fingers. This will help keep your finger wires in place and you can take the wire-cutters and cut in between the connected finger wire pieces. You can take a sharpie marker and mark-off how long you’d like each finger to measure then cut them down to size.

This is our first layer of paper tape- it looks pretty rough, but it’ll come together in the end

This is our first layer of paper tape- it looks pretty rough, but it’ll come together in the end

 
Wrapping paper tape around each finger

Wrapping paper tape around each finger

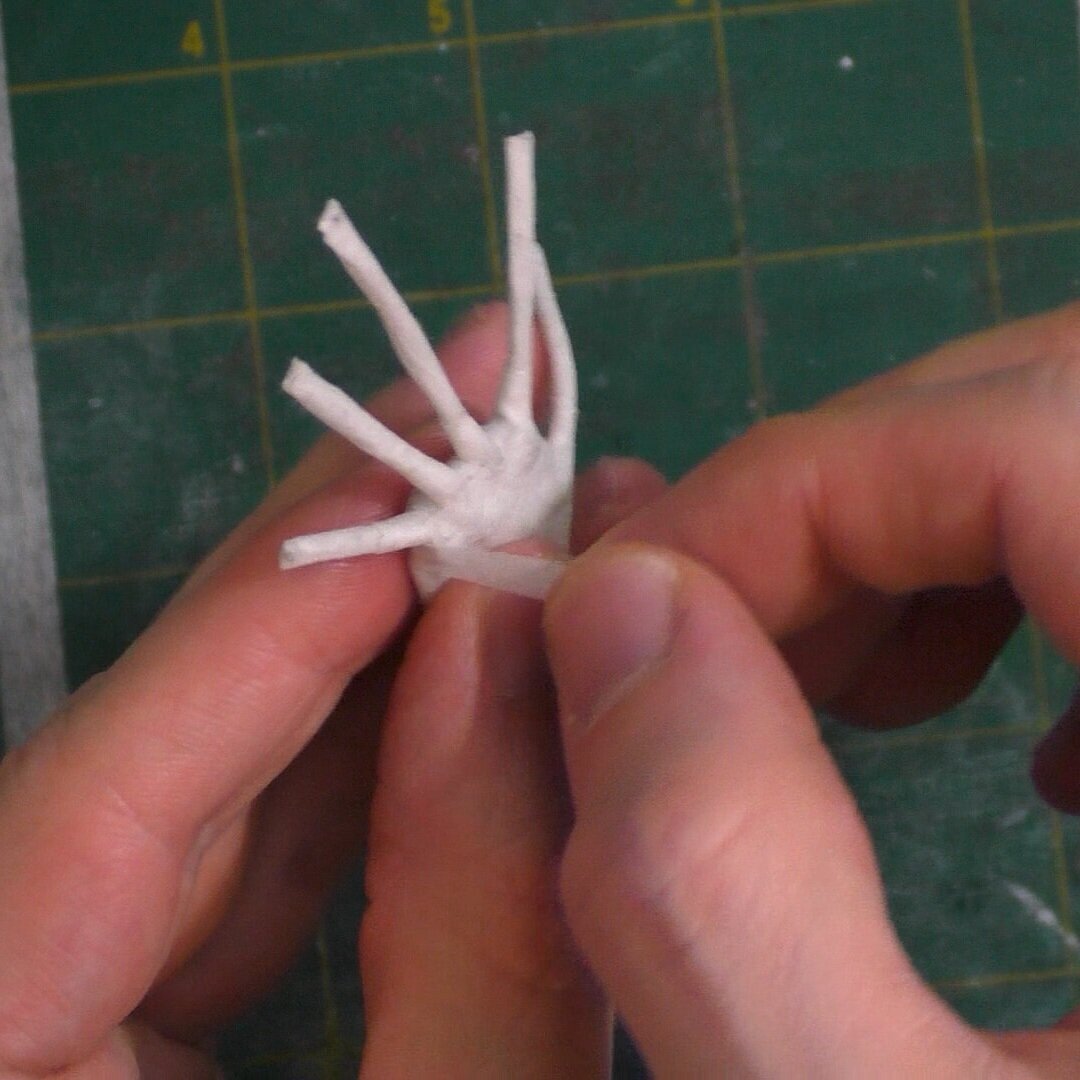
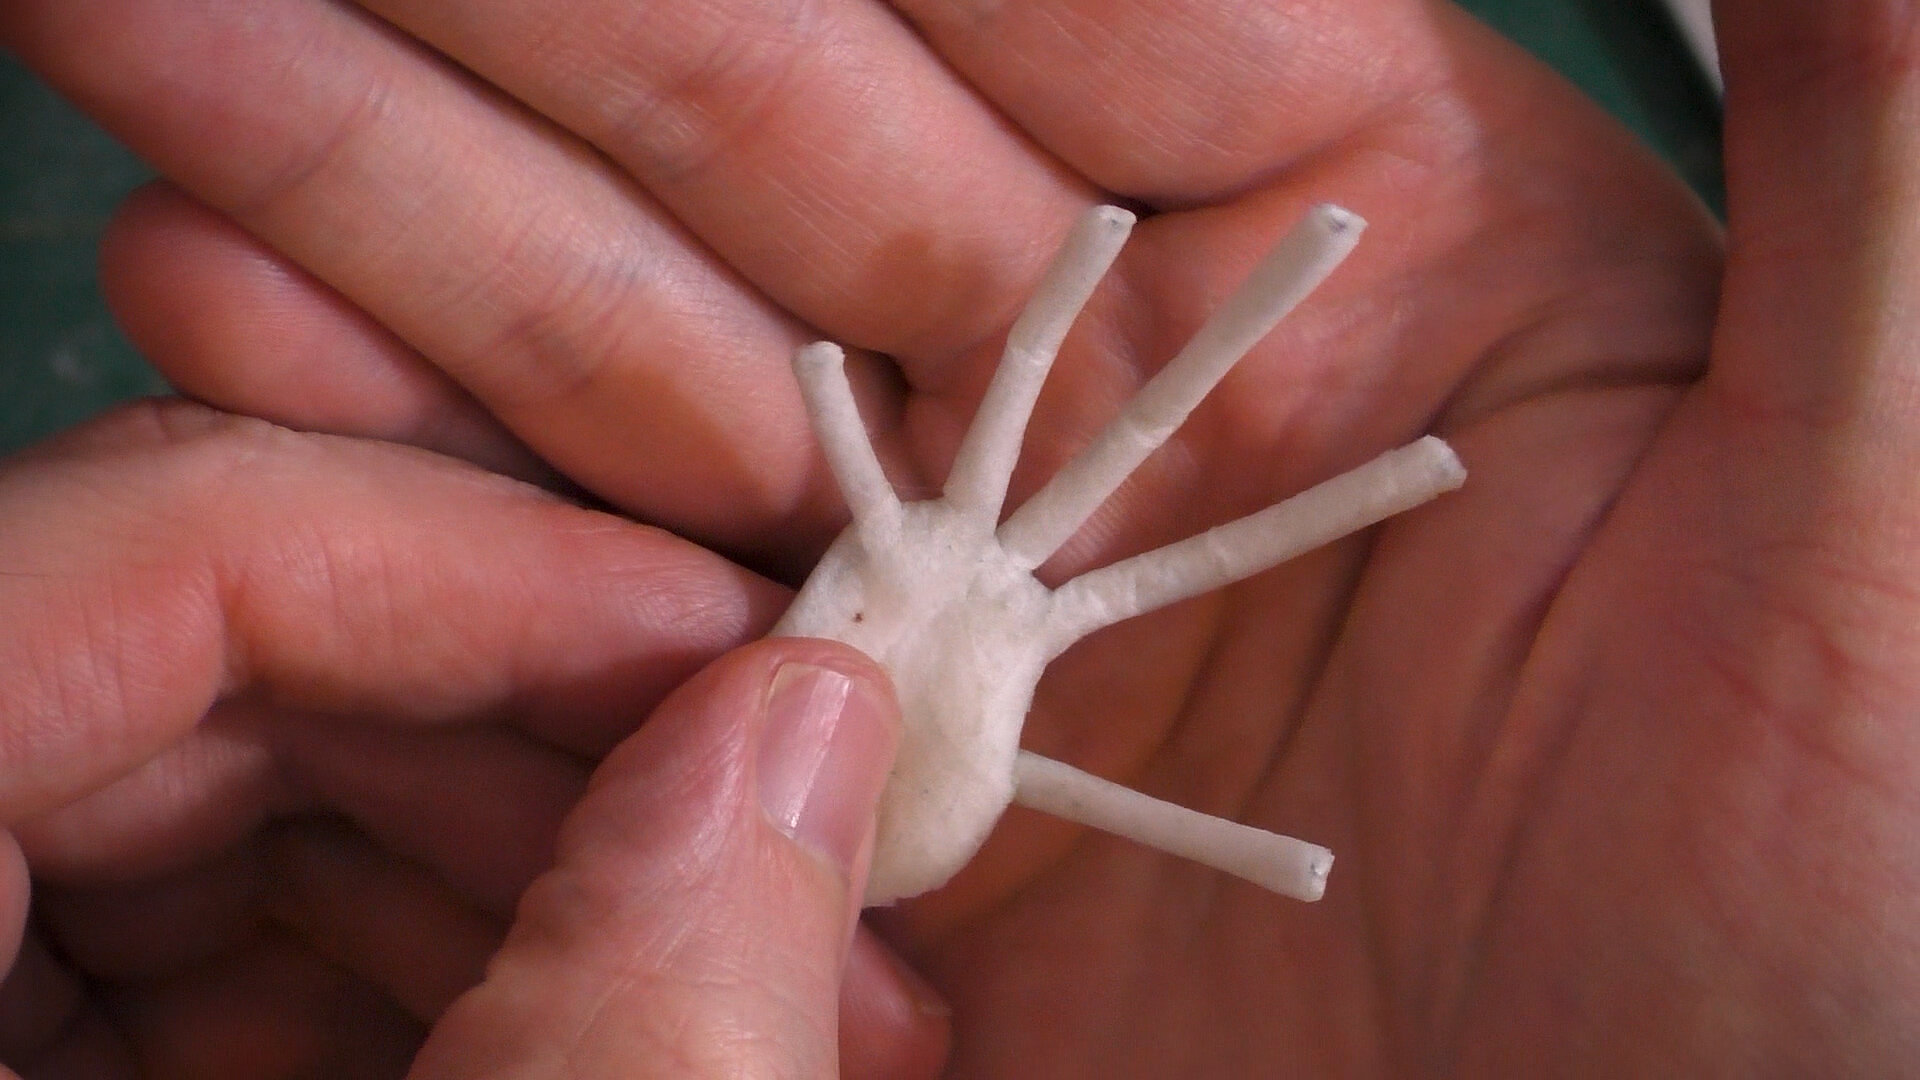
Next you will wrap strips of paper tape, that are a little longer than twice as long as the finger, over each finger’s wire, smoothing it over one side and then having the paper tape overlap itself, wrapping around. You’ll typically do two layers on each finger in this manner.


As you place strips, follow the contours of the hand

As you place strips, follow the contours of the hand

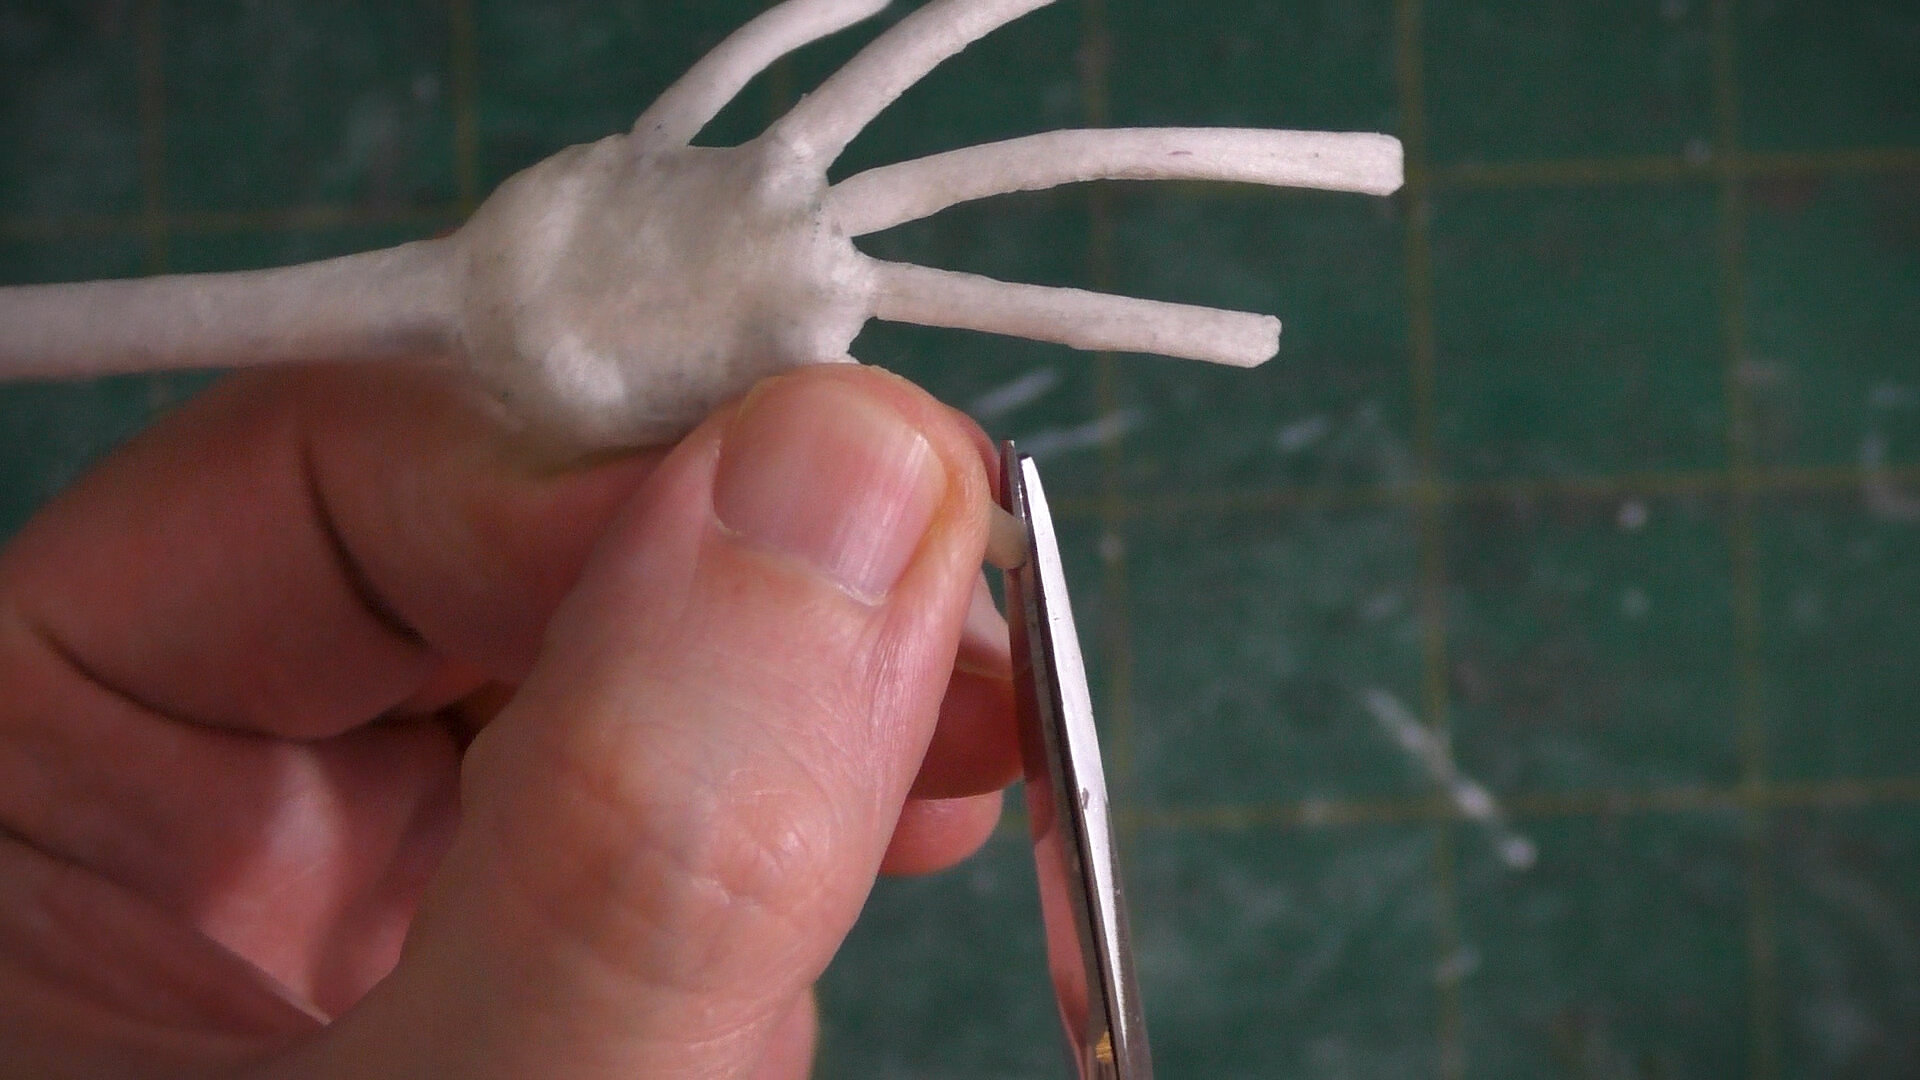
Using thicker strips of medical paper tape, you’ll cover-over parts of the palm, usually folding over the wire at it’s mid-point. It’s going to begin to cover over the hand and also cover the tape from in-between the fingers and also the paper that coats the fingers. You want the paper tape to go where it wants to go, it may not form a mirror image of itself as it folds around the contours of the hand.

After you’ve a base layer of paper tape covering the hand armature wire, you can wrap pieces of tape around each finger. These paper tape pieces should be just a little shorter than the length of the fingers and about one and half times to twice as wide as the width of each finger.


You can bulk-out the muscles that comes from the thumb and pinky on the palm by placing strips that go across the length and width of these areas. At this point, you can also wrap a piece of paper tape that’s almost as long as the aluminum tubing and overlaps pieces covering the hand wire.

Next you’ll use as broad of pieces of tape on the hand as will comfortably fit- the wider the pieces, the less seams will be apparent on the hand. As you start to get a hand shape that you like, you can place a long strip that you might taper on the hand that will then wrap around the aluminum tubing and then you can wind another piece of tape around the tubing.

Wrapping a larger strip around the aluminum tubing

Wrapping a larger strip around the aluminum tubing


Painting a flesh tone on an art doll hand

Painting a flesh tone on an art doll hand

“…Paint your art doll’s hands at the same time you’re painting other areas of it’s flesh so that you won’t have to try and color match it’s skin tones later.”


ModPodgePic.jpg

Other than patching areas that might need more tape, the poseable art doll hands are constructed. You can now apply heavily water diluted Mod Podge and let the hands dry. At this point you can trim the finger tips as they will have a blunt and malformed appearance. You want to trim a little bit of the paper tape material at a time. Once this is done, you can also patch any areas of the hand that look like they need it. You’ll apply a coat of less diluted Mod Podge, let that dry, and then you might mix-up a base coat tone with some Mod Podge and water that will serve as an under painting for whatever flesh tone you want for your art doll. The under painting color should be one that if the flesh tone paint was thinly applied over it and it showed through, it would add rather than detract from the piece. One tip I can give you is to paint your art doll’s hands at the same time you’re painting other areas of it’s flesh so that you won’t have to try and color match it’s skin tones later.


Thanks so much for stopping by. If you’ve read this post and watched the YouTube video, but still have questions, be sure to comment them below and I’ll do my best to field it. If you use this technique, tag me on social media so that I can see what you’ve made. You can find me on these platforms:

Prints of my art are available through my online store.

You can find my process videos by subscribing to The Dream Syndicate Arts here for more fantasy art doll polymer clay sculpture videos: https://www.youtube.com/channel/UCFMoEW3xC740tWfQNSixs_Q

Until next time: Make. Believe.

𝐌𝐚𝐤𝐢𝐧𝐠 𝐭𝐡𝐞 𝐈𝐦𝐚𝐠𝐢𝐧𝐚𝐫𝐲 𝐚 𝐑𝐞𝐚𝐥𝐢𝐭𝐲 | 𝐒𝐮𝐩𝐞𝐫 𝐏𝐚𝐭𝐫𝐨𝐧 𝐆𝐫𝐚𝐧𝐭 𝐀𝐩𝐩𝐥𝐢𝐜𝐚𝐭𝐢𝐨𝐧

𝐌𝐚𝐤𝐢𝐧𝐠 𝐭𝐡𝐞 𝐈𝐦𝐚𝐠𝐢𝐧𝐚𝐫𝐲 𝐚 𝐑𝐞𝐚𝐥𝐢𝐭𝐲 | 𝐒𝐮𝐩𝐞𝐫 𝐏𝐚𝐭𝐫𝐨𝐧 𝐆𝐫𝐚𝐧𝐭 𝐀𝐩𝐩𝐥𝐢𝐜𝐚𝐭𝐢𝐨𝐧

You can find the Dream Syndicate Art Dolls submission to Jack Conte's first annual Super Patron Endowment Grant. Maker of Poseable Fantasy Art Dolls, Ryan Friant, makes submission to Super Patron Grant.

Read More

𝐌𝐞𝐞𝐭 𝐚 𝐃𝐡𝐚𝐫𝐤𝐥𝐢𝐧𝐠 | 𝐂𝐫𝐚𝐟𝐭𝐢𝐧𝐠 𝐚 𝐃𝐚𝐫𝐤 𝐅𝐚𝐞𝐫𝐢𝐞 𝐂𝐫𝐞𝐚𝐭𝐮𝐫𝐞 𝐰𝐢𝐭𝐡 𝐏𝐨𝐥𝐲𝐦𝐞𝐫 𝐂𝐥𝐚𝐲 𝐅𝐚𝐧𝐭𝐚𝐬𝐲 𝐀𝐫𝐭 𝐃𝐨𝐥𝐥

Meet the latest addition to the world I’m building, a dharkling. These dark faerie creatures are more your spooky fae spirits of old, along the lines of being strictly on the malicious side. Their wicked blades stab at dreams and they’ve certainly been known to carry out the abduction or two. But we shouldn’t hold it against them too much, it’s in their nature.


Watch the Crafting a Dark Faerie Creature with Polymer Clay


I played around with the design for this fantasy art doll in my sketchbook and I imagine them as a sort of race of dark faerie creatures. They might vary a bit and height and proportions, but they all have a similar look about them and even wear the same drab clothes. The dark upper part of the head was inspired by one of my favorite fantasy artists growing-up, Brom, though I hope I added enough of a twist with giving it a sort of dripping look. I also enjoyed this idea of the hair being these wispy tendrils that constantly languidly drift behind them. I imagine them having this unchanging neutral expression on their faces and they may not even speak at all. One element that I’m thrilled about is his dagger. I often end-up with a sharps container that little by little gets full of X-acto blades that I’ll have to eventually have to dispose of… but I figured I could make them the blades of tiny daggers, so now I can upcycle them into mini weaponry!


crafting a dark faerie creature with polymer clay fantasy art doll


Darklings are said to be comprised of malignant shadows and spiteful dust. They are the Sleeping Emperor’s knives of the eventide. Though others might speculate that their under the sway of the nefarious and secretive Dream Syndicate. With their hateful blades they come and cut away at your dreams if they live you living at all. They come stepping out of shadows and are gone in a whisper. Their faces the most unnerving of all as they gaze at you with a soulless, remorseless visage. Be wary traveler of the shadow that looks as though it is following you!


Shadows Wake

Shadows bide and shadows lied

Shadows lurk and shadows slink

Shadows stride and shadows hide

Shadows trick and shadows prick

Shadows take and shadows wake

-Efraen Children’s Rhyme

Prints of “Dharkling” are available here:

Open edition printhttps://www.inprnt.com/gallery/thedreamsyndicate/dharkling-dark-faerie/


Thanks for joining me so far and here’s to the adventures we have in future! To be the first to know when I launch new polymer clay art videos, be sure to subscribe to my YouTube channel and hit the bell icon. Catch all of my videos here: https://www.youtube.com/thedreamsyndicatearts. You can also find many of the supplies I use in crafting here: https://www.thedreamsyndarts.com/supplies-gear/. And sign-up for my newsletter (in the sidebar) to get the latest studio goings-on! Thanks so much for joining me on this journey and until next time: Make. Believe!

"𝐑𝐄𝐀𝐂𝐇𝐈𝐍𝐆" | 𝐏𝐨𝐥𝐲𝐦𝐞𝐫 𝐂𝐥𝐚𝐲 𝐅𝐚𝐧𝐭𝐚𝐬𝐲 𝐀𝐫𝐭 𝐃𝐨𝐥𝐥 𝐈𝐥𝐥𝐮𝐬𝐭𝐫𝐚𝐭𝐢𝐨𝐧

goblin art doll

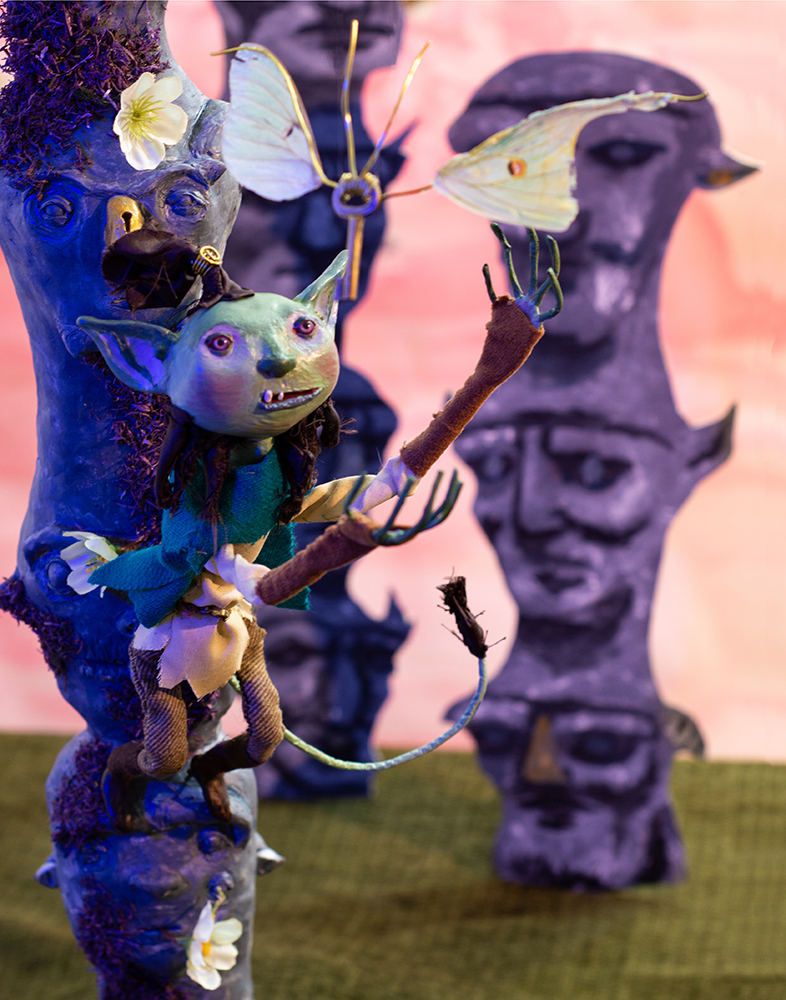
I’m not sure what my latest polymer clay fantasy art doll Drust is… I think of him as some sort of goblin I suppose. If you asked Drust, I don’t know what he would tell you he is either. I imagine him to be adventurous and likely mischievous at times. One day in his boredom, a wayfly happened by and Drust couldn’t help but chase it!

In the scene captured in “Reaching”, I imagine that Drust has scaled a column of face vaults, statues with secrets of the ages locked away within, and finds his wayfly quarry just out of his grasp! Will he catch it or will it slip through his spindly little fingers?

A wayfly is a winged-key found in the wilds of the Dream Syndicate. Found individually, in pairs, or flying in flocks, wayflies often are found near ancient ruins or in catacombs. Capturing a wayfly takes guile, but the real clever feat is to determ…

A wayfly is a winged-key found in the wilds of the Dream Syndicate. Found individually, in pairs, or flying in flocks, wayflies often are found near ancient ruins or in catacombs. Capturing a wayfly takes guile, but the real clever feat is to determine which lock a given wayfly calls home.


Watch the process of how the poseable goblin art doll Drust was crafted

poseable goblyn artdoll

Prints of “Reaching” are available through my store here:

Limited Edition of 25 Print: https://www.thedreamsyndarts.com/thedreamsyndstore/reaching18x24print

Open Edition: https://www.thedreamsyndarts.com/thedreamsyndstore/reaching11x14print


Watch Details Being Added to the Face Vaults Polymer Clay Sculptures


Check-out a Winged Key Fantasy Stop-Motion Animation

Thanks for joining me so far and here’s to the adventures we have in future! To be the first to know when I launch new polymer clay art videos, be sure to subscribe to my YouTube channel and hit the bell icon. Catch all of my videos here:  https://www.youtube.com/thedreamsyndicatearts. You can also find many of the supplies I use in crafting here: https://www.thedreamsyndarts.com/supplies-gear/. And sign-up for my newsletter (in the sidebar) to get the latest studio goings-on! Thanks so much for joining me on this journey and until next time: Make. Believe!

𝐎𝐝𝐞 𝐭𝐨 𝐎𝐛𝐬𝐞𝐬𝐬𝐢𝐨𝐧: 𝐀 𝐂𝐚𝐩𝐭𝐚𝐢𝐧 𝐀𝐡𝐚𝐛 𝐏𝐨𝐫𝐭𝐫𝐚𝐢𝐭 | 𝐌𝐨𝐛𝐲 𝐃𝐢𝐜𝐤 𝐀𝐫𝐭 𝐃𝐨𝐥𝐥

I’ve had a fair number of sketches similar to the image I created for my Captain Ahab piece, “Ode to Obsession”, for years. I’ve been intending to make a Captain Ahab portrait and actually read Herman Melville’s “Moby Dick” for years. Recently I’ve finally read the book and crafted a Moby Dick inspired art doll, but it’s telling that I was able to make an image that gets the theme of Moby Dick and Ahab’s disastrous pursuit of the white whale across without ever having read the book- most of us know this story without having ever read it! That’s the power of Melville’s Captain Ahab: he is THE archetype of when passion and drive crosses-over into self-destructive obsession and ruin. He’s transcended the pages of the novel and become the cliche, the shorthand of the thing he represents.


Watch the Captain Ahab Art Doll Being Crafted


Designing a Moby Dick Art Doll

When creating the Moby Dick art doll, Melville describes Capt. Ahab, aside from his iconic whalebone peg leg, as having a scorched face, grey hair, and a scar that runs the length of his face and body, which I wanted to capture in my interpretation. I’ve seen other interpretations of Ahab that make him look hardy and vigorous, but when I imagine him, I always see him as this hard-angled, hollowed-out sinewy character. I really liked this idea of Ahab solemnly looking out and being tangled-up in his harpoon line and though it’s kind of subtle, he has a noose cast about his neck, foretelling the doom that he seeks and the prophesy of hempen rope being his end.

Captain Ahab art doll sketch


St. Ahab: Patron Saint of Creatives

I find myself thinking of Ahab as a patron saint of creatives or anyone that has a passion, a drive for what they do but the path is unclear and even perilous. Many artists find themselves making emotional, relationship, and financial sacrifices to chase that white whale of earning a livelihood doing the things that they love. And since we don’t only have an effect on our own life, we impact the live’s of those around us, the pull of our creative pursuits could also take a toll on our loved-ones as surely as it did Ahab’s crew. The ups and downs of a creative life can be harrowing and it’s often trying to even know if you’re heading toward your white whale or if the risks and the inner turmoil will pan-out and be worth it in the end. The only thing you know for certain’s as scary as all of this has been, is, and will be, looking back and regretting not even attempting the pursuit would’ve been infinitely worse.


I do want to pull this back from the bleakness a bit and say that we right now live in the best times to try to be a creative! The fact that you can attempt to put your art in front of thousands of people across social media and various websites, the only thing it costs you is time, and find-out if anyone cares- that’s such an opportunity that all of us creators shouldn’t take for granted. This opportunity simply wasn’t there for creators that were trying to put themselves on their career path and previously only a few people at publishing companies were the ones to decide whether your art was “good enough”. Now if you figure-out how to market your work and amass only a few thousand dedicated fans that you work’s for them, you can have a sustainable career and life, just getting there is full of headwinds and crashing waves. And for that I think it’s worth risking the venture!

Prints of “Ode to Obsession” are available through my store here:

  • Limited Edition: https://www.thedreamsyndarts.com/thedreamsyndstore/ode-to-obsession-captain-ahab-portrait

  • Open Edition: https://www.thedreamsyndarts.com/thedreamsyndstore/ode-to-obsession-captain-ahab-portrait-cwas5

Here is the finished Capt. Ahab illustration! If you would like a print, it is available as a Limited Edition and for a limited time, as an Open Edition Print.

Here is the finished Capt. Ahab illustration! If you would like a print, it is available as a Limited Edition and for a limited time, as an Open Edition Print.


Thanks for joining me so far and here’s to the adventures we have in future! To be the first to know when I launch new polymer clay art videos, be sure to subscribe to my YouTube channel and hit the bell icon. Catch all of my videos here:  https://www.youtube.com/thedreamsyndicatearts. You can also find many of the supplies I use in crafting here: https://www.thedreamsyndarts.com/supplies-gear/. And sign-up for my newsletter (in the sidebar) to get the latest studio goings-on! Thanks so much for joining me on this journey and until next time: Make. Believe!

2018 and Beyond!!! A Year in the Life of The Dream Syndicate Arts

2018 and Beyond!!! A Year in the Life of The Dream Syndicate Arts

As I look ahead to this year before me, it begs the question, “what’s next?” I’ve a few pieces that have been lurking in my sketchbook for months, if not years, I want to involve this new audience that’s formed around my art and I’m going to occasionally ask their input on what to make next, and I’ve an idea for a longer form book project that’s probably going to take a couple of years to make the coolest thing I’m able to make at this time.

Read More

𝐌𝐚𝐤𝐢𝐧𝐠 𝐚 𝐍𝐨𝐬𝐟𝐞𝐫𝐚𝐭𝐮 𝐕𝐚𝐦𝐩𝐢𝐫𝐞 𝐀𝐫𝐭 𝐃𝐨𝐥𝐥

I recently wrapped-up making a Nosferatu vampire art doll inspired by the character from the classic film of the same name. I used reference images from the film and also found some inspiration as I did research about the original film, there was one line that stuck with me that described Nosferatu as vermin-like as opposed to the more debonair portrayals of vampire that we’ve had in later media.


One point where my version of Nosferatu diverges from the film version is that the costumers had given him these long, thick eyebrows, which I found to be kind of silly looking, so I eliminated them from the design. Many modern interpretations of Nosferatu omit them, so I can’t be the only one that feels this way.

This is the final illustration that was created with the vampire art doll. If you would like a print, you can get one here.

This is the final illustration that was created with the vampire art doll. If you would like a print, you can get one here.


It was also fascinating to read that Nosferatu was actually an illegitimate Count Dracula. As many people are aware, Bram Stoker wrote “Dracula” and when he passed his widow, Florence Balcombe, had authority over his works and didn’t authorize a film adaptation of the novel. This didn’t prevent the creators of Nosferatu from going so far as to advertise Nosferatu as adapted from Stoker’s Dracula!

I hope you enjoyed seeing this lurking terror come together! To be the first to know when I launch new polymer clay art videos, be sure to subscribe to my YouTube channel and hit the bell icon (but because YouTube's wonky, you can also join the newsletter). Catch all of my videos here:  https://www.youtube.com/thedreamsyndicatearts. You can also find many of the supplies I use in crafting here: https://www.thedreamsyndarts.com/supplies-gear/. Until next time, make believe!


𝐒𝐢𝐦𝐩𝐥𝐞 𝐃𝐈𝐘 𝐂𝐥𝐚𝐲 𝐂𝐫𝐨𝐰 | 𝐌𝐚𝐤𝐢𝐧𝐠 𝐚 𝐏𝐨𝐥𝐲𝐦𝐞𝐫 𝐂𝐥𝐚𝐲 𝐁𝐢𝐫𝐝

𝐒𝐢𝐦𝐩𝐥𝐞 𝐃𝐈𝐘 𝐂𝐥𝐚𝐲 𝐂𝐫𝐨𝐰 | 𝐌𝐚𝐤𝐢𝐧𝐠 𝐚 𝐏𝐨𝐥𝐲𝐦𝐞𝐫 𝐂𝐥𝐚𝐲 𝐁𝐢𝐫𝐝

In the final installment for making the Jack O’-Lantern illustration, I’ve a tutorial for making a DIY clay crow. He’s really simply made with just forming a clay shape over some aluminum foil, using some armature wire, acrylic paint, and feathers (I’m quite pleased with my use of feathers on this!). You could use this simple technique in making a polymer clay bird of whatever type you like, just modify the shapes slightly and paint colors and patterns that match your favorite bird.

Read More

𝐁𝐮𝐢𝐥𝐝𝐢𝐧𝐠 𝐚 𝐇𝐚𝐥𝐥𝐨𝐰𝐞𝐞𝐧 𝐉𝐚𝐜𝐤 𝐎 𝐋𝐚𝐧𝐭𝐞𝐫𝐧 𝐀𝐫𝐭 𝐃𝐨𝐥𝐥 🎃

In continuation of building a Halloween Jack O’ Lantern art doll, I’ll be making Jack’s body and clothes (because it’s simply indecent to have a nude Jack O’ Lantern running around!). I wanted this character have something of a folk-art look to him, so I chose to give him twigs for hands which have the added effect of looking rather creepy- and that’s a good thing.

Watch Building a Halloween Jack O’ Lantern Art Doll 🎃


This character’s body, like many of my art dolls, is built from aluminum armature wire with a chest and pelvic block made of plumber’s epoxy and that is covered with upholstery foam. Once the character’s built, I move on to hand-sewing clothes on to the art doll. I take measurements from the character and simply draw this on to my fabric, cut it out, and sew it on to the figure, making adjustments as I go.


This Halloween character was built to create this illustration, which was photographed in a hand-made set and is available as a print:

Jack and his fellow pumpkin-sprite friends are looking forward to that time of year when they can roam the mortal world once again! You can purchase a print from Etsy here as well as the original sculpture here.

Jack and his fellow pumpkin-sprite friends are looking forward to that time of year when they can roam the mortal world once again! You can purchase a print from Etsy here as well as the original sculpture here.

If you missed how the halloween art doll’s head was sculpted, you can read my post about it here.

We’re not quite done visiting Jack O’ Lantern’s world as I’ve one more crafting tutorial to show with you! In the next video, I’ll show you how the crow on the fence was made! To be the first to know when I launch new polymer clay art videos, be sure to subscribe to my YouTube channel and hit the bell icon.

Catch all of my videos here:  https://www.youtube.com/thedreamsyndicatearts. You can also find many of the supplies I use in crafting here:  https://www.thedreamsyndarts.com/supplies-gear/.

And sign-up for my newsletter to get the latest studio goings-on! Thanks so much for joining me on this journey and until next time: Make. Believe!

𝐌𝐚𝐤𝐢𝐧𝐠 𝐚 𝐇𝐚𝐥𝐥𝐨𝐰𝐞𝐞𝐧 𝐉𝐚𝐜𝐤 𝐎' 𝐋𝐚𝐧𝐭𝐞𝐫𝐧 𝐀𝐫𝐭 𝐃𝐨𝐥𝐥 𝐇𝐞𝐚𝐝 𝐒𝐜𝐮𝐥𝐩𝐭 🎃

In my latest project, I’m making a Jack O’ Lantern art doll. This character probably has the largest head out of any art doll I’ve previously built in proportion to his body, but I found using a large wad of tin-foil to do the trick all the same. In making this Jack O’ Lantern head sculpt, I spent plenty of time looking at reference online, looking various interpretations of Jack O’ Lantern characters and photographs of real Jack O’ Lanterns people carve for Halloween.


Making a Halloween Jack O Lantern Art Doll Head Sculpt 🎃


The design of a Jack O’ Lantern character’s pretty simple, it’s just a round or oval shape with a stem and a central seam at the top and bottom of the form, though since I created a human-like figure, the neck overs much of the bottom of the pumpkin. I love art and objects with surface texture, so I really enjoyed adding the variations of the pumpkin rind on the art doll head sculpt and later the way the sepia ink wash was able to pick-up these little indentations.

Here I’m roughing out the spherical shape of the Jack O’ Lantern’s head sculpt

Here I’m roughing out the spherical shape of the Jack O’ Lantern’s head sculpt


Giving this lil Jack O’ Lantern doll a smile

Giving this lil Jack O’ Lantern doll a smile


Continuing with this series, I’ll show you how I built this little Halloween Jack O’ Lanterns body as well as how as I made a crow that appears in the background of the finished dimensional-illustration. To be the first to know when I launch new polymer clay art videos, be sure to subscribe to my YouTube channel and hit the bell icon. Catch all of my videos here:  https://www.youtube.com/thedreamsyndicatearts. You can also find many of the supplies I use in crafting here: https://www.thedreamsyndarts.com/supplies-gear/. And sign-up for my newsletter to get the latest studio goings-on! Thanks so much for joining me on this journey and until next time: Make. Believe!


Around his mouth got a lil bubbly and warped, but I actually think it added to this piece

Around his mouth got a lil bubbly and warped, but I actually think it added to this piece

Making Slimy Slug Art Dolls with Resin Slime 🐌

Today we'll be embellishing wooden display bases as we make slimy slug art dolls with resin slime! I'd previously sculpted these polymer clay slug art dolls with super sculpey over aluminum foil armatures, made these handsome display bases, and only recently had the idea of "slug trail" trailing behind them as if the slugs (slowly) made their way up on to the base.


WATCH MAKING SLIMY SLUG ART DOLLS WITH RESIN SLIME 🐌


I'd already given the slugs a thin coating of two part epoxy resin to give the sculpey art dolls a wet sheen look and I used the material again to make the slimy path for the little critters. Since I've had these particular opened bottles of epoxy resin for a few years, this was a great way to use the older materials rather than wasting them. 


SlugsArtDolls1.jpg

Slimy Slug Sculptures

These slug sculptures can slime their way to your home & heart.


To be the first to know when I launch new polymer clay art videos, be sure to subscribe to my YouTube channel and hit the bell icon. Catch all of my videos here:  https://www.youtube.com/thedreamsyndicatearts. You can also find many of the supplies I use in crafting here: https://www.thedreamsyndarts.com/supplies-gear/. And sign-up for my newsletter to get the latest studio goings-on! Thanks so much for joining me on this journey and until next time: Make. Believe!