ooak fantasy art dolls

𝐌𝐫. 𝐑𝐞𝐧𝐝𝐞𝐫 | 𝐒𝐜𝐮𝐥𝐩𝐭𝐢𝐧𝐠 𝐚 𝐓𝐫𝐨𝐥𝐥 𝐇𝐞𝐚𝐝 𝐰𝐢𝐭𝐡 𝐏𝐨𝐥𝐲𝐦𝐞𝐫 𝐂𝐥𝐚𝐲

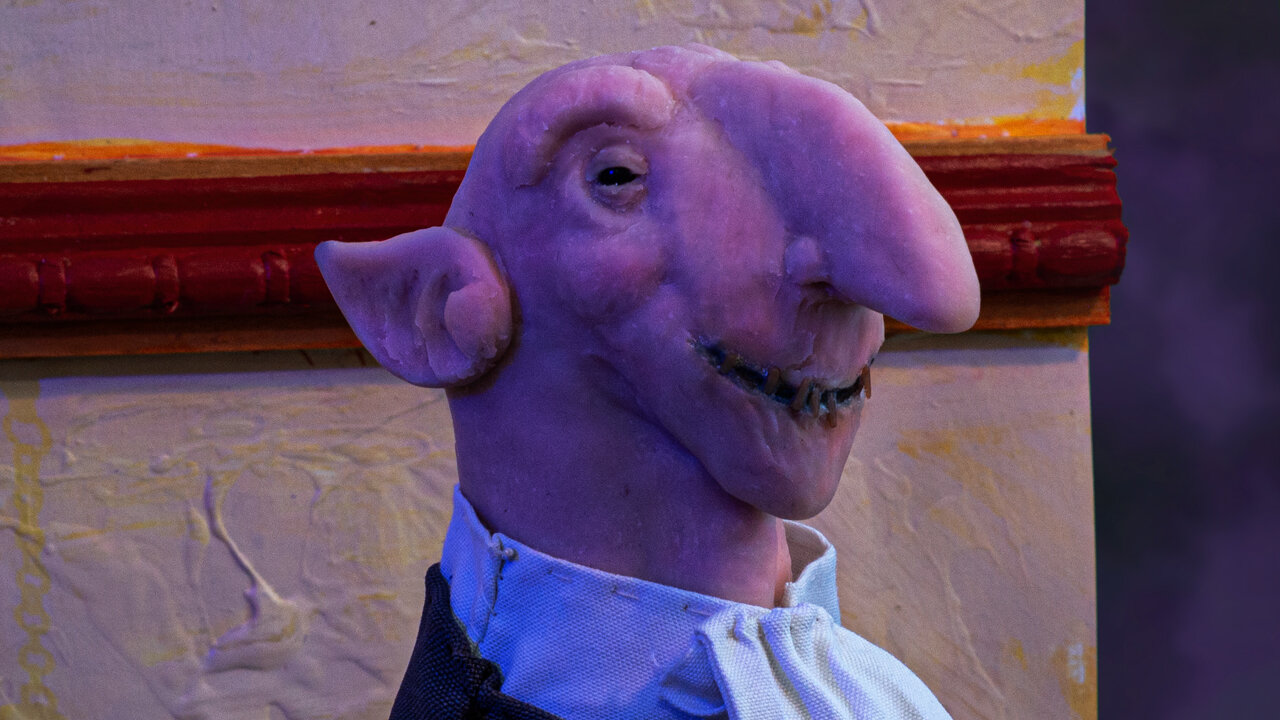
During a recent period of artist block, I was inspired to get up to a bit of sculpting a troll head with polymer clay. Meet Mr. Render, an underworld enforcer troll-like character that I created. I’ve often had a fondness for period gangster film and television like Guy Ritchie’s “Lock, Stock, & Two Smoking Barrels” and “Snatch” as well as “Peaky Blinders”. While I also enjoy American period crime drama, I really enjoy stories of the cockney accented London east enders. The idea for Mr. Render “The Ender” was sparked by such media as well as tough-man turned actor Lenny “The Guv’nor” McLean who was cast as Barry “The Baptist” in Ritchie’s “Lock, Stock”. McLean was not only cast in such roles, but also was something of that in real life in addition to being a champion in illegal bare knuckle boxing. There’s a documentary on him on Amazon Prime called “The Guv’nor” that I’d recently watched.


Watch Mr. Render | Sculpting a Troll Head with Polymer Clay

 
Sketching-out some design ideas for the troll.

Sketching-out some design ideas for the troll.

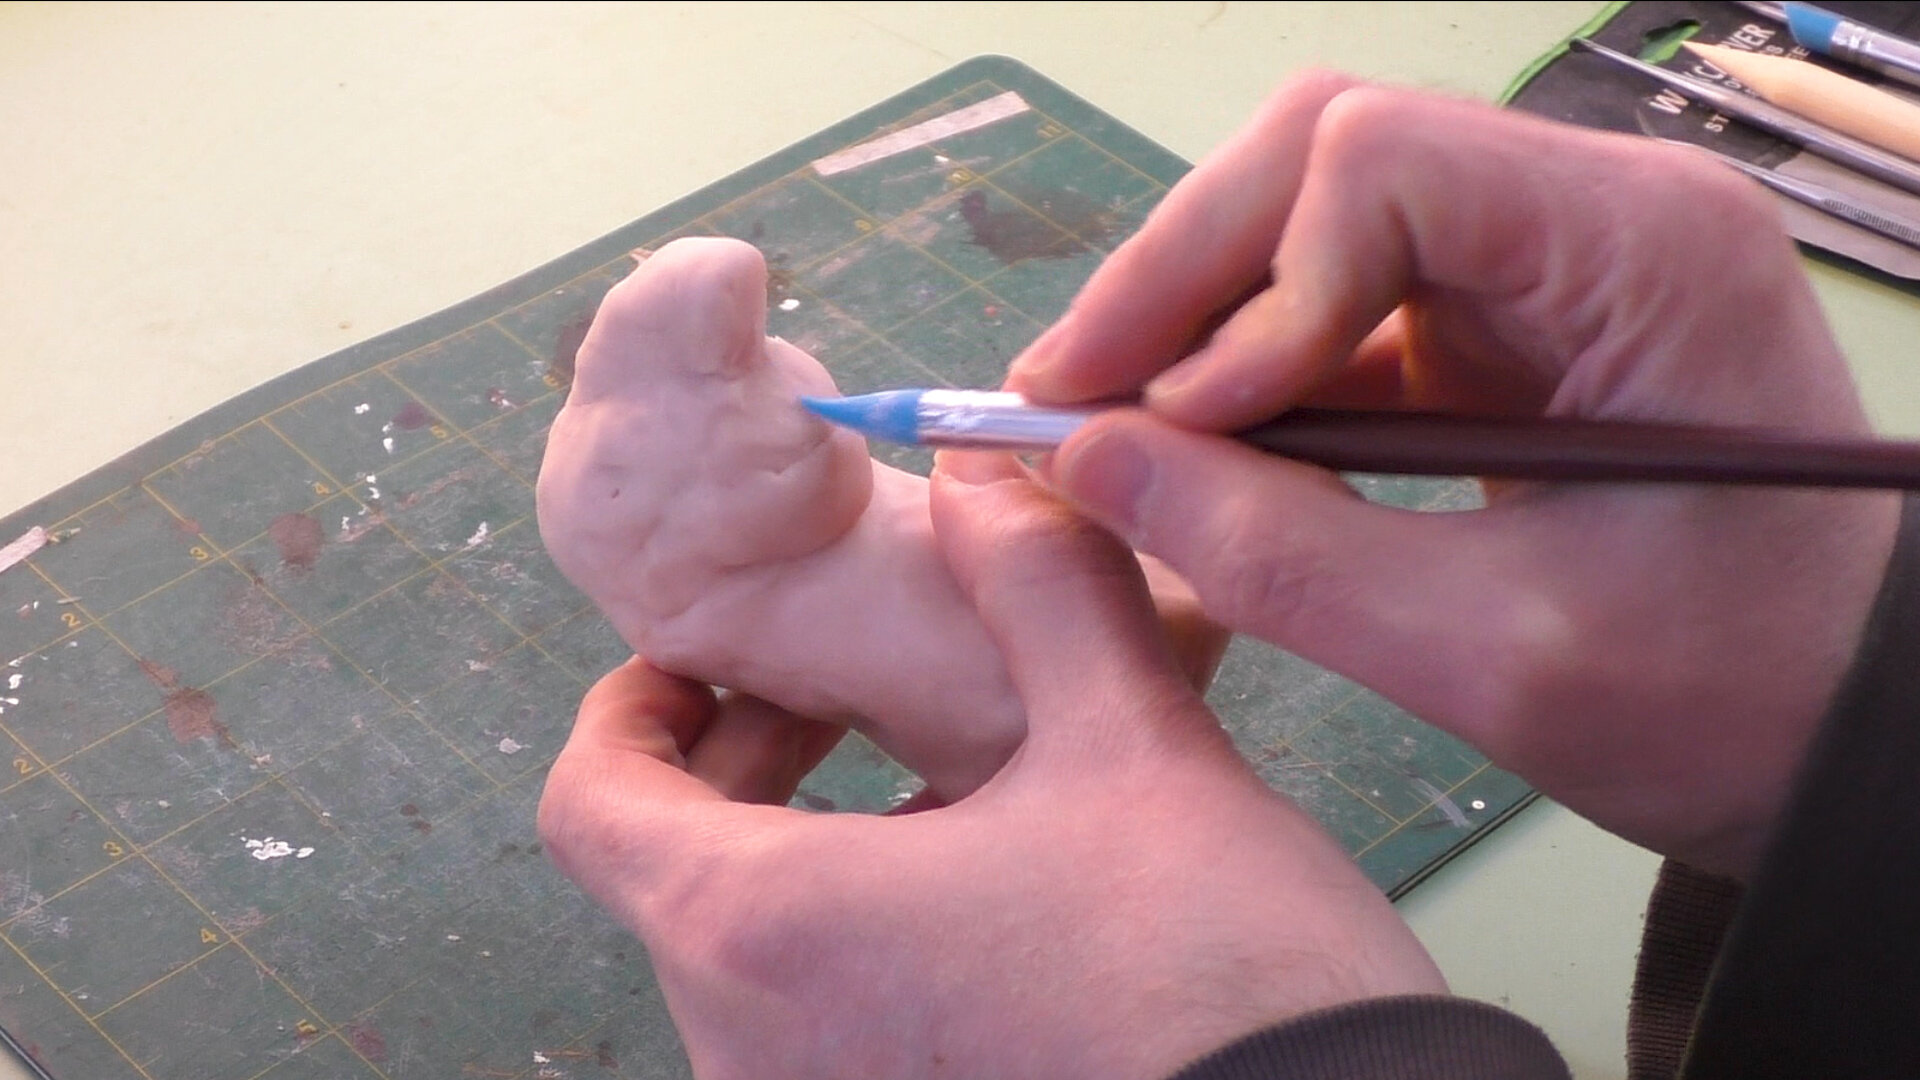
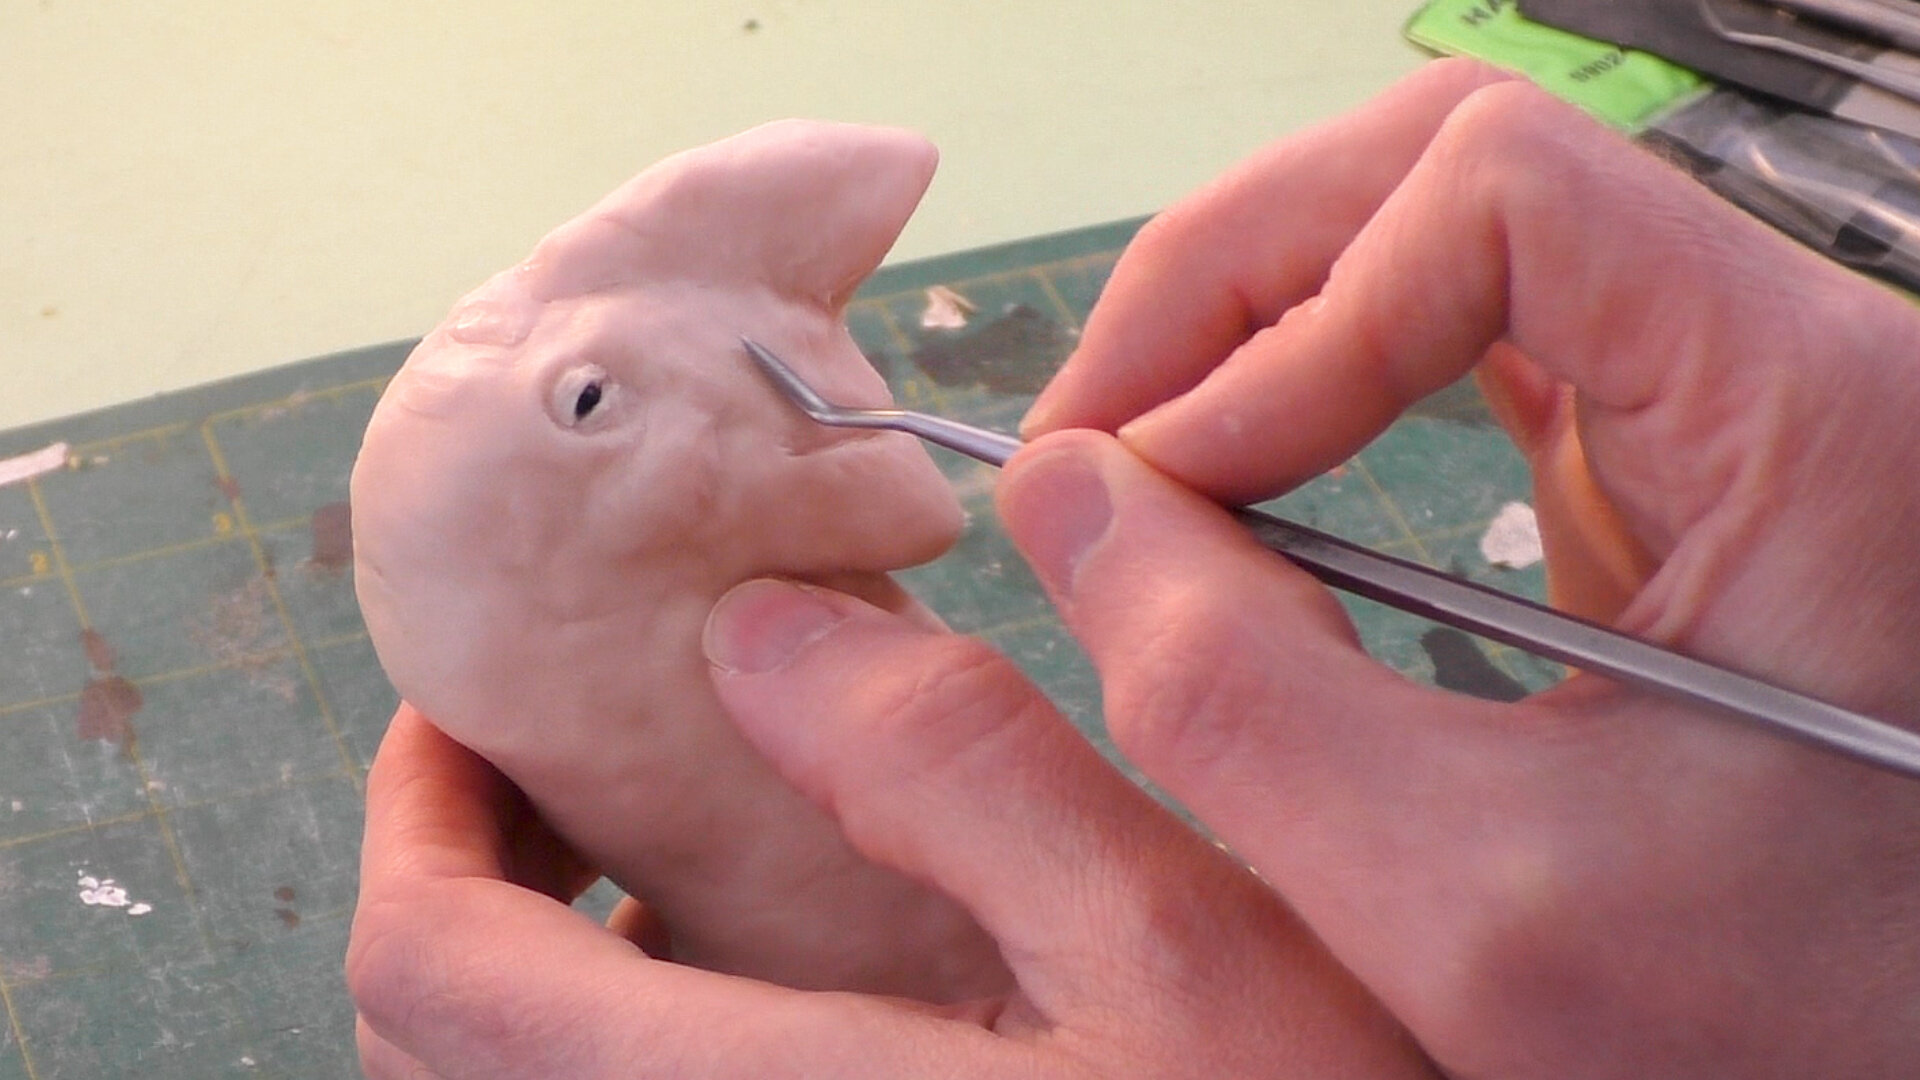
The armature of this troll bust is just some crumpled up tin-foil that I built-up a Sculpey polymer clay form up around. Once the basic shape’s formed it’s then a matter of adding bits of clay here and there and refining the details with clay tools- steel tools, color shapers, and ball styluses as well as my fingers. I wanted to give this creature a very characterful face that recalls the look of the elongated snouts of storybook trolls. I also have a tendency to enjoy depicting characters with large noses and beady eyes (in this case, made from actual beads), which I didn’t fail to deliver on with this sculpt.
One of my favorite costuming references, “Historic Costume in Pictures”

One of my favorite costuming references, “Historic Costume in Pictures”

The sculpture’s only a bust, but I decided I wanted to add some fabric costuming. For that I turned to one of my favorite resources to page through, “Historic Costume in Pictures” for inspiration. Using some white fabric with some added ruffles and a grey fabric, I implied a fashionable gentlemanly suit. I generally find I can accomplish what I want with the simple whip and running stitches, which is great because I’m by no means an amazing tailor. The ruffles were made with some Fabri-Tac seams, accordion folding the pieces (I went over them with an iron to help reinforce the folds), and then using a gathering stitch to attach each progressively shorter layer to the one underneath.

Mr. Render isn’t exactly a troll. In this fantasy world I’ve been building, I kind of see most humanoid creatures as individuals with their own unique characteristics and sometimes abilities. I’m mostly breaking with the fantasy trope of races of creatures that all have X characteristics like elves or goblins or whatever. I think of all of that stuff as a pretty modern conception that’s sort of been ingrained in us through pop culture, genre writing, role-playing games, video games, that sort of stuff, but terms like fairy, elf, spirit, and goblin were used pretty interchangeably throughout mythology and folklore to just refer to some thing not of this world.

 
TrollHead.FinishedBust.jpg

I’m considering the idea of doing a silicone mold and resin casting him and hand sewing on clothes Mr. Rend. For this reason I filled in some gaps in his sharp teeth with some Apoxie Sculpt so they wouldn’t get caught in the silicone while molding. Doing a silicone mold would let me paint different colorations of this creature and I could use different fabrics to create variations. For example, he could be in a simple cloak- maybe with a hood.

Here’s an idea of what the troll bust would look like with a simple cloak.

Here’s an idea of what the troll bust would look like with a simple cloak.

 
TrollHead.BustIdea.jpg

Thanks for joining me so far and here’s to the adventures we have in future! To be the first to know when I launch new polymer clay art videos, be sure to subscribe to my YouTube channel and hit the bell icon. Catch all of my videos here: https://www.youtube.com/thedreamsyndicatearts. You can also find many of the supplies I use in crafting here: https://www.thedreamsyndarts.com/supplies-gear/. And sign-up for my newsletter (in the sidebar) to get the latest studio goings-on! Thanks so much for joining me on this journey and until next time: Make. Believe!

Want to be the first to know about new happenings in the Dream Syndicate? Sign-up for my newsletter below!
𝐌𝐚𝐧𝐢𝐟𝐞𝐬𝐭 𝐋𝐚𝐥𝐨𝐫𝐚 𝐚 𝐏𝐨𝐬𝐞𝐚𝐛𝐥𝐞 𝐖𝐢𝐳𝐚𝐫𝐝 𝐅𝐚𝐧𝐭𝐚𝐬𝐲 𝐀𝐫𝐭 𝐃𝐨𝐥𝐥 | 𝐓𝐢𝐦𝐞𝐥𝐚𝐩𝐬𝐞 𝐌𝐢𝐱𝐞𝐝-𝐌𝐞𝐝𝐢𝐚 𝐀𝐫𝐭 𝐃𝐨𝐥𝐥 𝐓𝐮𝐭𝐨𝐫𝐢𝐚𝐥

𝐌𝐚𝐧𝐢𝐟𝐞𝐬𝐭 𝐋𝐚𝐥𝐨𝐫𝐚 𝐚 𝐏𝐨𝐬𝐞𝐚𝐛𝐥𝐞 𝐖𝐢𝐳𝐚𝐫𝐝 𝐅𝐚𝐧𝐭𝐚𝐬𝐲 𝐀𝐫𝐭 𝐃𝐨𝐥𝐥 | 𝐓𝐢𝐦𝐞𝐥𝐚𝐩𝐬𝐞 𝐌𝐢𝐱𝐞𝐝-𝐌𝐞𝐝𝐢𝐚 𝐀𝐫𝐭 𝐃𝐨𝐥𝐥 𝐓𝐮𝐭𝐨𝐫𝐢𝐚𝐥

I recently wrapped-up making a piece called “Manifest Garden” that featured a poseable wizard art doll as the main character. The fantasy art doll, who I named Manifest Lalora, is crafted in my usual mixed-media process and there’s a fairly extensive timelapse tutorial if you would like to see how she was made. The Manifest wield the power to shape and manipulate reality in the fantasy world that I’ve been tinkering away on.

Read More

𝐌𝐞𝐞𝐭 𝐚 𝐃𝐡𝐚𝐫𝐤𝐥𝐢𝐧𝐠 | 𝐂𝐫𝐚𝐟𝐭𝐢𝐧𝐠 𝐚 𝐃𝐚𝐫𝐤 𝐅𝐚𝐞𝐫𝐢𝐞 𝐂𝐫𝐞𝐚𝐭𝐮𝐫𝐞 𝐰𝐢𝐭𝐡 𝐏𝐨𝐥𝐲𝐦𝐞𝐫 𝐂𝐥𝐚𝐲 𝐅𝐚𝐧𝐭𝐚𝐬𝐲 𝐀𝐫𝐭 𝐃𝐨𝐥𝐥

Meet the latest addition to the world I’m building, a dharkling. These dark faerie creatures are more your spooky fae spirits of old, along the lines of being strictly on the malicious side. Their wicked blades stab at dreams and they’ve certainly been known to carry out the abduction or two. But we shouldn’t hold it against them too much, it’s in their nature.


Watch the Crafting a Dark Faerie Creature with Polymer Clay


I played around with the design for this fantasy art doll in my sketchbook and I imagine them as a sort of race of dark faerie creatures. They might vary a bit and height and proportions, but they all have a similar look about them and even wear the same drab clothes. The dark upper part of the head was inspired by one of my favorite fantasy artists growing-up, Brom, though I hope I added enough of a twist with giving it a sort of dripping look. I also enjoyed this idea of the hair being these wispy tendrils that constantly languidly drift behind them. I imagine them having this unchanging neutral expression on their faces and they may not even speak at all. One element that I’m thrilled about is his dagger. I often end-up with a sharps container that little by little gets full of X-acto blades that I’ll have to eventually have to dispose of… but I figured I could make them the blades of tiny daggers, so now I can upcycle them into mini weaponry!


crafting a dark faerie creature with polymer clay fantasy art doll


Darklings are said to be comprised of malignant shadows and spiteful dust. They are the Sleeping Emperor’s knives of the eventide. Though others might speculate that their under the sway of the nefarious and secretive Dream Syndicate. With their hateful blades they come and cut away at your dreams if they live you living at all. They come stepping out of shadows and are gone in a whisper. Their faces the most unnerving of all as they gaze at you with a soulless, remorseless visage. Be wary traveler of the shadow that looks as though it is following you!


Shadows Wake

Shadows bide and shadows lied

Shadows lurk and shadows slink

Shadows stride and shadows hide

Shadows trick and shadows prick

Shadows take and shadows wake

-Efraen Children’s Rhyme

Prints of “Dharkling” are available here:

Open edition printhttps://www.inprnt.com/gallery/thedreamsyndicate/dharkling-dark-faerie/


Thanks for joining me so far and here’s to the adventures we have in future! To be the first to know when I launch new polymer clay art videos, be sure to subscribe to my YouTube channel and hit the bell icon. Catch all of my videos here: https://www.youtube.com/thedreamsyndicatearts. You can also find many of the supplies I use in crafting here: https://www.thedreamsyndarts.com/supplies-gear/. And sign-up for my newsletter (in the sidebar) to get the latest studio goings-on! Thanks so much for joining me on this journey and until next time: Make. Believe!

"𝐑𝐄𝐀𝐂𝐇𝐈𝐍𝐆" | 𝐏𝐨𝐥𝐲𝐦𝐞𝐫 𝐂𝐥𝐚𝐲 𝐅𝐚𝐧𝐭𝐚𝐬𝐲 𝐀𝐫𝐭 𝐃𝐨𝐥𝐥 𝐈𝐥𝐥𝐮𝐬𝐭𝐫𝐚𝐭𝐢𝐨𝐧

goblin art doll

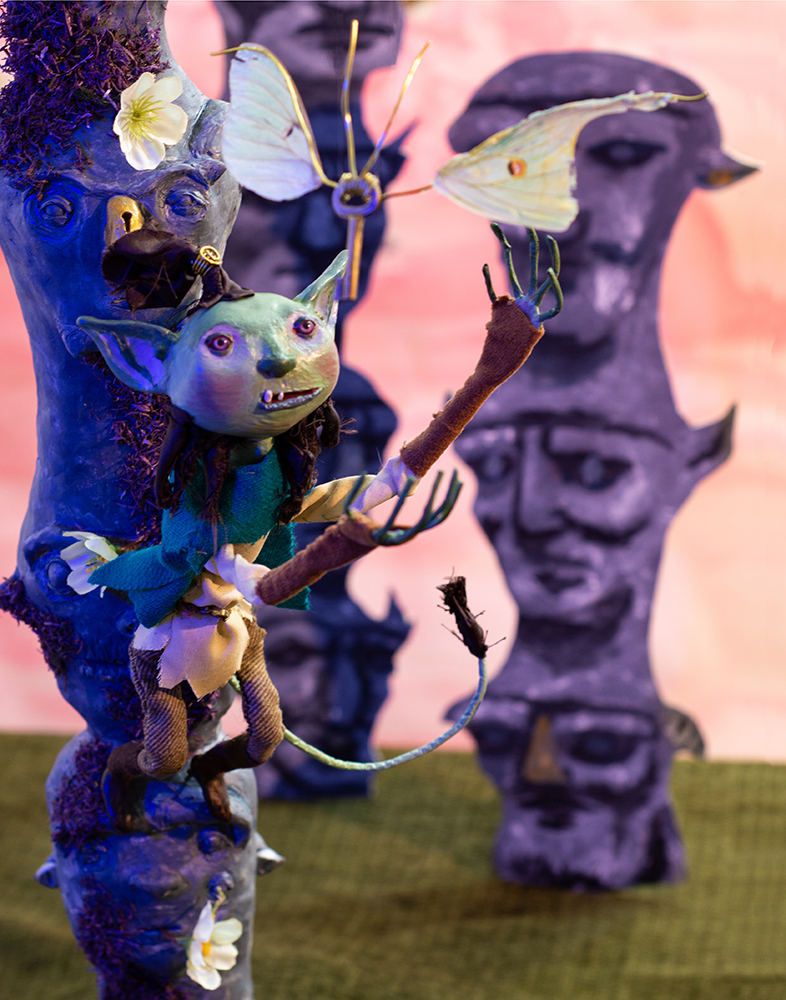
I’m not sure what my latest polymer clay fantasy art doll Drust is… I think of him as some sort of goblin I suppose. If you asked Drust, I don’t know what he would tell you he is either. I imagine him to be adventurous and likely mischievous at times. One day in his boredom, a wayfly happened by and Drust couldn’t help but chase it!

In the scene captured in “Reaching”, I imagine that Drust has scaled a column of face vaults, statues with secrets of the ages locked away within, and finds his wayfly quarry just out of his grasp! Will he catch it or will it slip through his spindly little fingers?

A wayfly is a winged-key found in the wilds of the Dream Syndicate. Found individually, in pairs, or flying in flocks, wayflies often are found near ancient ruins or in catacombs. Capturing a wayfly takes guile, but the real clever feat is to determ…

A wayfly is a winged-key found in the wilds of the Dream Syndicate. Found individually, in pairs, or flying in flocks, wayflies often are found near ancient ruins or in catacombs. Capturing a wayfly takes guile, but the real clever feat is to determine which lock a given wayfly calls home.


Watch the process of how the poseable goblin art doll Drust was crafted

poseable goblyn artdoll

Prints of “Reaching” are available through my store here:

Limited Edition of 25 Print: https://www.thedreamsyndarts.com/thedreamsyndstore/reaching18x24print

Open Edition: https://www.thedreamsyndarts.com/thedreamsyndstore/reaching11x14print


Watch Details Being Added to the Face Vaults Polymer Clay Sculptures


Check-out a Winged Key Fantasy Stop-Motion Animation

Thanks for joining me so far and here’s to the adventures we have in future! To be the first to know when I launch new polymer clay art videos, be sure to subscribe to my YouTube channel and hit the bell icon. Catch all of my videos here:  https://www.youtube.com/thedreamsyndicatearts. You can also find many of the supplies I use in crafting here: https://www.thedreamsyndarts.com/supplies-gear/. And sign-up for my newsletter (in the sidebar) to get the latest studio goings-on! Thanks so much for joining me on this journey and until next time: Make. Believe!

𝐎𝐝𝐞 𝐭𝐨 𝐎𝐛𝐬𝐞𝐬𝐬𝐢𝐨𝐧: 𝐀 𝐂𝐚𝐩𝐭𝐚𝐢𝐧 𝐀𝐡𝐚𝐛 𝐏𝐨𝐫𝐭𝐫𝐚𝐢𝐭 | 𝐌𝐨𝐛𝐲 𝐃𝐢𝐜𝐤 𝐀𝐫𝐭 𝐃𝐨𝐥𝐥

I’ve had a fair number of sketches similar to the image I created for my Captain Ahab piece, “Ode to Obsession”, for years. I’ve been intending to make a Captain Ahab portrait and actually read Herman Melville’s “Moby Dick” for years. Recently I’ve finally read the book and crafted a Moby Dick inspired art doll, but it’s telling that I was able to make an image that gets the theme of Moby Dick and Ahab’s disastrous pursuit of the white whale across without ever having read the book- most of us know this story without having ever read it! That’s the power of Melville’s Captain Ahab: he is THE archetype of when passion and drive crosses-over into self-destructive obsession and ruin. He’s transcended the pages of the novel and become the cliche, the shorthand of the thing he represents.


Watch the Captain Ahab Art Doll Being Crafted


Designing a Moby Dick Art Doll

When creating the Moby Dick art doll, Melville describes Capt. Ahab, aside from his iconic whalebone peg leg, as having a scorched face, grey hair, and a scar that runs the length of his face and body, which I wanted to capture in my interpretation. I’ve seen other interpretations of Ahab that make him look hardy and vigorous, but when I imagine him, I always see him as this hard-angled, hollowed-out sinewy character. I really liked this idea of Ahab solemnly looking out and being tangled-up in his harpoon line and though it’s kind of subtle, he has a noose cast about his neck, foretelling the doom that he seeks and the prophesy of hempen rope being his end.

Captain Ahab art doll sketch


St. Ahab: Patron Saint of Creatives

I find myself thinking of Ahab as a patron saint of creatives or anyone that has a passion, a drive for what they do but the path is unclear and even perilous. Many artists find themselves making emotional, relationship, and financial sacrifices to chase that white whale of earning a livelihood doing the things that they love. And since we don’t only have an effect on our own life, we impact the live’s of those around us, the pull of our creative pursuits could also take a toll on our loved-ones as surely as it did Ahab’s crew. The ups and downs of a creative life can be harrowing and it’s often trying to even know if you’re heading toward your white whale or if the risks and the inner turmoil will pan-out and be worth it in the end. The only thing you know for certain’s as scary as all of this has been, is, and will be, looking back and regretting not even attempting the pursuit would’ve been infinitely worse.


I do want to pull this back from the bleakness a bit and say that we right now live in the best times to try to be a creative! The fact that you can attempt to put your art in front of thousands of people across social media and various websites, the only thing it costs you is time, and find-out if anyone cares- that’s such an opportunity that all of us creators shouldn’t take for granted. This opportunity simply wasn’t there for creators that were trying to put themselves on their career path and previously only a few people at publishing companies were the ones to decide whether your art was “good enough”. Now if you figure-out how to market your work and amass only a few thousand dedicated fans that you work’s for them, you can have a sustainable career and life, just getting there is full of headwinds and crashing waves. And for that I think it’s worth risking the venture!

Prints of “Ode to Obsession” are available through my store here:

  • Limited Edition: https://www.thedreamsyndarts.com/thedreamsyndstore/ode-to-obsession-captain-ahab-portrait

  • Open Edition: https://www.thedreamsyndarts.com/thedreamsyndstore/ode-to-obsession-captain-ahab-portrait-cwas5

Here is the finished Capt. Ahab illustration! If you would like a print, it is available as a Limited Edition and for a limited time, as an Open Edition Print.

Here is the finished Capt. Ahab illustration! If you would like a print, it is available as a Limited Edition and for a limited time, as an Open Edition Print.


Thanks for joining me so far and here’s to the adventures we have in future! To be the first to know when I launch new polymer clay art videos, be sure to subscribe to my YouTube channel and hit the bell icon. Catch all of my videos here:  https://www.youtube.com/thedreamsyndicatearts. You can also find many of the supplies I use in crafting here: https://www.thedreamsyndarts.com/supplies-gear/. And sign-up for my newsletter (in the sidebar) to get the latest studio goings-on! Thanks so much for joining me on this journey and until next time: Make. Believe!

The Devil May Cry with this Devil Art Doll Repair 👹

This devil art doll's name is Diavolo Malvolo and he fits that old wedding tradition of something old, something new, something borrowed, and something new as the blue devil himself is an older work, the illustration's new, I borrowed some dry-rotted wood to make the "cliff" he's standing on, and well, the blue part's pretty obvious, isn't it? In this latest video, I take the devil art doll that's been sitting on my shelf and reveal his dark, disturbing secret... no, it's not that he's a devil- that much's obvious! The secret is this: he has crevice along his horn and ear- he's damaged goods. Over the course of the video I try to repair him, but do I succeed? Watch and find-out good viewer!


WATCH DEVIL ART DOLL REPAIR 👹


As you might have seen if you made it to the end of the video (I say in an accusatory voice), I made an dimensional illustration with this handsome devil art doll. If you'd like one to hang on your wall, you can order a print from my Etsy store.


You can bring this handsome devil home from my store.

You can bring this handsome devil home from my store.

Just in case you're still in suspense- I was able to repair Diavolo after all through the use of plumber's epoxy and epoxy resin as well as a fresh coat of paint. Huzzah! I hope you enjoyed your chance encounter with the devil! To be the first to know when I launch new polymer clay art videos, be sure to subscribe to my YouTube channel and hit the bell icon (but because YouTube's wonky, you can also join the newsletter). Catch all of my videos here:  https://www.youtube.com/thedreamsyndicatearts. You can also find many of the supplies I use in crafting here: https://www.thedreamsyndarts.com/supplies-gear/. Until next time, make. Believe!

BRAMBLING 🌲| Making a Fantasy Art Doll

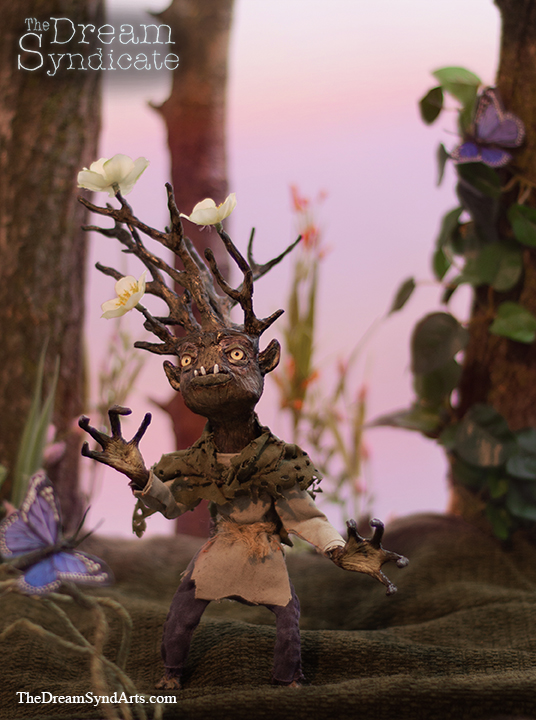
And finally, a brambling is full born... or is it sprouted from a little acorn? The biology of the little fae creatures aside, this fantasy art doll is completed! All told, he probably took around 16 hours to craft (including accidentally sculpting two right hands for him! Unfortunately, not the first time something like that's happened, I assure you!). In prior videos I shared the process of sculpting and painting him in-depth and in this most recent one, I sew his clothes and show-off a bit of the staged set that went into making the finished dimensional illustration.


Watch Brambling | Making a Fantasy Art Doll


I enjoy characters with fanciful clothing and while the brambling's clothes are meant to have a utilitarian, rustic look to them, I was able to add some visual interest with the fae creature's asymmetrical, tattered cloak. The clothing was distressed by wrinkling, staining with acrylic paint, sanding, and then hand-sewing the fabric directly on to the art doll's body. I usually make a point of distressing an art doll's fabric as i like the viewer to imagine the secret life that the art doll has when they're not around. A life with a bit of mystery and magic's a better one! Lastly I set-up the scene by arranging fabric, vines, butterflies, and even used some small tree stumps! I photographed this mixture of found objects and then spent a little time post-producing the image in Photoshop.


Here's the finished dimensional-illustration:

You can find a print of this illustration here: https://www.etsy.com/listing/601530840/brambling-fey-fantasy-fine-art-85x11?ref=listings_manager_grid

You can find a print of this illustration here: https://www.etsy.com/listing/601530840/brambling-fey-fantasy-fine-art-85x11?ref=listings_manager_grid


I hope you enjoyed exploring this magical fey creature as much as I have! To be the first to know when I launch new polymer clay art videos, be sure to subscribe to my YouTube channel and hit the bell icon (but because YouTube's wonky, you can also join the newsletter). Catch all of my videos here:  https://www.youtube.com/thedreamsyndicatearts. You can also find many of the supplies I use in crafting here: https://www.thedreamsyndarts.com/supplies-gear/. Until next time, make believe!

Painting the Brambling | Painting a Fantasy Creature Head

Now that the brambling's head is sculpted to my liking, it's time to lay down some paint! When painting a fantasy creature head, it's actually kind of important to ground yourself in realism because bramblings are elusive in the wild! I had to do the next best thing and bring a couple of tree branches into the studio. Who'd have thought realism's the best strategy when painting a fantasy creature head? By looking at this tree branch I could observe that it was largely a warm grey tone with moments of green and brown on it rather than that iconic brown Crayola crayon that we might all instantly imagine.


Watch the Brambling Head Be Painted with Acrylics Here


I used a range of earth-tones in painting the fey creature's head- siennas, umbers, ochers, and greens with touches of grey tones to dull-down the pigments. I also painted the head generally lighter than I would have naturally due to the fact that I was about to embark on trying my hand with an ink wash technique...

EXPERIMENTING WITH INK!

ACRYLIC INK

In painting this head, I tried a technique that was new to me: using an acrylic ink wash with dark toned ink. I had carved a lot of bark texture all over the brambling and I wanted a way to darken the recessed areas that didn't involve my painstakingly painting in dark tones and then carefully trying not to undo this work as I painted-in lighter tones. Before I used the technique on the actual fantasy art doll head, I tested on scrap sculpted piece I had (who'd have thought I was doing myself a favor when I accidentally sculpted two right hands for this art doll?!). Admittedly, I still feel like I can do a better job at highlighting sculpted details with this technique, but overall, I'm happy with the outcome.


If you would like a print of the Brambling final image, you can purchase it HERE.


I hope you enjoyed exploring this magical fey creature as much as I have! To be the first to know when I launch new polymer clay art videos, be sure to subscribe to my YouTube channel and hit the bell icon (but because YouTube's wonky, you can also join the newsletter). Catch all of my videos here:  https://www.youtube.com/thedreamsyndicatearts. You can also find many of the supplies I use in crafting here: https://www.thedreamsyndarts.com/supplies-gear/. Until next time, make believe!

MAKING A ST. GEORGE ART DOLL ⚔🐉

In this part of the process of making a St. George art doll, the poseable doll's made from a variety of mixed media. Most of the materials your as likely to find in a hardware store as you are an art supply or hobby shop. The armature consists of twisted aluminum wire, aluminum tubing in the neck and used at the forearms, a length of steel wire to give the figure stability and allow it to anchor into a set or display base, and plumber's epoxy. The body's massed-out with upholstery foam and then clothing's sewn around the art doll.


Watch Part 5 in the St. George & the Dragon Piece | MAKING A ST.  GEORGE ART DOLL ⚔🐉:


An art doll's neck doesn't need to be reinforced with the aluminum tubing, you can typically just drill right into the clay if you'd like, but the way I design my characters, I like them to have thin necks because that's the way I tend to draw figures- I like lanky, gawky, attenuated characters. If I were to make a character's neck as thin as I do without putting in the tubing and drill into it, the backed polymer clay would likely crack and crumble around the drill bit.


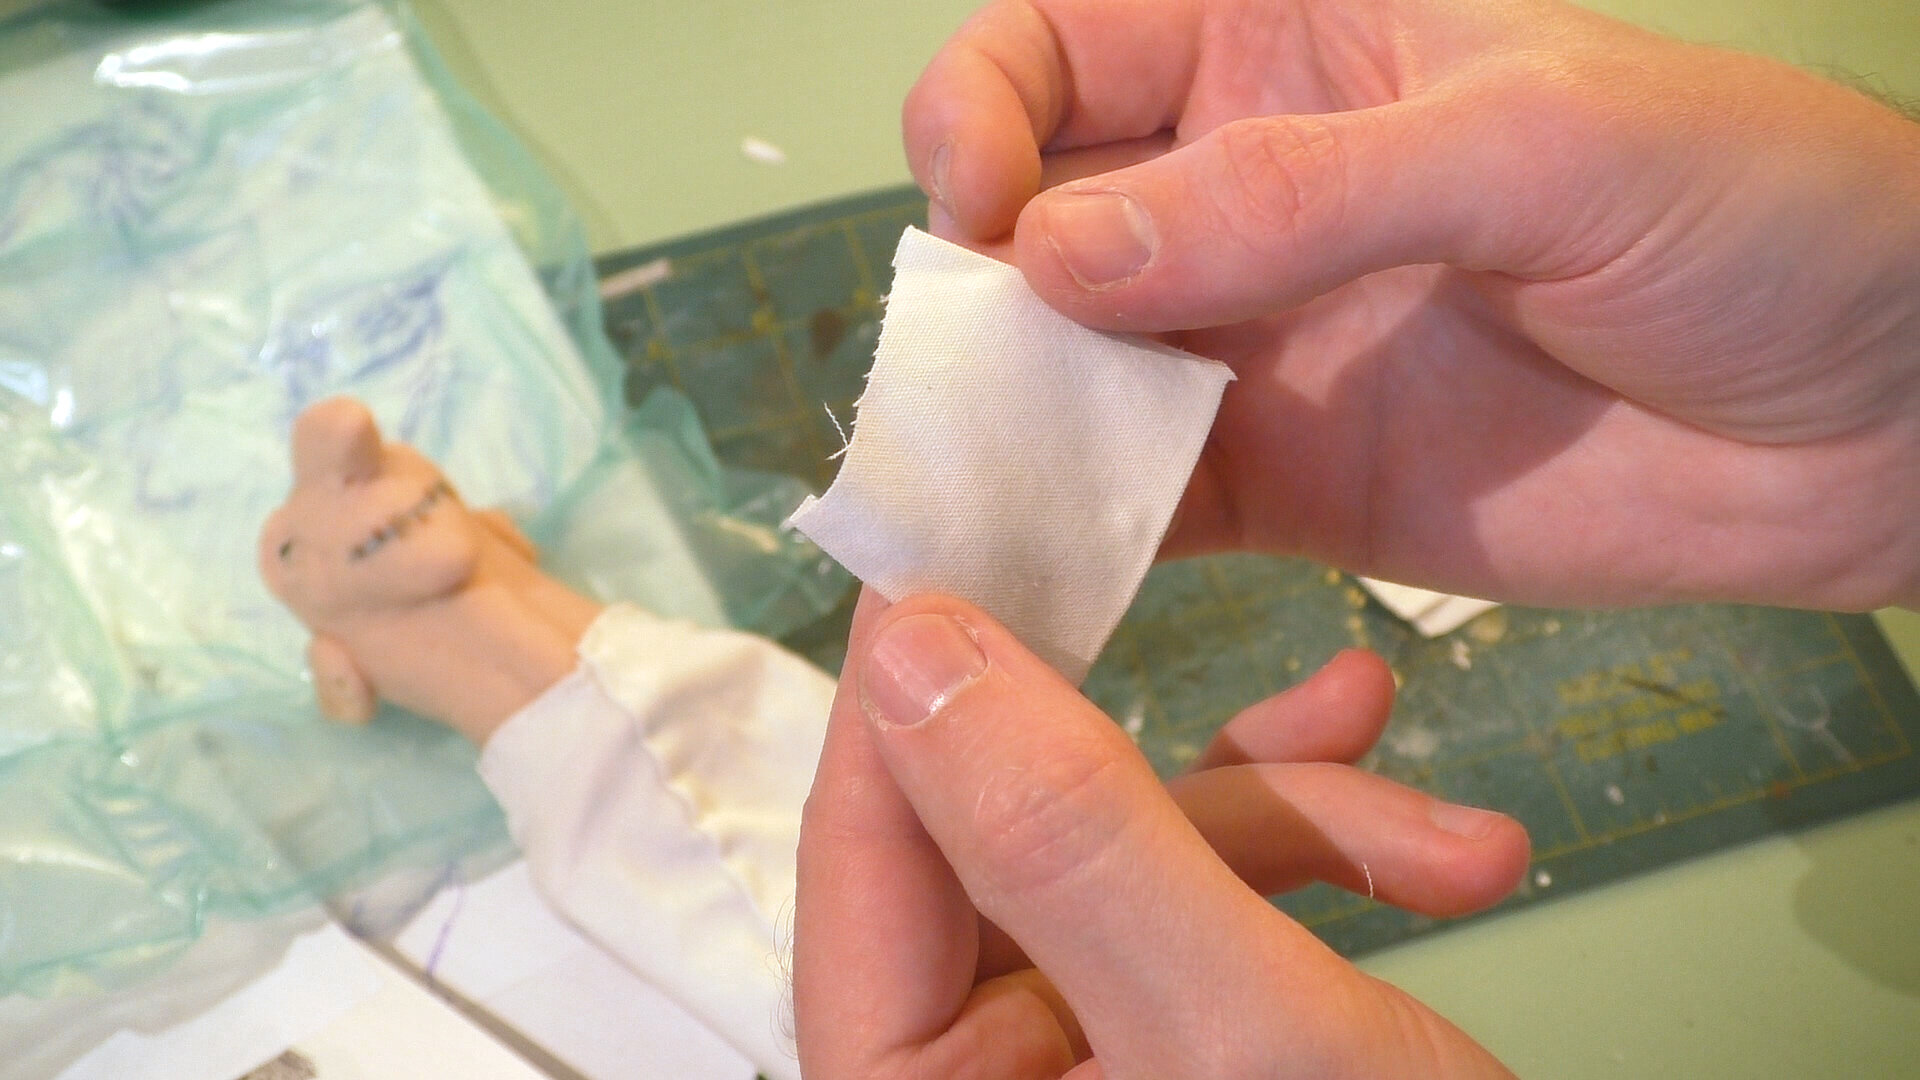
Once the aluminum and steel wire are all twisted into place, they're secured with plumber's epoxy that's molded into a form to create a cylinder shaped chest and smaller oblong cylinder for the pelvis, which all takes about an hour to set (if you were handling the plumber's epoxy more vigorously, you might want to give it a day). From there, I use the figure's contours to sketch-out a front and back form out of the upholstery foam and cut it out with pair of scissors. These front and back pieces get attached to the plumber's epoxy with a resin based epoxy. Lastly I sketch-out the amount of fabric I'll need to sew the clothing, leaving a bit of a seam allowance. Ordinarily, it's a good idea to use lighter weight fabric, but for the look of the chain-mail armor, I used a heavier upholstery weight fabric that was kind of a pain to work with. The process of making St. George art doll probably took a couple of full work days, not including the time I spent sketching-out details or gathering materials.


If you want to make the imaginary a reality, be sure to subscriber on YouTube!

If you want to be the first to know when I launch new polymer clay art videos, be sure to subscribe to my YouTube channel and hit the bell icon (but because YouTube's wonky, you can also join the newsletter). At present, I am launching new videos Saturdays at 2pm EST and I will keep this information up-to-date on my YouTube channel's banner and "about" section here:  https://www.youtube.com/thedreamsyndicatearts.

Sculpting St. George 🐉

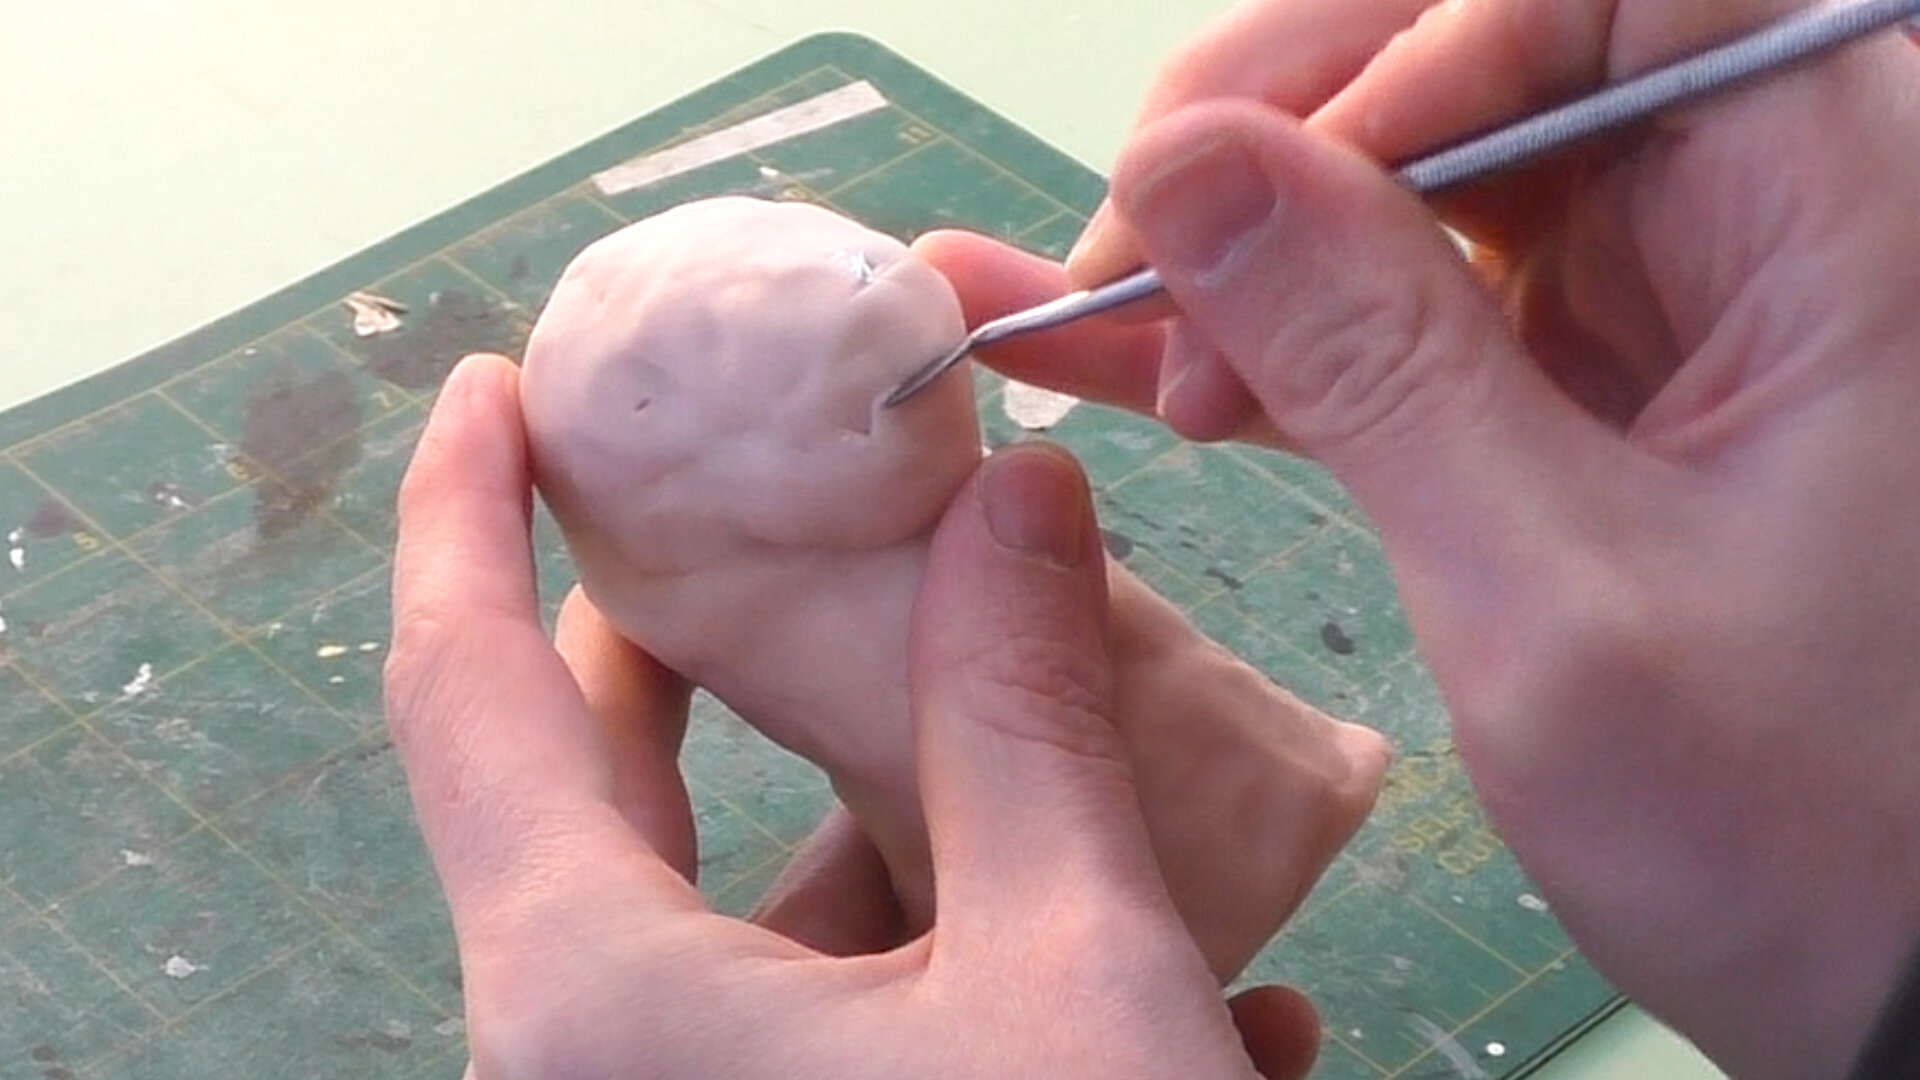
When sculpting St. George, I wanted a younger interpretation of our hero. Just about every time I'm sculpting an art doll, I begin with sketches and for this piece I did a few quick studies from teenage aged boys- some of the reference pictures came from Google image searches and some from this great book of Norman Rockwell's depictions of childhood. I also spent spent some time looking at prior depictions of St. George in medieval and renaissance art.

Watch Part 4 in the St. George & the Dragon Piece | Sculpting St. George 🐉:


I wanted to capture a sort of frightened, panicked expression and I was somewhat thinking of Kevin McCallister from "Home Alone", you know, the shaving cream, "Aaahhhhhhhhhh!" scene. My idea for the finished piece of art is to create an image that references the legend of St. George and the Dragon, but to also convey the concept that the dragon isn't nearly as threatening as George thought and it was his imagination making the dragon more terrible than he thought.


If you want to make the imaginary a reality, be sure to subscriber on YouTube!

If you want to be the first to know when I launch new polymer clay art videos, be sure to subscribe to my YouTube channel and hit the bell icon (but because YouTube's wonky, you can also join the newsletter). At present, I am launching new videos Saturdays at 2pm EST and I will keep this information up-to-date on my YouTube channel's banner and "about" section here:  https://www.youtube.com/thedreamsyndicatearts.